If Time-Tracking Apps Don't Work for You, Try a Productivity Journal
- Get link
- X
- Other Apps
Monitoring how you spend your time leads to a wealth of useful information: It can tell you what time of day you're most productive, help you create better estimates for how long tasks will take, and show you what activities you'd have to cut to focus your energy on a new idea or project.
The most precise way to monitor how you spend your time is to use a time-tracking app. But these apps require a lot of overhead. You have to diligently log your hours (or make sure your app is logging them correctly) and sort your tracked time into categories. You have to pause after every task—no matter how brief—to capture time spent accurately.
If tracking your time at such a granular level sounds like a punishment, but you still want insight into how and where you spend your time, consider the less menacing sibling of time-tracking apps: a productivity journal.
What Is a Productivity Journal?

I kept a journal as a preteen, though in those days I called it a diary. Snoopy and Woodstock were on the cover, it had a small lock and smaller keys, and I used it to log details about my day, things like new friends I'd made and people who had wronged me (Dawn wouldn't play "don't step on the lava" with me today).
When you say the word journal, that's the image that creeps into people's minds, but a productivity journal isn't an adult diary. Sure, it's a place to log your activities, but the logging of those activities is more matter-of-fact than emotionally driven. It's more "I worked on a blog post all day" and less "Writing this post reignited my dreams of launching my own blog."
You can add entries to a productivity journal as often or infrequently as you want: Each time you complete a task, at the end of the day, or even once a week. And you can document that information wherever you want: A paper notebook, an app, or anywhere else that saves text.
The only important criterion when choosing a place to keep your productivity journal is that it will save everything you write in it. In order to get the biggest benefits from tracking your time in a productivity journal, you need to be able to go back and access previous entries to see how you spent your time on different types of tasks and projects.
How Does Productivity Journaling Work?
The thing I like the most about productivity journaling is that it can be as flexible as you need it to be. You can write in your journal on a schedule that makes sense to you, capturing details at a high-level only or as granularly as you would in a time-tracking app.
Here are a few examples.
Interstitial Journaling
Tony Stubblebine—Founder and CEO of Coach.me—recommends a productivity journaling method he calls Interstitial Journaling:
During your day, journal every time you transition from one work project to another. Write a few sentences in your journal about what you just did, and then a few more sentences about what you're about to do.
For example, say you finished a project, and now you're going to answer emails. Before you move on to answering emails, take a few minutes to add a timestamp to your journal and write a few sentences about the task you completed and the task you're moving into. Do that every time you switch tasks throughout the day.
Stubblebine also says that this method works well with the Pomodoro Technique. After each 25-minute focus period, use your five-minute break to write about what you've been working on and what you plan to work on next.
Interstitial Journaling offers three big benefits.
First, having to write in your journal every time you switch tasks could discourage you from getting pulled away from work by distractions. Say you're working on a project but happen to notice you have several new Twitter notifications. If you check in on the notifications, you'll have to write in your journal, and that extra work could encourage you to stick to the task at hand.
Second, Interstitial Journaling lets you capture how you spent your time as granularly as you would with a time-tracking app. Since you're documenting every time you switch a task, you have detailed information you can reference later to find out exactly how long a task took you to complete or how much time you spend each week answering emails or in meetings.
Finally, writing about tasks you complete gives you a moment to reflect on those tasks. For example, you might notice that something you thought didn't take much time—like answering emails—actually encompasses a good portion of your day. Pausing to reflect gives you space to identify impediments to your productivity and think about how to remove those impediments.
But like using a time-tracking app, Interstitial Journaling requires overhead. You'll spend a lot of time over the course of the day writing about how you're spending your time.
If that overhead is what you're looking to avoid by opting for a productivity journal over a time-tracking app, there are other options.
Daily productivity journaling
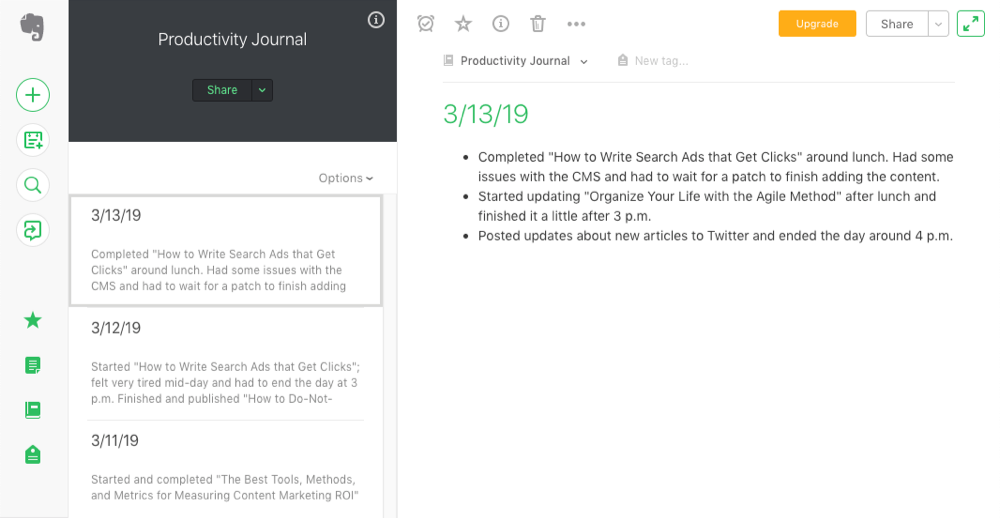
The productivity journaling method that works best for me is writing a journal entry at the end of the workday about what I accomplished that day. You can write a lot of details if you feel it's helpful or necessary, but I usually capture tasks I completed in a bulleted list. Here's an example:

This method takes me about five minutes, and since I write it at the end of the day, it doesn't create delays throughout the day for logging and categorizing my time in a time-tracking app or Interstitial Journal. It's an extremely lightweight approach, but it delivers a lot of benefits. For example:
- I can make notes about how I was feeling at different times during the day/week and review this data later to find patterns. For example, I've learned that I'm much more likely to feel tired and unfocused in the afternoon early in the week than later in the week. This helps me plan my work better.
- I can look back to see how many blog posts I wrote in a week or a month, and I can compare multiple weeks and months to get a better idea of the average number of blog posts I'm able to complete within a specific timespan. This helps me understand how much work I can realistically accept.
- If I need to estimate new work, I can review how much time it took me to write similar pieces in the past to form a more accurate estimate.
Plus, since I'm not tracking every single task switch, I get a better picture of how long an entire task will realistically take to complete.
As an example, let's say I'm writing a blog post. I spend most of the day writing, but I'm also doing other things: answering emails, eating lunch, joining meetings, and so on. Instead of tracking all of those context switches, I capture it all as the amount of time it takes to complete the blog post.
If I tracked only the time it took to write the blog post in a time-tracking app, my end result might be seven hours. But if I track the time to complete the blog post as I do in my productivity journal—knowing that work is never without distractions and interruptions—the end result is 10 hours.
Then, instead of telling a client "I can have this to you by the end of the day" because I'm expecting seven hours of work, I can say, "I'll get this back to you before the end of the day tomorrow." The latter is a better estimate because it accounts for all of the ways I'm likely to get distracted and interrupted while writing the blog post.
Another example: Say I'm trying to figure out how many blog posts I can write in a month. On average, I work 160 hours a month (40 hours a week over four weeks). If I review only the time I spent writing those blog posts and see that an average post takes me 12 hours to write, I might think I have the capacity to write 13 posts per month.
But I never have a month where I spend all 40 hours of every week writing blog posts. I'm also answering emails, collecting tax paperwork, considering prospective clients, editing posts I've written, creating invoices, and so on. So if I review my overall data—how many blog posts I usually write in a month—I get a more realistic estimate: 10 posts.
I only use my productivity journal to track my productivity at work, but you can use it to track what you've accomplished in both work and life if you want. Instead of journaling at the end of the workday, make a quick entry before you go to bed. Or if you have trouble remembering the entire day, make an entry after work and add to it again before you go to bed.
Weekly productivity journaling
Unless you have an excellent memory, weekly productivity journaling is probably best reserved for tracking side projects (like building an app in your personal time) or major personal projects you only focus on over the weekend (like renovating your house).
The process is essentially the same as keeping a daily productivity journal; you just create an entry once a week instead of at the end of every day. Capture the tasks you completed, any issues you encountered, and approximately how much time you spent on each task. Then, you can reference that data later to form better estimates for future, similar tasks.
The Best Tools for Keeping a Productivity Journal
All you really need to keep a productivity journal is a place to capture text, so the simplest solution is a paper notebook and pen. Notebooks are easy to carry around with you, they never have technical issues that prevent you from accessing them, and they might be easier to write in than trying to type notes using your phone's tiny keyboard.
The downside of using paper notebooks: The only way to search them is to read everything you've written, and they have limited space. And if you keep a productivity journal for an extended amount of time, you'll end up with a bunch of notebooks you'll need to store somewhere if you want to reference them later.
For those reasons, a digital productivity notebook is often a better choice. Here are some tools to consider.
Google Docs and Microsoft Word Online
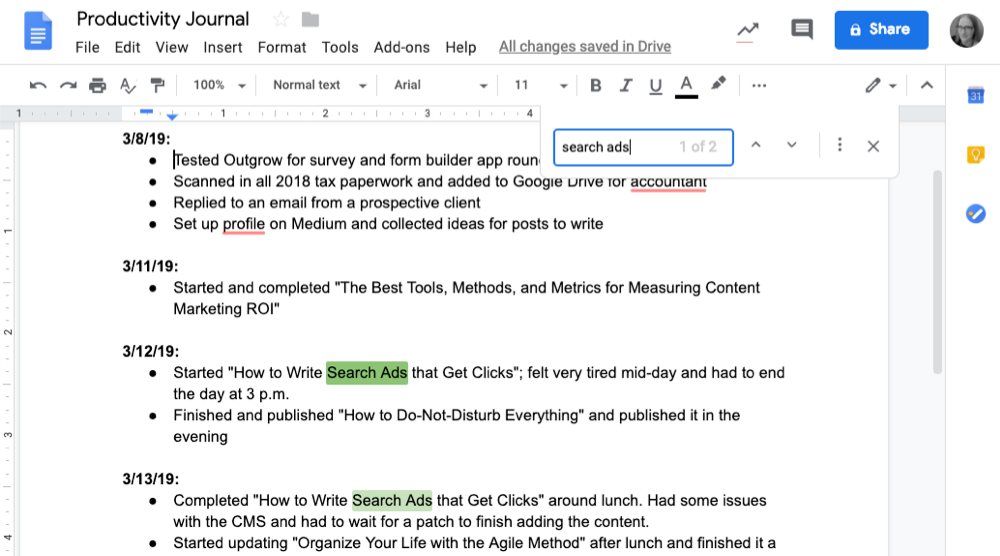
Google Docs and Microsoft Word Online both function similarly to paper notebooks, but they also have a Find feature that makes it easier to locate specific entries you're interested in.
To create entries in your Google Docs or Word Online journal, type the date of your entry and follow it with your detailed Interstitial Journaling notes or your daily bulleted list of tasks worked on/completed.
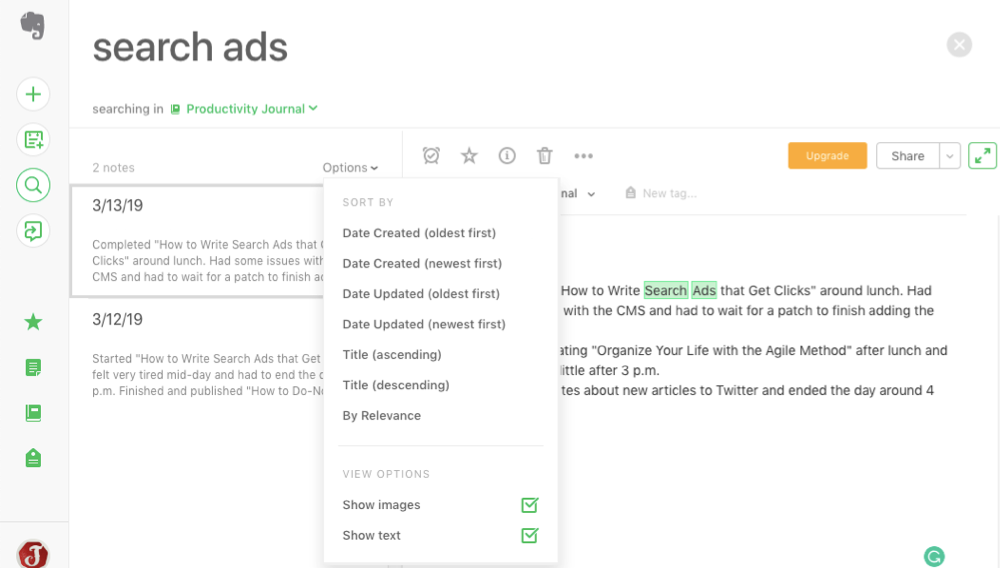
Then, when you need to search your entries for a specific piece of information (e.g., How long did it take me to write that piece about search ads?) you can use the Find feature to search all of the text in your document and jump to any matches.

Type Control + F (Windows) or Command + F (Mac) to open the Find feature. Then, type in the specific words you're looking for to highlight uses of those words in the document. The up and down arrows in both apps let you jump between uses if it finds multiple instances of the word/term in your document.
Google Docs and Microsoft Word also offer mobile apps for both iOS and Android, letting you add your productivity journal entries from your phone if you're journaling before bed. Or you can use this Zap (an automated workflow powered by Zapier) if you'd rather email your journal entries to yourself and have them automatically added to your journal document in Google Docs:
Google Docs and Word Online Prices: Both apps are free, but you'll need either a Google (for Google Docs) or Microsoft (for Word Online) account to access them.
Evernote and Microsoft OneNote
Using a note-taking app like Evernote or Microsoft OneNote for your productivity journal provides you with even more features and flexibility:
- Create a specific notebook for your productivity journal entries, and create a new note for each day. This keeps your notes much cleaner than maintaining a never-ending list of entries in a Google or Word document.
- Add labels and tags to specific entries or pieces of information, then filter your journal entries to see only those with specific labels/tags.
- Use the search function in each tool to find specific words or phrases used in any of your journal entries.

In addition to letting you create a cleaner and more organized productivity journal, both Evernote and OneNote Online have an optical character recognition feature that lets you search text in PDFs and images. So if you feel like writing your journal entry down on paper one day, you can take a picture of it or scan it, upload it to Evernote/OneNote later, and search its text like you would any typed entry in your journal.
Evernote and OneNote also both have iOS and Android apps, so you can create entries on your mobile phone when needed. Or if you prefer to email your journal entries to yourself, you can use these Zaps to automatically add those emailed entries to your journal:
Evernote and OneNote Prices: If you don't need optical character recognition, you can subscribe to Evernote's free plan, or pay $7.99/month for Evernote Premium for access to the optical character recognition feature. OneNote Online gives you access to all of OneNote's features for free.
Not sure which notes app is best for you? Check out our Evernote vs. OneNote showdown for a deep comparison of the apps' features.
In the end, the specific tool you use to maintain your productivity journal doesn't matter as long as it's something you're comfortable using—and able to use—every day.
If none of these suggestions work for you, you could also use an app designed specifically for journaling or whatever notes app shipped by default with your computer or mobile phone. You could also email your entries to yourself every day and put them in their own label/folder, or you can add your journal as an entry on your calendar at the end of every day.
With the right tool at hand, start adding your journal entries. Then set aside time at the end of every week or month to review your recent journal entries. Doing so will help you identify patterns that may lead to valuable insights like where you're spending too much time, how often you're underestimating how long tasks will take, and how much work you're likely going to able to complete within a specific timeframe.
Related reading:
Paper journal image by Alejandro Escamilla via Unsplash.
from The Zapier Blog https://ift.tt/2U8ILSf
- Get link
- X
- Other Apps
Comments
Post a Comment