It goes like this: I install a journaling app, intending to use it. I learn how the interface works, maybe even write entries for a couple days. Then I forget the app exists entirely. Two months later I notice I installed the app, briefly feel guilty for never actually writing any entries, and then delete it.
Rinse, wash, repeat. Until now. I've found a solution that works for me: I built my own journaling system which lives in the application where I do all my writing and note-taking. Here's how you can do the same thing.
Don't want to build your own app? Here are the best journaling apps, which I will personally never use.
What I wanted in a journal
Journaling is, by nature, a very private thing, which is part of why it's so hard for me to find a system that works. I had a few requirements. My journal needed to:
- Create new entries automatically. You know how video games have quest logs, which basically amount to a list of things that need doing? I love those. I wanted journaling to feel the same way, which is why it was important for new files to regularly show up—ideally in an app that I already use every day.
- Include a few section headers. I like starting my journal entry by listing a few things I'm thankful for and a few reasons today is going to be good. This admittedly cheesy practice is inspired by the five minute journal, and it works for me. I wanted my journal to include sub-headings for these categories, so it would be easier to dive into writing first thing in the morning.
- Work with any application that I want. I don't want to use a separate application just for journaling—I wanted my entries to show up somewhere I already look regularly.
- Stores entries in a format I can easily export. I wanted my journal stored somewhere I control, so that I can easily take the data with me should I decide to switch services.
I looked for a service that met all of these criteria. Eventually, I realized the company I work for just happened to provide the ideal tool for building exactly the kind of journal I wanted.
Let me back up for a minute. You're reading this article on Zapier dot com, in case you didn't know. Zapier is a company that allows anyone to build automations without any coding knowledge, meaning even a lowly blogger such as myself can build exactly the journaling setup I want inside any application.
I ultimately decided my journal would live inside a text document that I store in Dropbox. I'll show you how I built it in the steps below. You could just as easily build yours so it shows up in Evernote, Google Drive, Microsoft OneDrive, or almost any other application you can imagine.
Wonder if Zapier works with your favorite app? Look in our App Directory.
First, you're going to need a Zapier account, which you can sign up for here. Once you've signed up and logged in, we can get started.
How to set up a basic automated journal
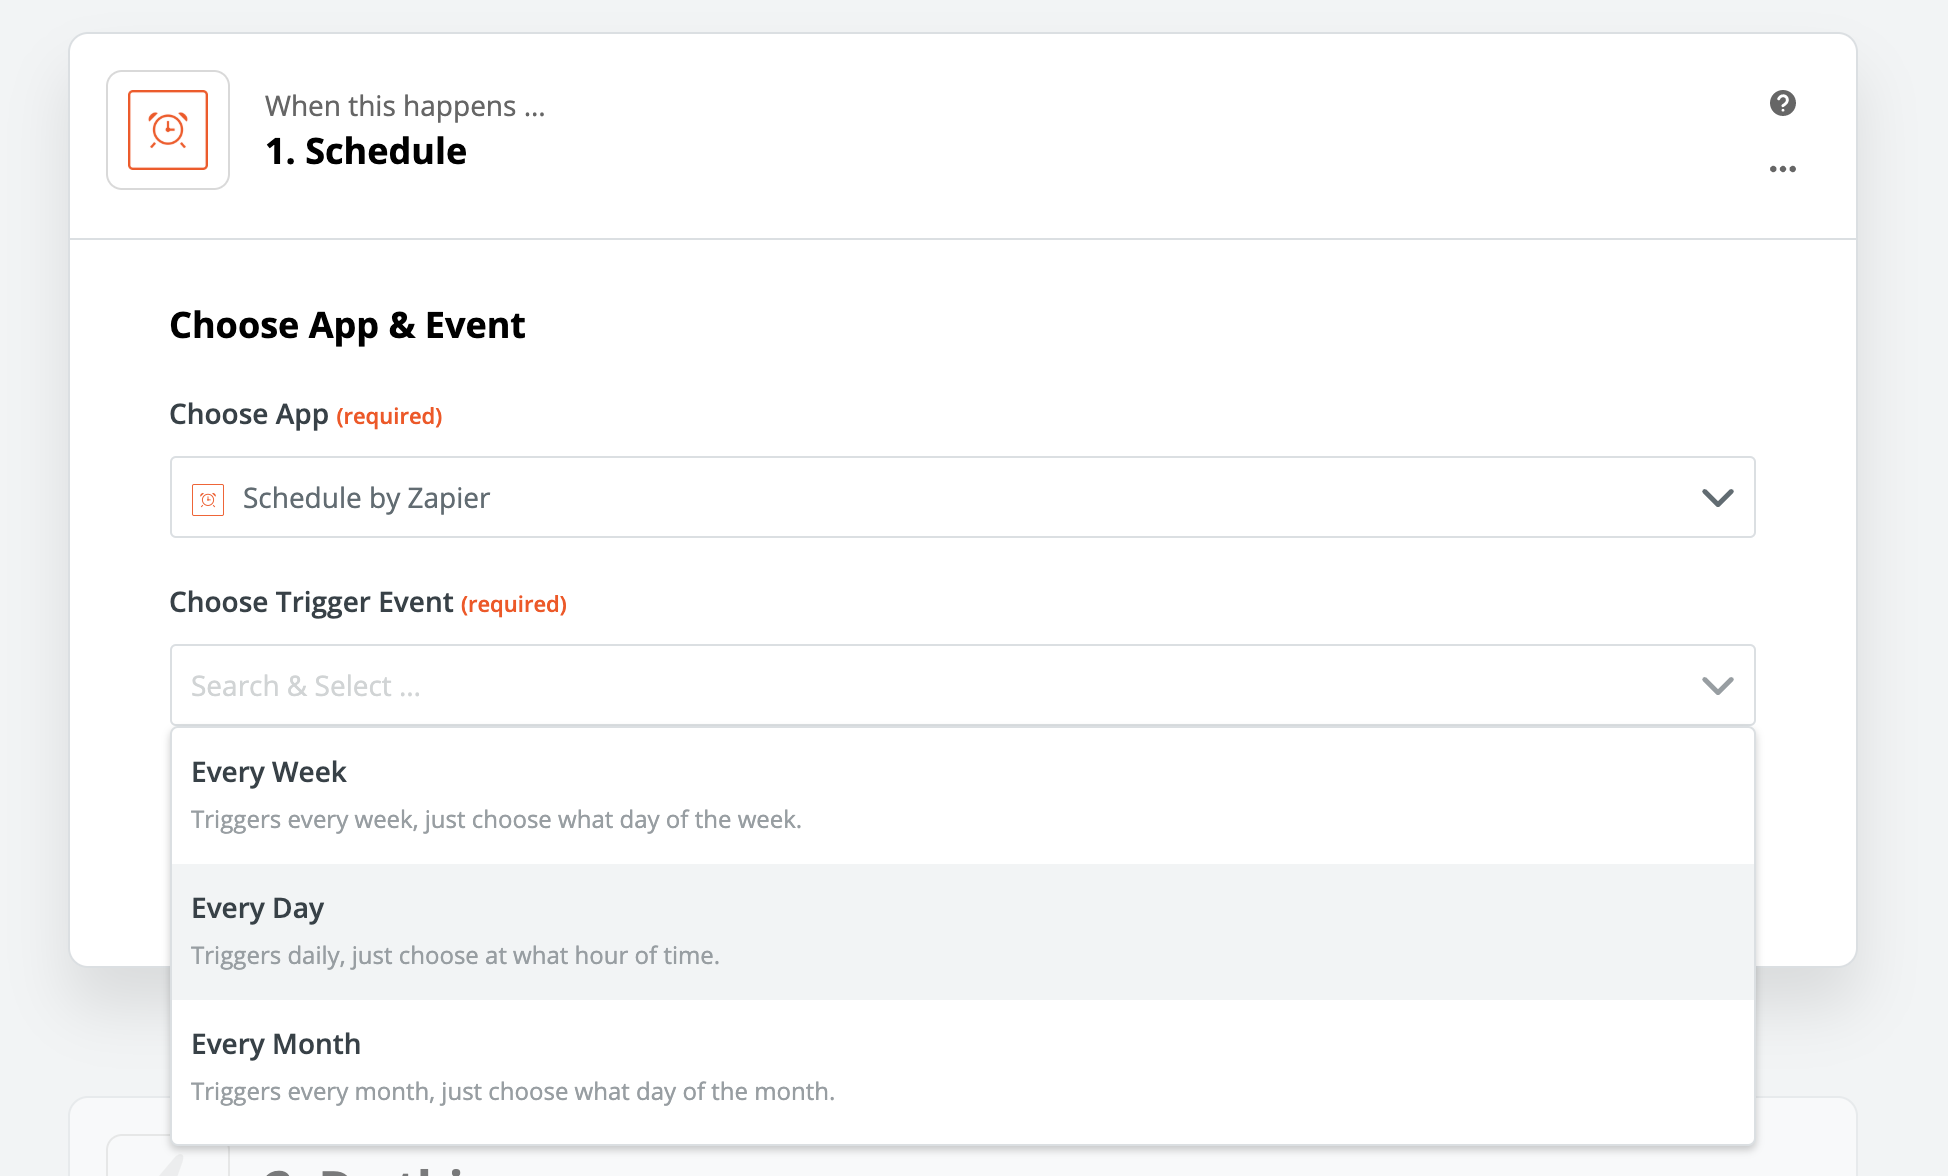
Start building your Zap by clicking here. For the trigger step use Schedule by Zapier.
We want a new journal entry created every day, so choose Every Day in the Event Trigger dropdown. You can then decide whether you want to journal on weekends, and what time every day your journal entry should be created.
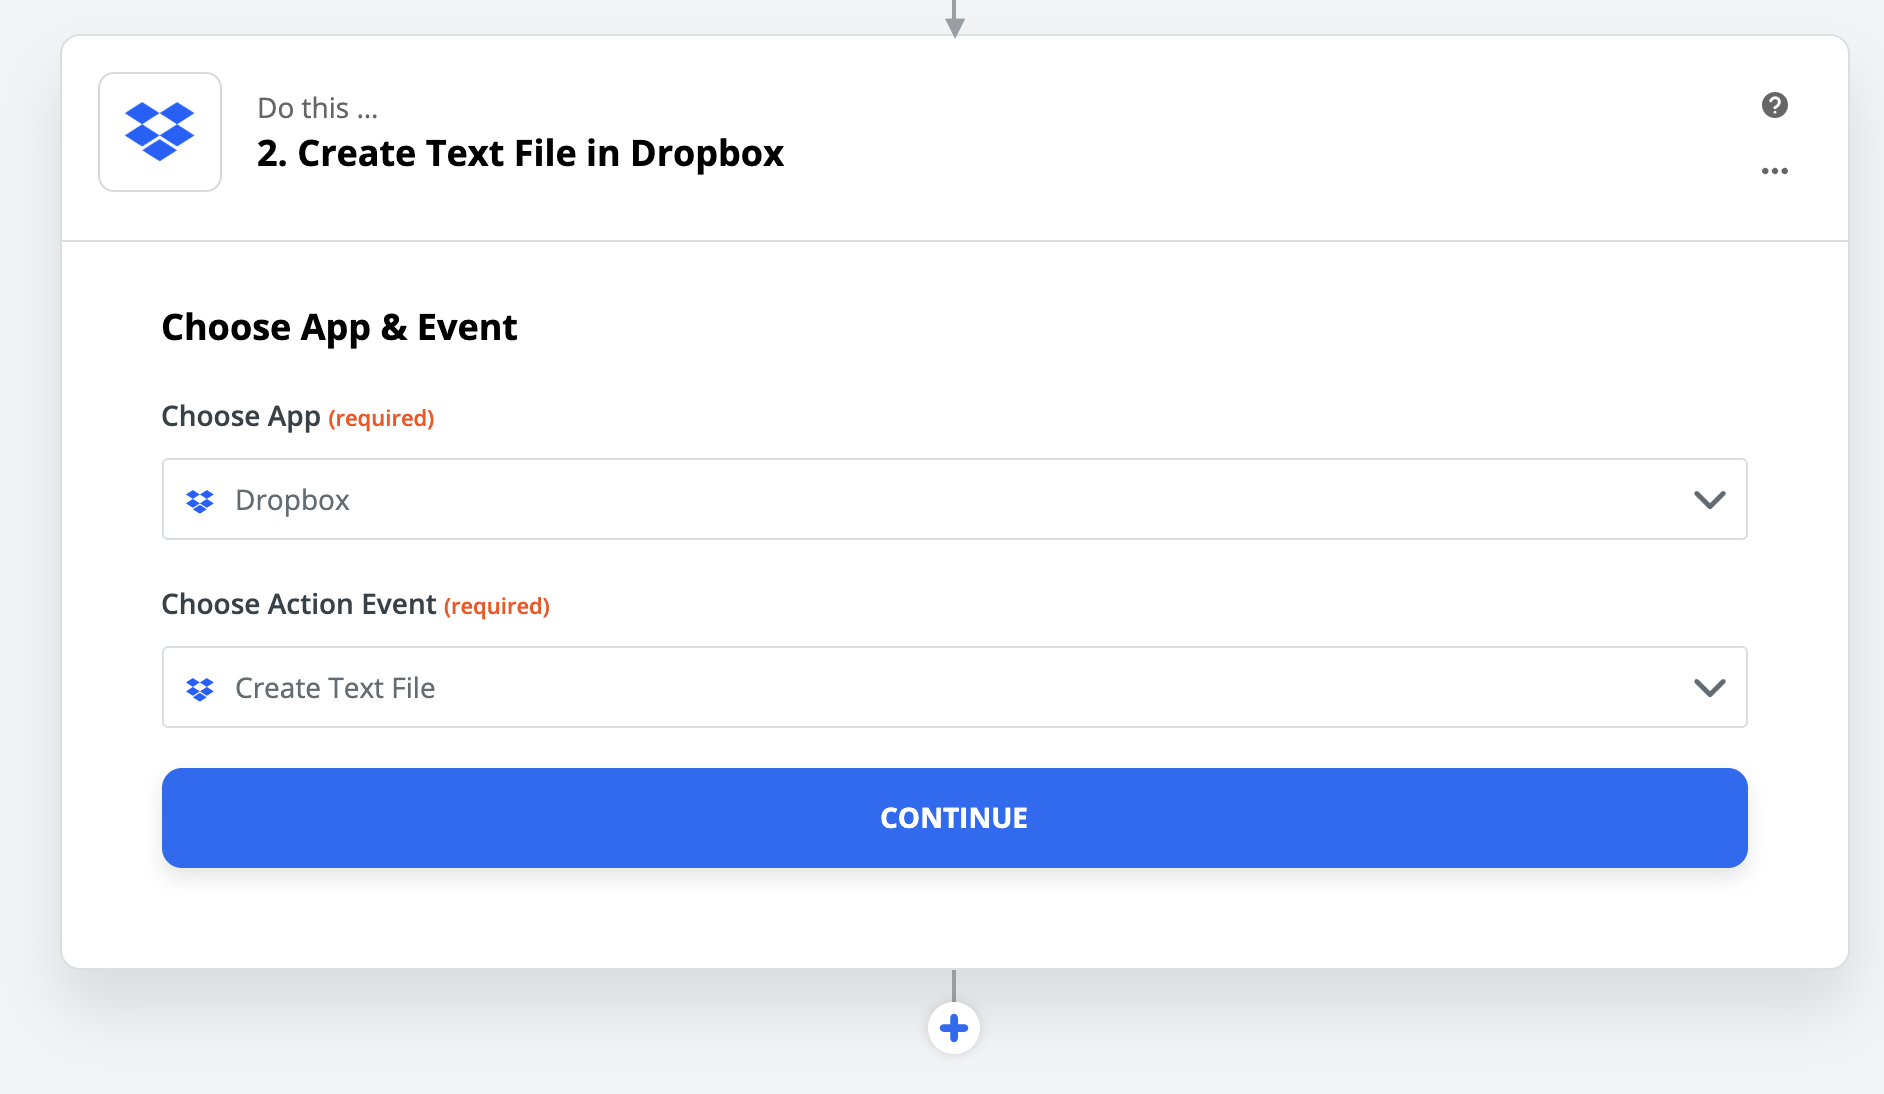
Now choose where you would like your journal to live. Note taking apps like Evernote or OneNote could work, but so could a documents service like Google Drive. I'm using markdown formatted text files in Dropbox, because I'm a huge nerd.
You will be asked to sign into your chosen service, after which you can set up your journal to look however you like.
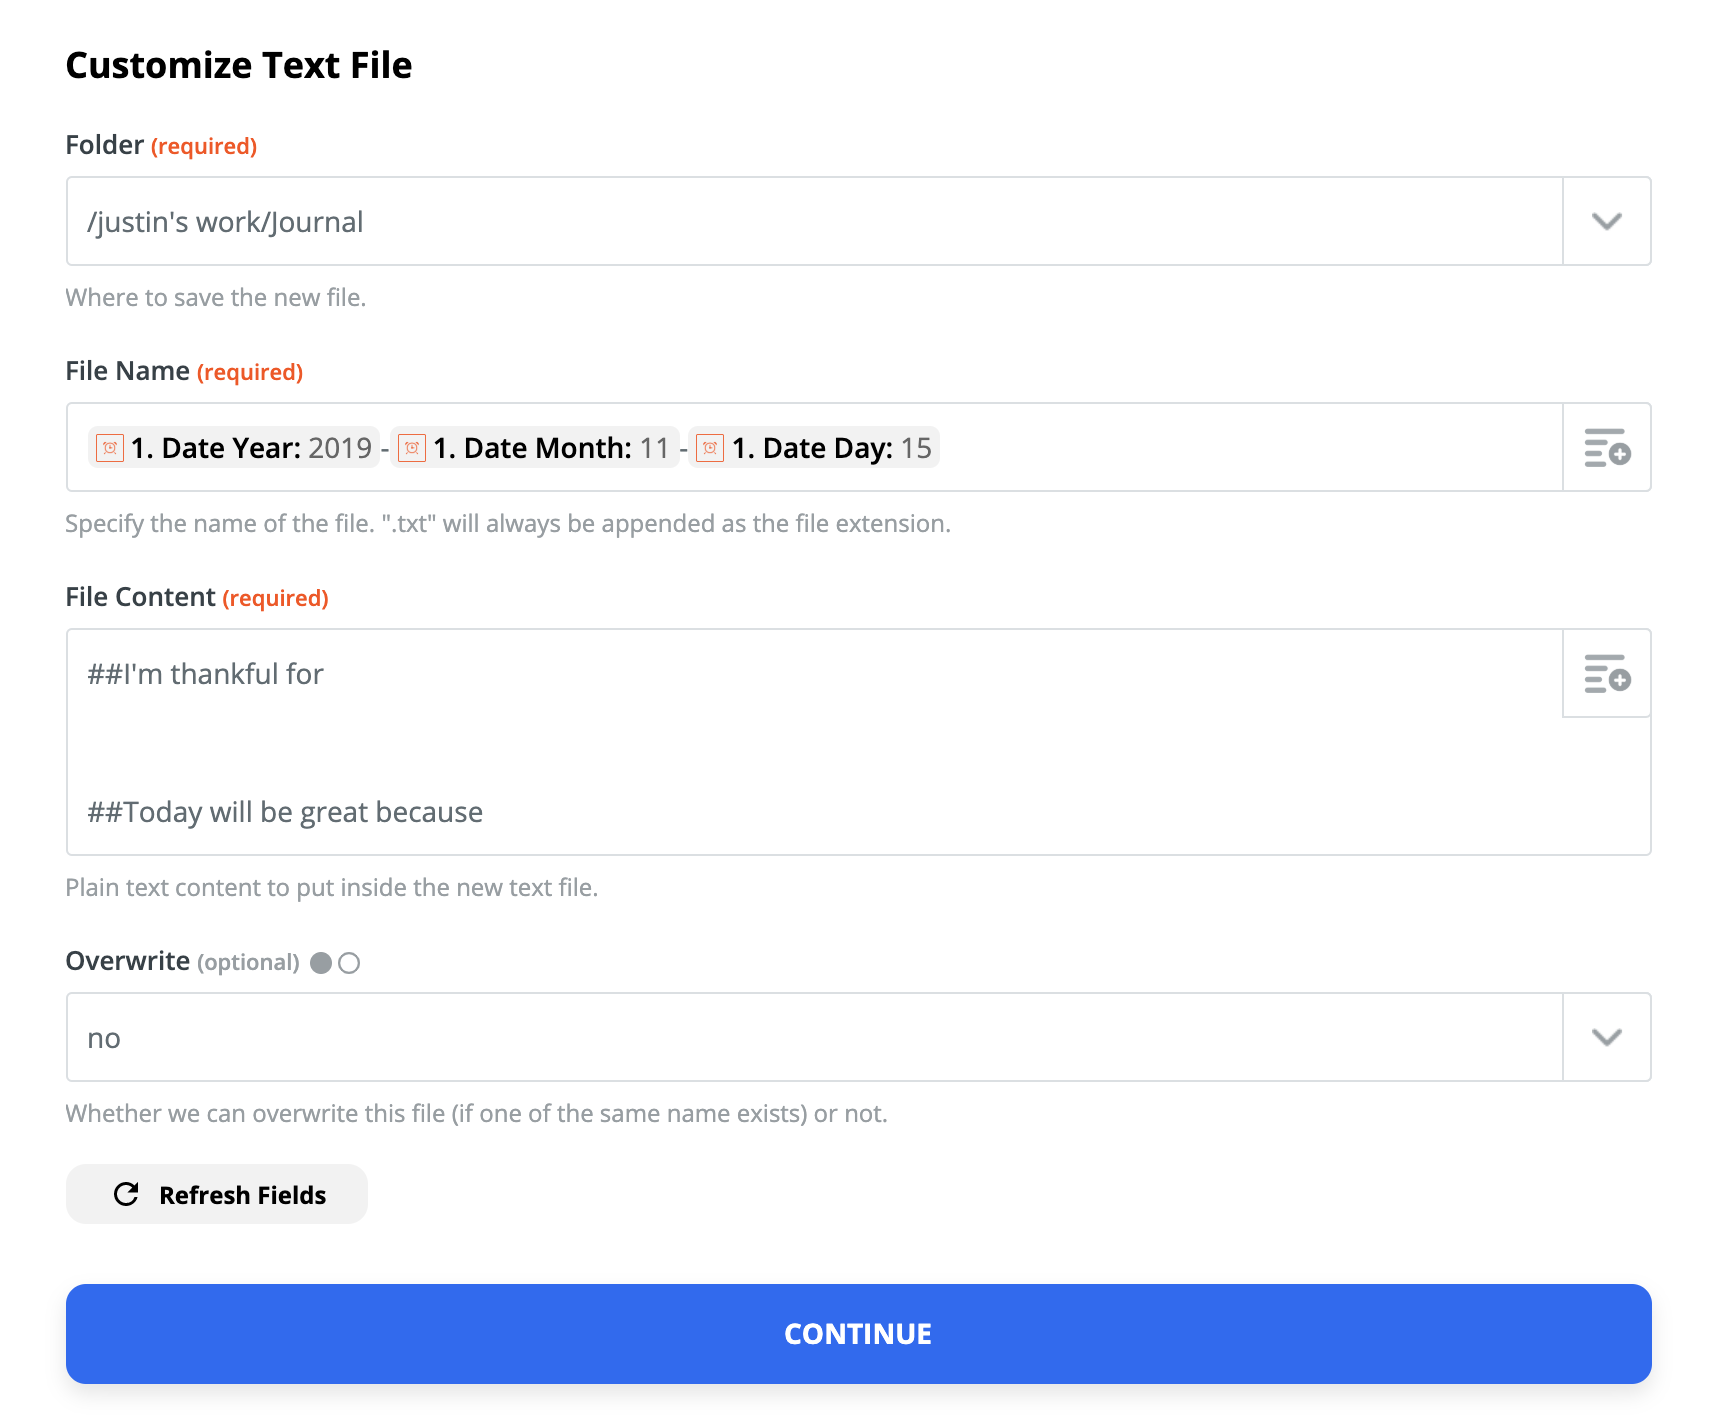
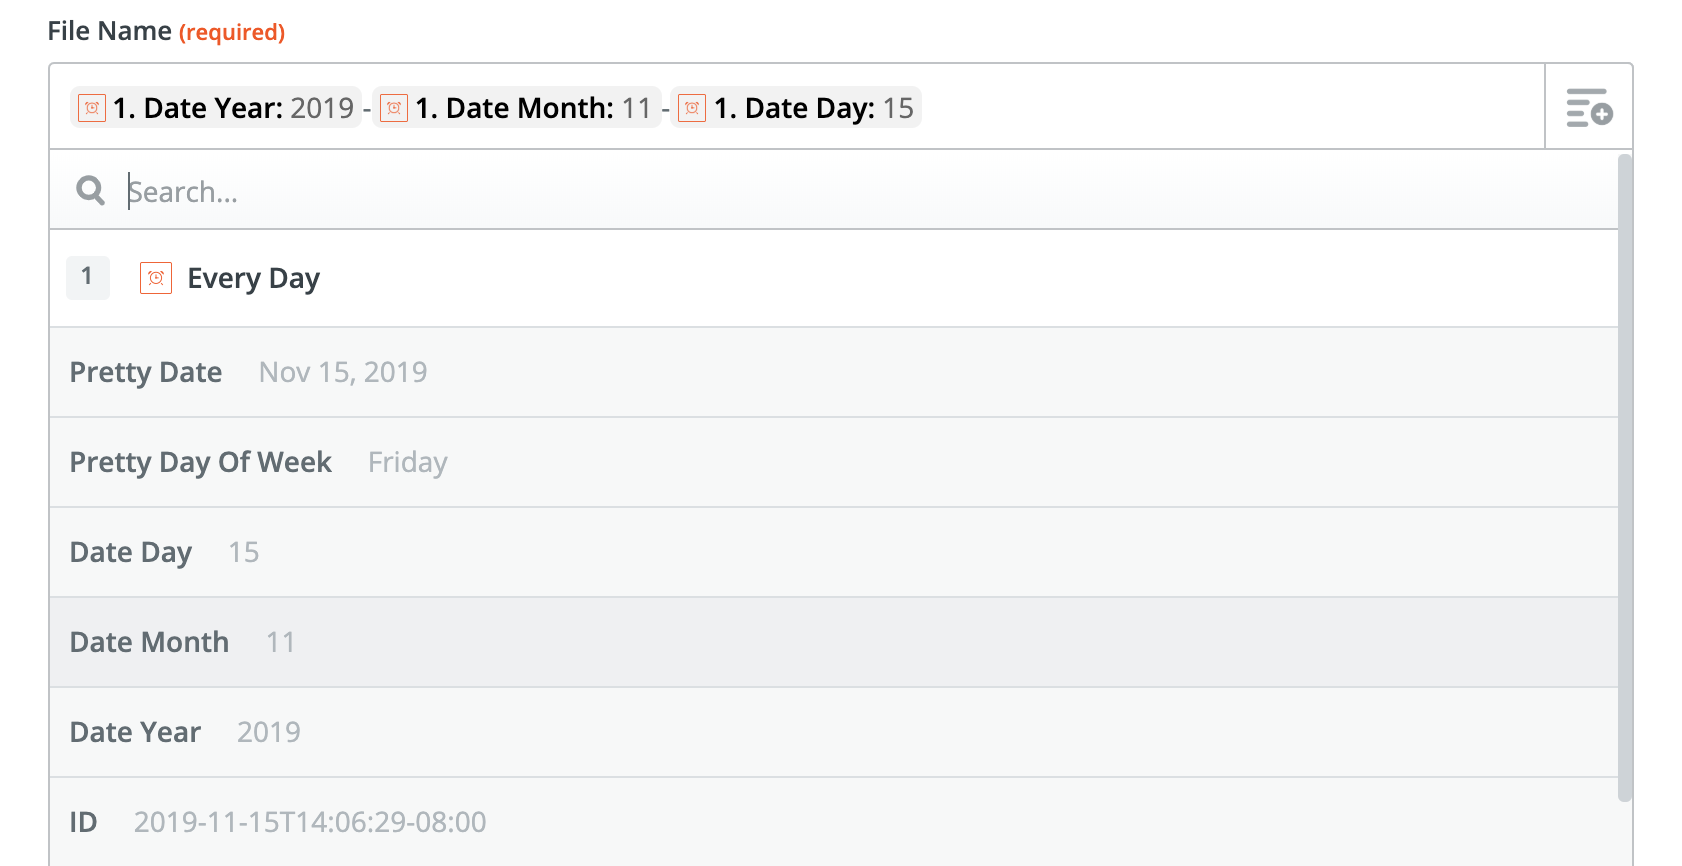
In my case I needed to choose a folder, so I created a journal file in my Dropbox just for this. I also needed a filename, and I used fields to map today's date.
Finally I added my sub-headers, so they will show up in my journal entries. I plan on editing my journal entries using Markdown, so I gave the sub-headers appropriate formatting. Here's how it looks in Typora, a great Markdown editor.
Set things up so they look just the way you want, then click Continue to test your setup. You should see a sample entry pop up in your chosen service. Tweak the Zap until your journal template looks just the way you want, then turn your Zap on when you're done. New entries will show up every day; all you have to do is actually fill them.
How to set up an automated journal with today's forecast
Want to go a step further? You can automatically pull information into your automated journal. I, for example, like seeing the weather at the top of my entries. This helps me remember what a particular day was like when I'm reviewing it.
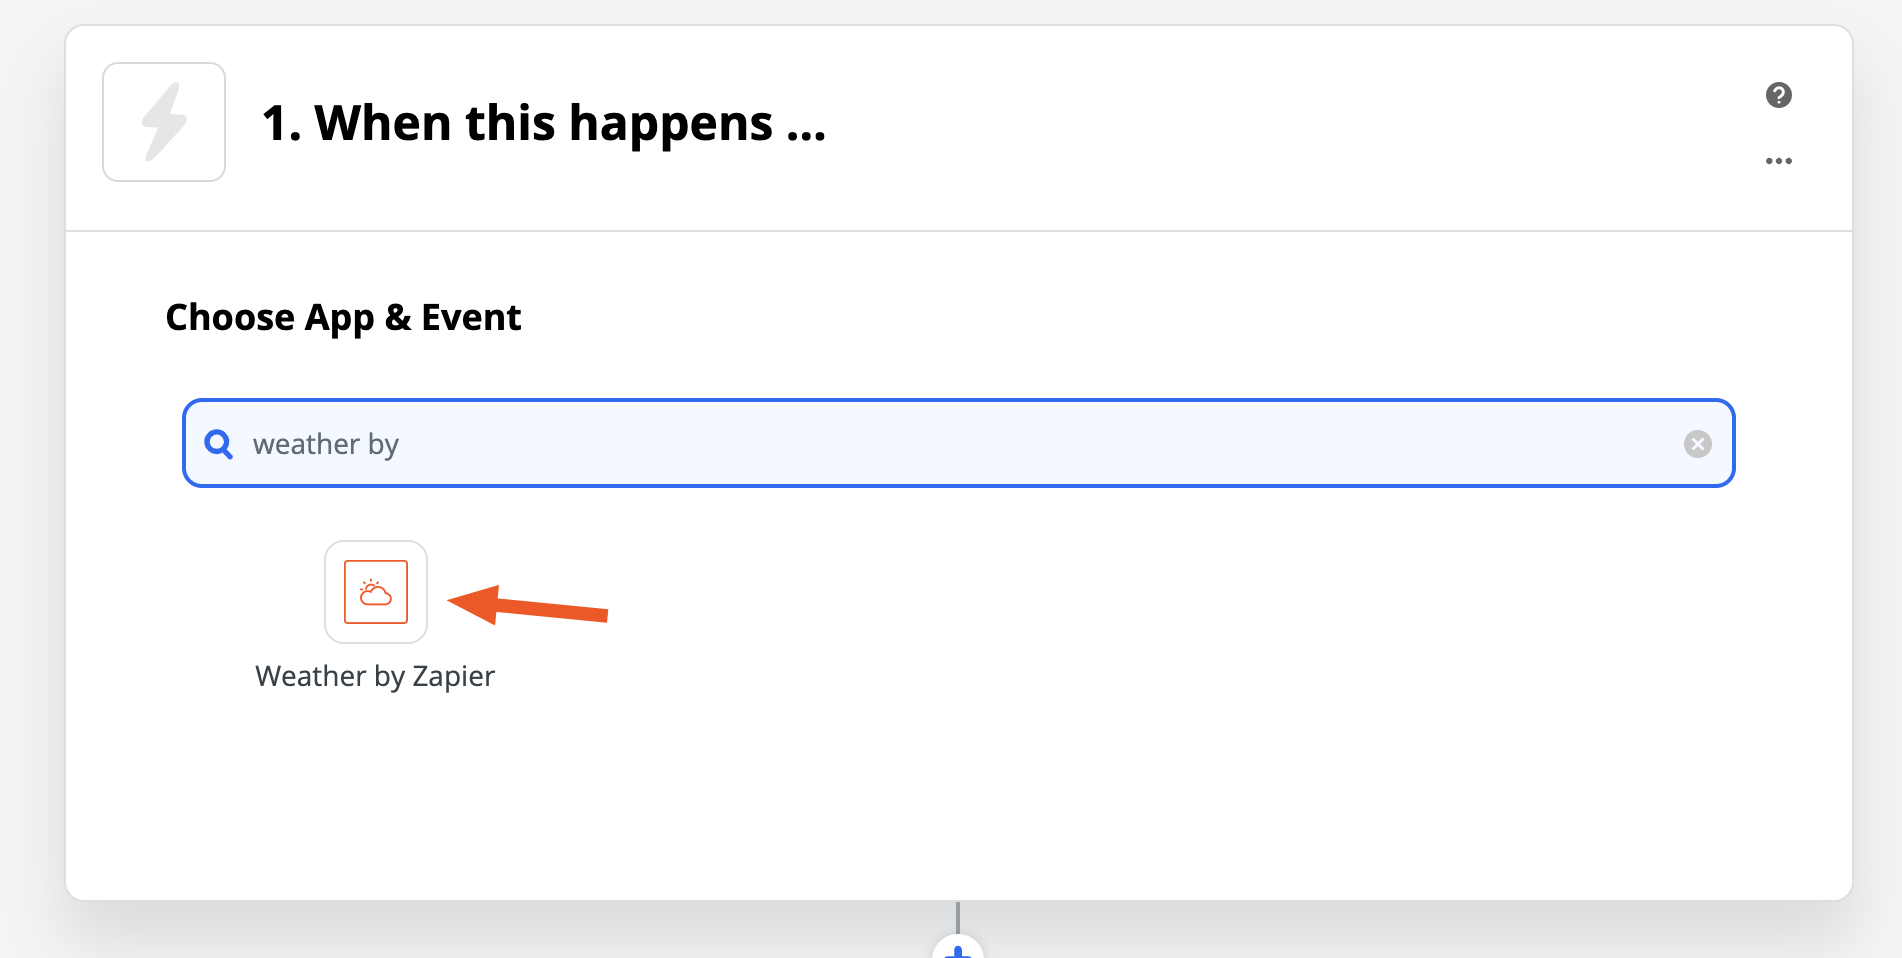
If you'd like the weather to show up in your journal, you can. Simply use Weather by Zapier for the first step instead of Schedule.
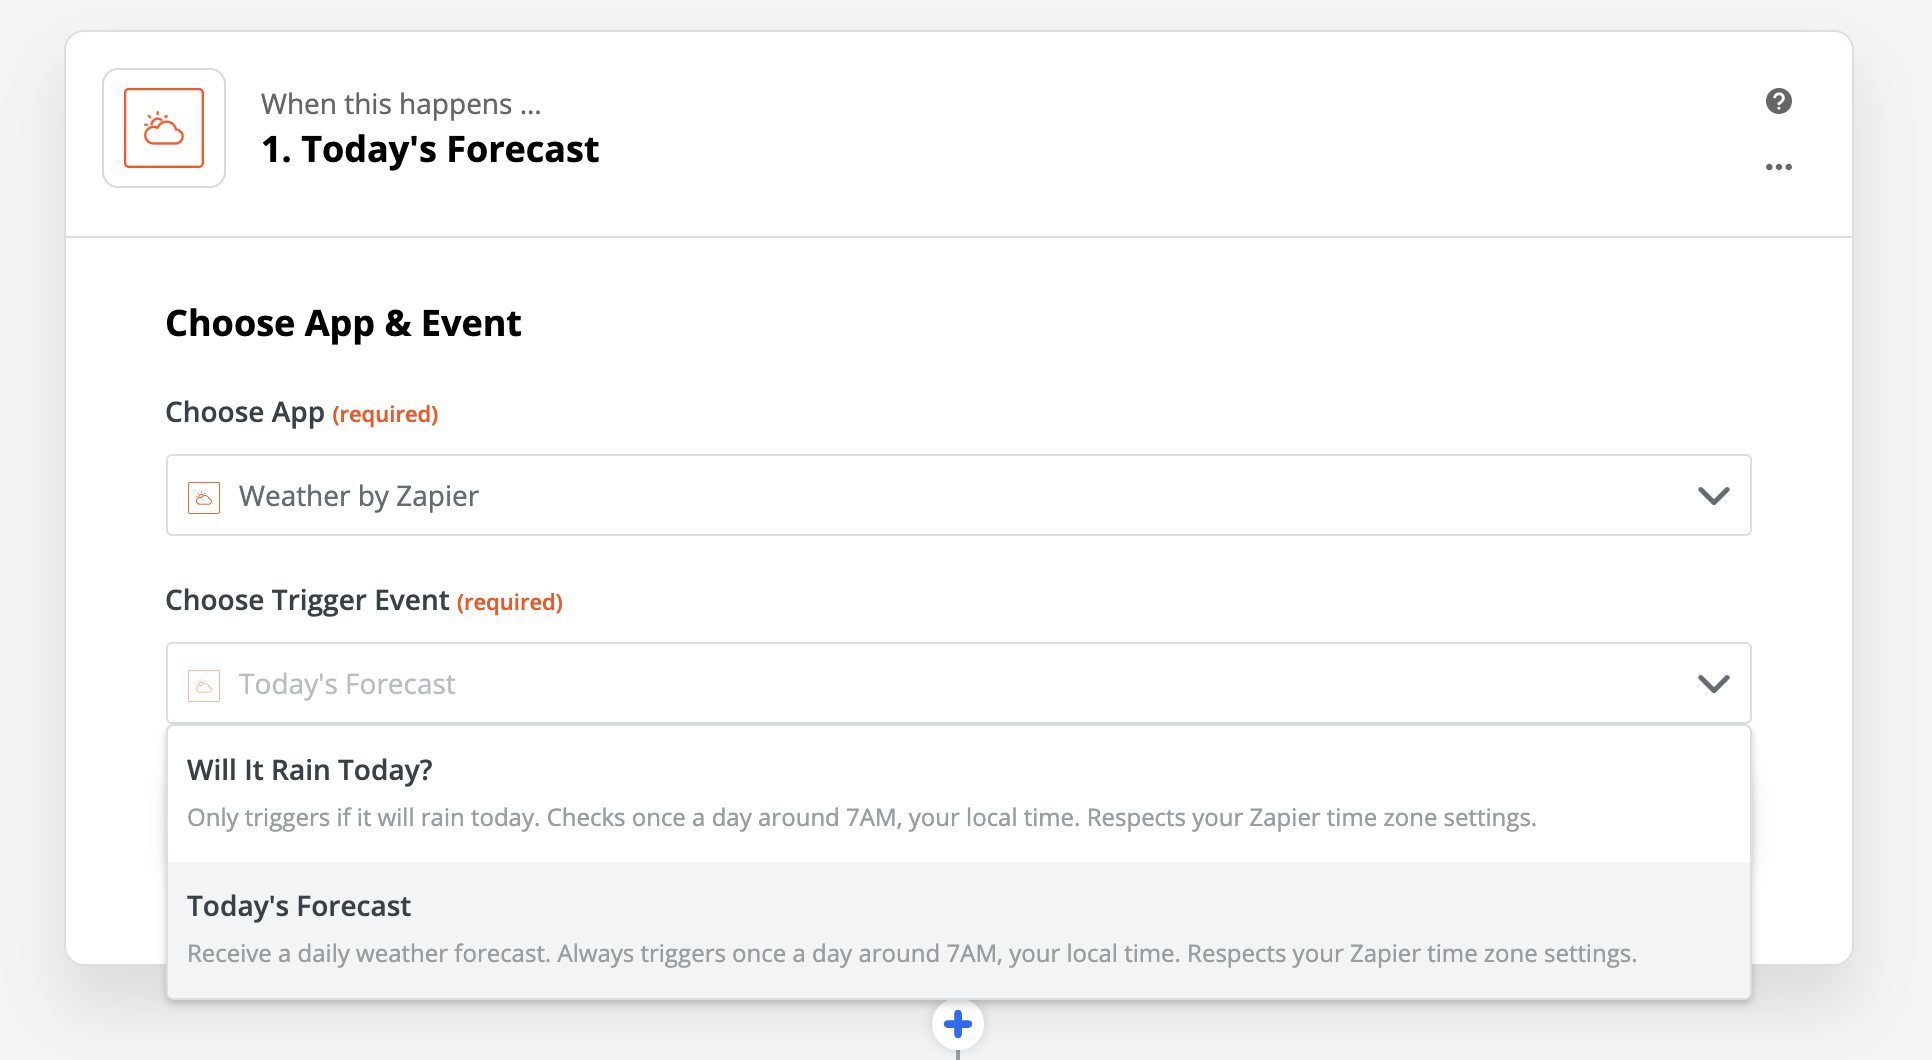
Select Today's Forecast as your trigger event. This triggers every day at 7am.
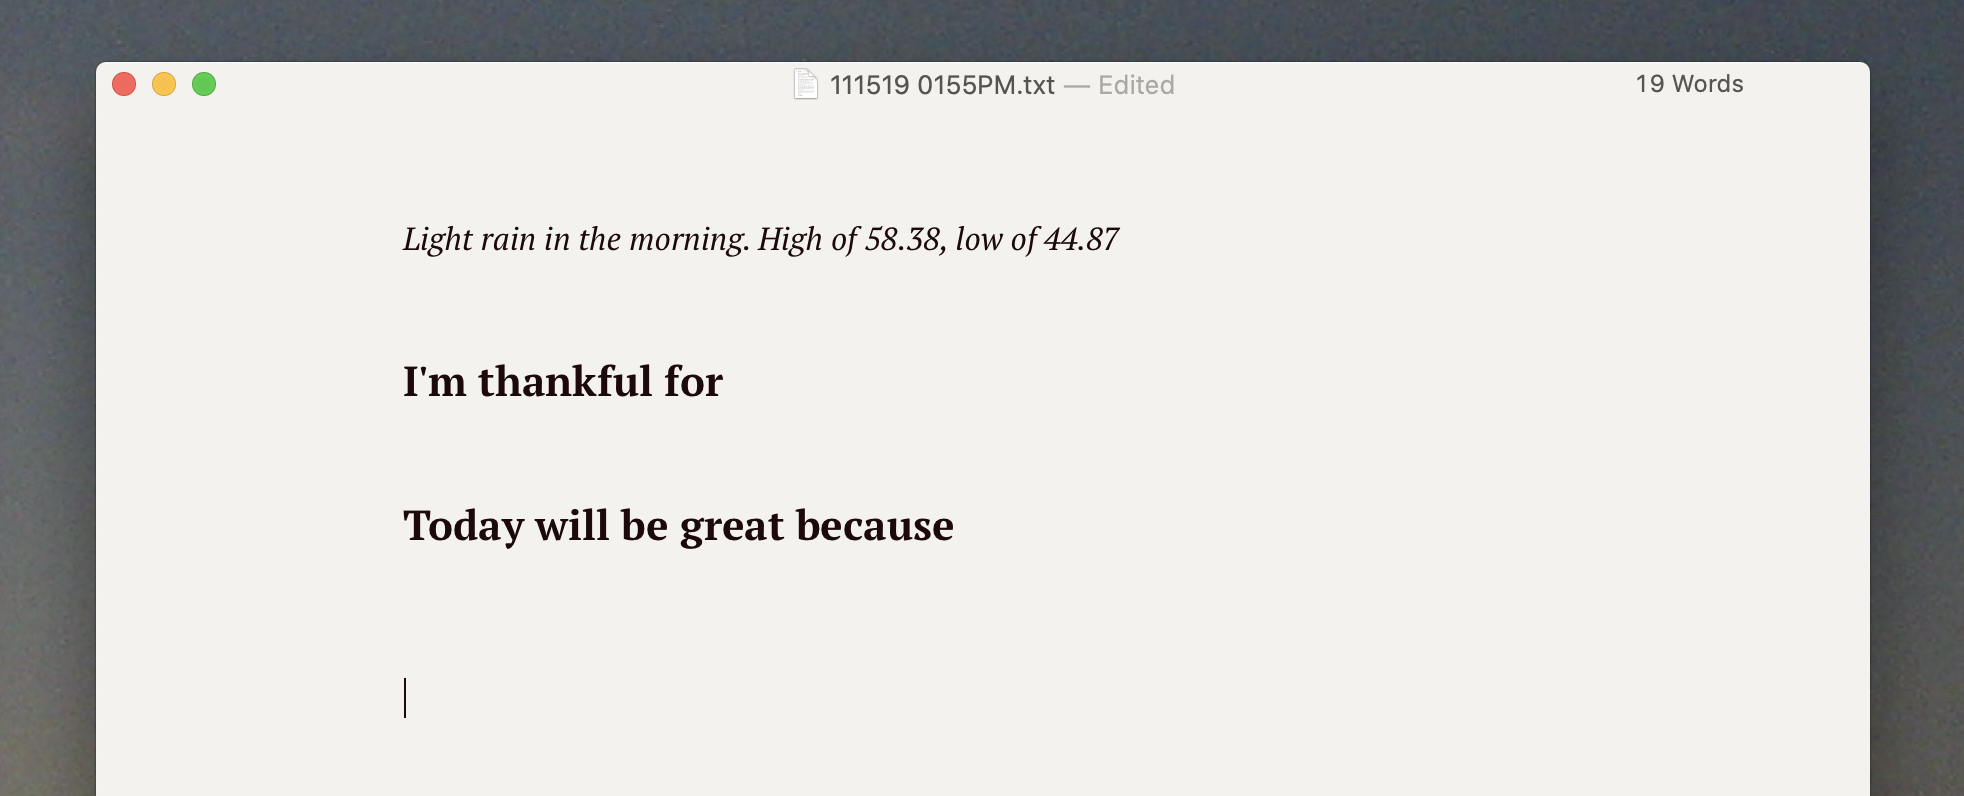
You will need to enter your longitude and latitude, after which you can set up the second stage of your Zap. Again, you can use whatever application you like; I'm using Dropbox again. For the file name I used , then pulled in weather data before adding my section headers.
Click Continue when you're ready, after which you can run a test to see how your journal entry will look. Here's how the above looks in Typora.
Adding the weather is helpful on the day of, but it also gives you a sense of what the day was like later on, when you're reviewing your entries.
Build your journal however you like
The best thing about this setup is how customizable it is. Zapier connects to 1,500+ apps, meaning you could set up your journal to include just about any information you can imagine.
You could use RSS by Zapier to create a journal using any feed that updates once a day, like Brainyquote's quote of the day or NASA's Astronomy Picture of the Day. You could connect to Twitter, feed your likes to a digest, then insert them all into your journal as a sort of writing prompt.
Or you could just leave each entry as a blank page! That's the beauty of this setup: You choose what your journal includes, where it lives, and everything else. Building your own solution is a beautiful thing.
from The Zapier Blog https://ift.tt/2EdJRSc


Comments
Post a Comment