7 Creative Ways to Visualize Your To-Do List
- Get link
- X
- Other Apps
A long to-do list can be overwhelming. Sometimes, you might want to take a step back and look at the day, week, or month at a high-level, visualizing what's coming up rather than just plowing through a list of to-dos. But that's not always possible with a traditional to-do list app that's text- and list-based.
If you're craving something more colorful and creative—or something that gives you a higher-level view of what you have on your plate—a visual to-do list could be exactly what you need. Below, you'll find seven different ways to visualize your to-do list, along with details on when each approach is most useful.
1. Hang Your To-Do List on the Wall to Keep Tasks Top-of-Mind
I'm really bad about creating to-do lists and then never actually using them. For example, I have a to-do label in Gmail. When I get an email with something I'd like to take action on—but that isn't terribly pressing—I assign the to-do label to the email to get it out of my inbox.
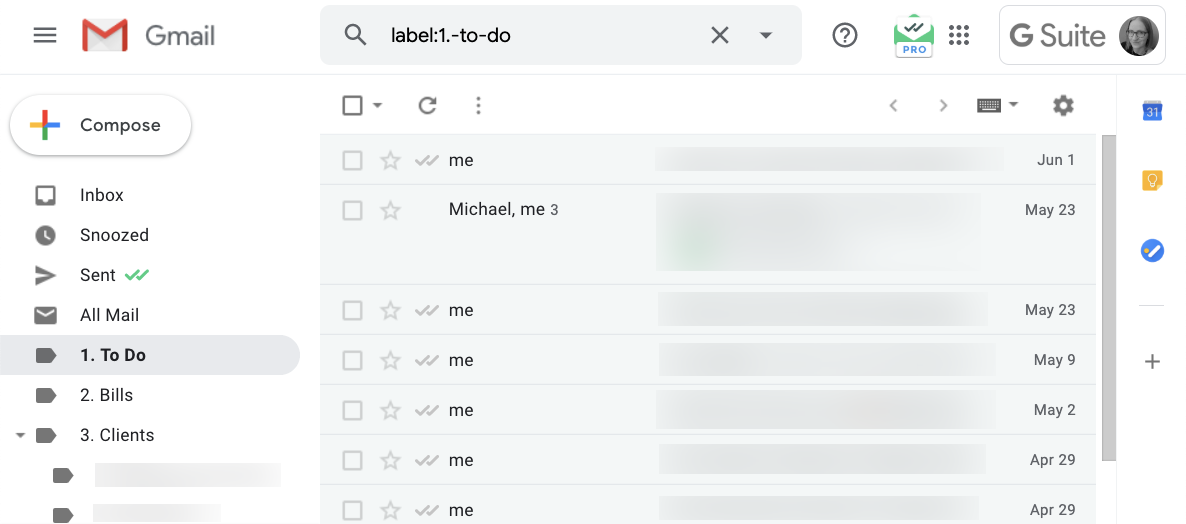
The problem: I never actually look through my to-do folder.
Another thing I like to do is to write to-dos in the same notebook I use to take notes while doing research for articles I'm writing. But I usually end up flipping the page because I'm taking notes, and I never flip back to collect the to-dos I wrote down.
The point of having a to-do list is not only to document your to-dos, but also to refer to what you've documented to decide what to work on next. If you only collect to-dos and never refer back to them, you're essentially relying on your memory to recall your outstanding tasks.
If you struggle with the same problem, you might want to create a physical to-do list and put it somewhere that you can't help but look at it. Here are some options.
Use a big sheet of paper and markers
A cheap, simple option is to get some butcher paper and write your to-dos on it with markers. But if you want something nicer-looking, you can get an easel pad—a giant notebook that's usually used for presentations—to create a big calendar or task list.
You can write your to-dos on your list using a single color, but using multiple colors gives your list a bit more character. Plus, you can use different colors to signify a task's category or priority if you want an easy way to distinguish between different types of tasks.
You may also want to invest in markers that won't bleed through the page onto subsequent pages—or worse, your wall—like these erasable Pilot Frixion markers.
Use a whiteboard or chalkboard

If you want a more reusable option, create your physical to-do list on a whiteboard or chalkboard. And if you don't want to put holes in your wall to hang a board, you can always set it on a surface and lean it against a wall for stability, or you could even buy some whiteboard paint or chalkboard paint to turn your wall into a to-do board.
One of the advantages of getting a freestanding board and not mounting it to your wall is that you can take it with you when needed. This makes it a great option if you sometimes work at home and sometimes work in the office but always need your to-do list on hand.
Use sticky notes
Using sticky notes can be a fun way to organize your schedule visually. You can stick them anywhere—on your desk, monitor, whiteboard, refrigerator, or the wall—so they can double as to-dos and reminders. Plus, they come in lots of bright colors, so it's easy to color-code task categories and priorities.
The other nice thing about sticky notes is that they're movable, so you could start by sticking all of your to-dos onto the wall and later rearrange your sticky notes into sections based on priority (one section each for high-, medium-, and low-priority tasks), status (backlog, in progress, blocked, done), or date (to do today, tomorrow, Wednesday, next week, etc.).
2. Create a Kanban Board to Move Tasks Through a Process
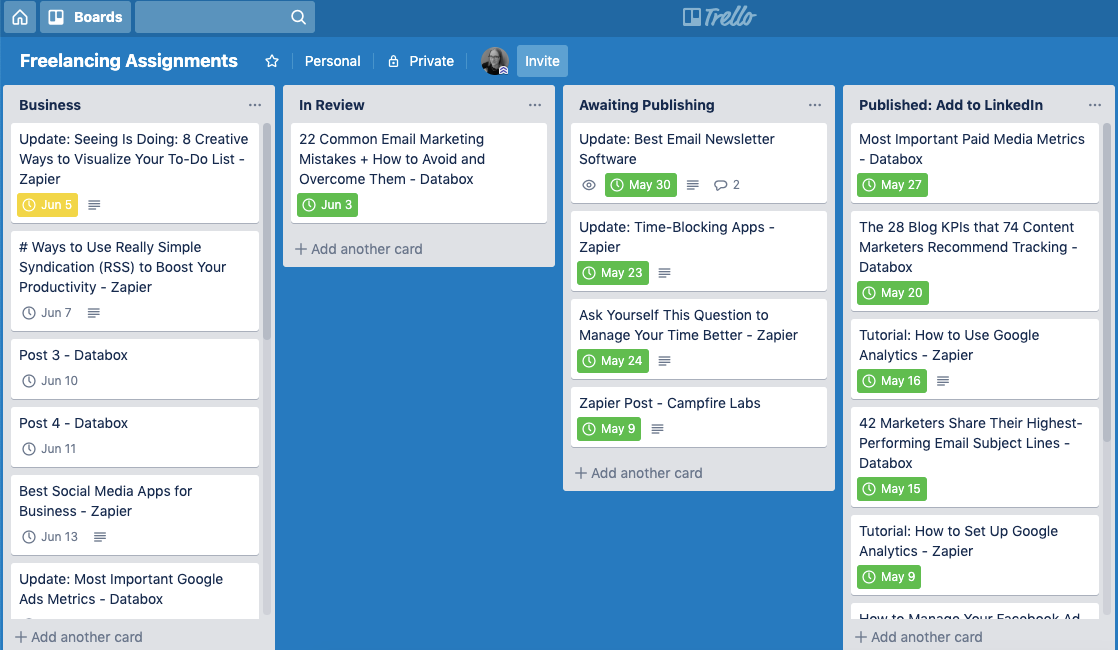
A kanban board is a great method for visualizing to-dos that need to go through a series of steps—sort of like an assembly line—before they're complete.
For example, when I have a writing assignment, I don't just write the article and mark it as complete. I write it, submit it for review, and make edits after it's reviewed. Then, I wait for it to be published before adding it to my LinkedIn profile and website. Only after all of those steps have been completed is the assignment fully complete.
Since that's an assembly-line type of process, I use a kanban board to document my writing assignments and track where they are in that pipeline.
You can use sticky notes on a large sheet of paper, board, or wall to create a kanban board, or you can use a kanban board app like Trello (pictured above) or MeisterTask. Both Trello and MeisterTask offer free plans for individual use.
The nice thing about using a kanban app is that you can pair it with Zapier to automatically move to-dos you receive in other apps to your kanban board. For example, since I never look at my to-do folder in Gmail, I created a Zap (automated workflow by Zapier) that automatically adds emails with the to-do label to my kanban board.
Here are some more examples:
3. Use Visuals to Assign and Identify Priorities
A typical to-do list looks something like this:
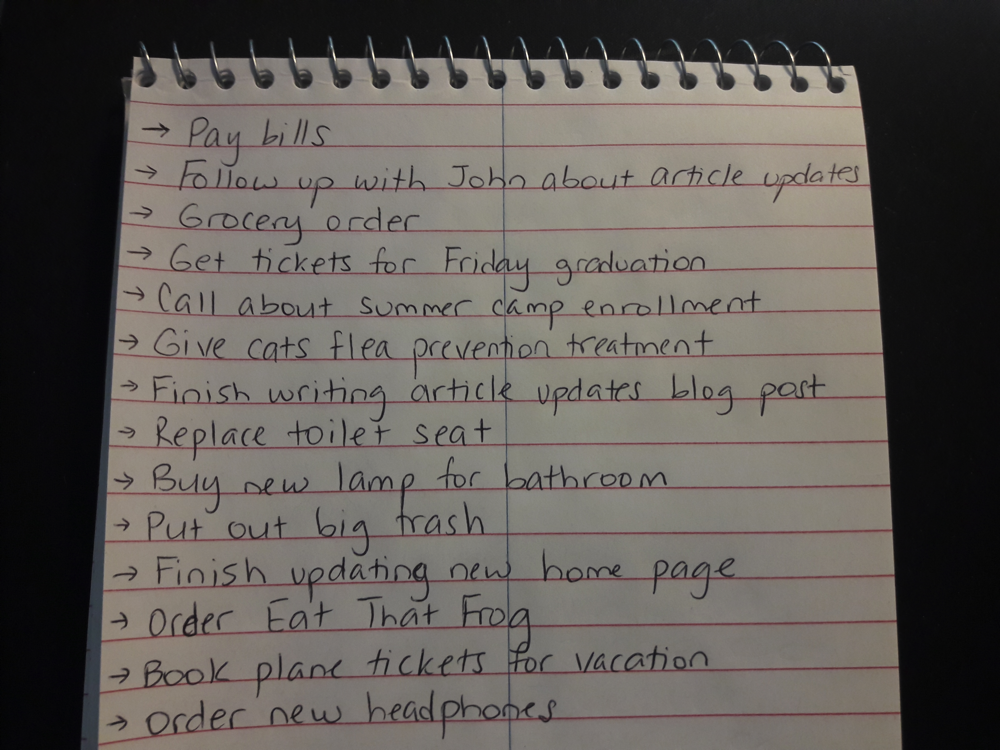
It's functional—it lists the tasks I need to complete—but it doesn't tell me which are the most important.
To evaluate importance, I have to read through each task to find the one that's most pressing. But I might not read through them all, especially if it's a long list. I might stop as soon as I see something I know needs to be completed soon, therefore missing something more pressing that's further down the list.
Creating a visual to-do list can help you identify high-priority tasks more easily. That could be something as simple as writing high priorities in red ink and everything else in black ink or using different colored sticky notes—or you could get even more detailed by creating a priority matrix.
Create a priority matrix
In The 7 Habits of Highly Effective People, Stephen Covey recommends putting each of your to-dos into a quadrant based on importance:

This method, also known as the Eisenhower Matrix, is a visual exercise in itself: You allocate your tasks to one of four boxes depending on whether they're urgent and important, urgent but not important, important but not urgent, or not urgent or important.
Doing this exercise on a sheet of paper and then sticking it to the wall near your desk is helpful during busy times. It's easy to get overwhelmed by a long task list, so having your priority matrix on the wall can help remind you what you need to focus on—and what to ignore or put off until later.
For a digital solution, you can use the Eisenhower Matrix app (free)—a simple tool that lets you add tasks directly to the matrix. Or for something more advanced, try Priority Matrix (from $12/month) to collaborate with others or create different matrices for different projects.
Looking for more ways to prioritize your tasks? Check out these six task prioritization methods, or learn how to apply Agile prioritization to both personal and professional projects.
4. Put Tasks on a Calendar to Plan Your Time Better
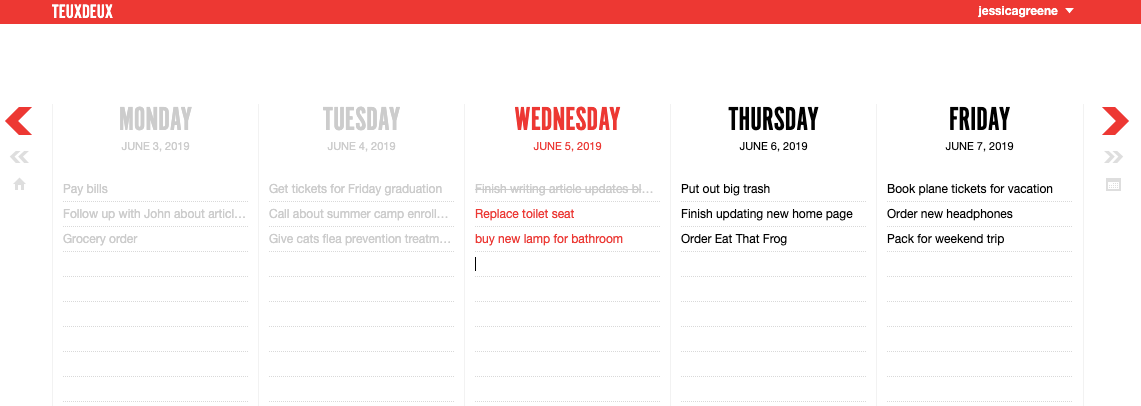
For tasks with hard deadlines—or if you're following a productivity technique like Zen to Done or GTD® that recommends planning tasks at the beginning of each day/week—laying out all of your tasks on a calendar can help you keep track of what needs to be done, and when.
There are plenty of analog ways to add tasks to a calendar. You can buy a daily planner or big desk calendar from any office supply store, or you could create your own calendar using sticky notes and a wall or a writing instrument and whiteboard/chalkboard. To keep costs low, you could even print out a calendar on regular printer paper.
There are plenty of to-do calendar apps that help you attach tasks to days, too. TeuxDeux (from $3/month), pictured above, makes it easy to assign tasks to specific days of the week. Or you could use a time-blocking app like Plan (free plan available) or HourStack (from $7/month) to schedule tasks for specific times of the day.
If you opt for an app like HourStack, you can also use HourStack's Zapier integration to copy new Google Calendar events to your HourStack calendar:
5. Doodle Your To-Dos in a Notebook to Avoid Feeling Overwhelmed

If you're artistic—or if you want to try something a bit different—you can turn your to-do list into a work of art using images and/or creative lettering to list your outstanding tasks.
Drawing what you need to get done can be fun, and it can take away some of the stress associated with creating a task list. Plus, research shows that we remember pictures better than words, so if you think you might be without your to-do list at some point but need to remember what was on it, you might have a better chance of recalling your list if you drew your tasks instead of just writing them down.
6. Use Google Sheets to See How You're Spending Your Time
Zapier Contributed Content Manager, Deb Tennen, recommends using Google Sheets as a to-do list. And while you might not think of a spreadsheet as being highly visual, Tennen says that's one of its biggest benefits:
Bold certain types of tasks, italicize others, or even add a border around cells. Whatever stands out to you visually, go with that. You can even use conditional formatting to automatically format rows that contain specific text, like if you always want to highlight rows with a specific person's name—say, an important client or your boss.
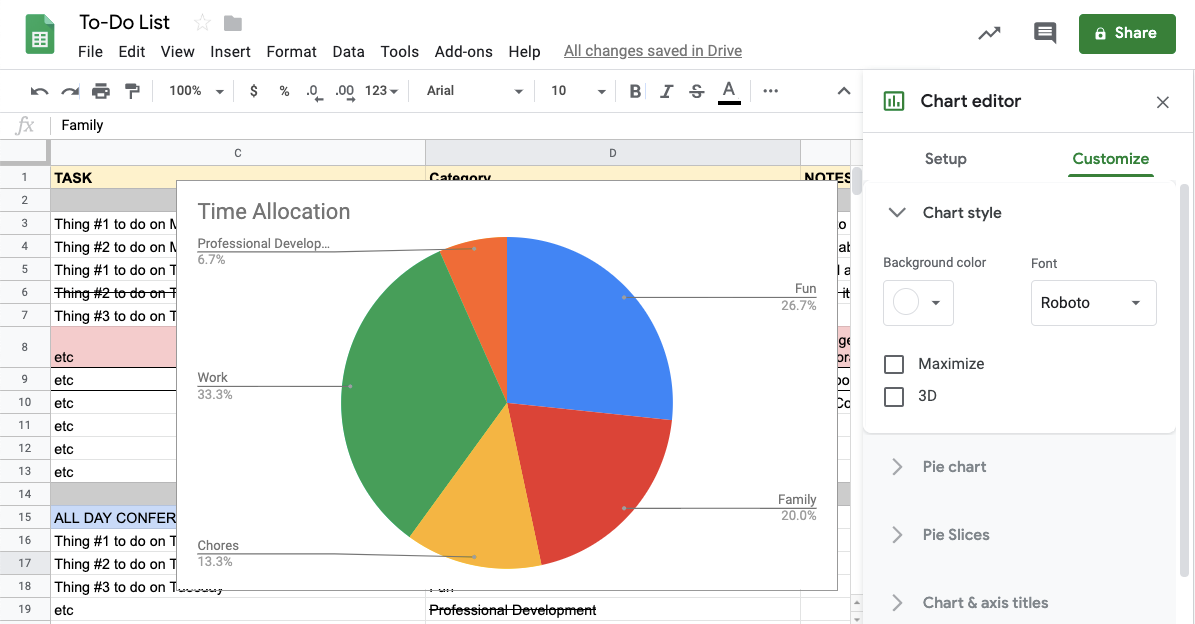
The other advantage of using Google Sheets as a to-do list is that you can turn your tasks into a graph or pie chart. For example, let's say you're trying to manage your time better, and you decide you want to allocate 40% of your time to work, 30% to spending time with family, 10% to chores, 10% to fun, and 10% to professional development.
If you format your to-do list properly, you can use the data to create a pie chart in Google Sheets in a couple of clicks, showing exactly what percentage of your tasks you're allocating to each category.
Plus, if you use one of Google Sheets' Zapier integrations, you can connect it to 1,500+ other apps to do things like:
7. Use a Mind Map to Break Down Large Tasks
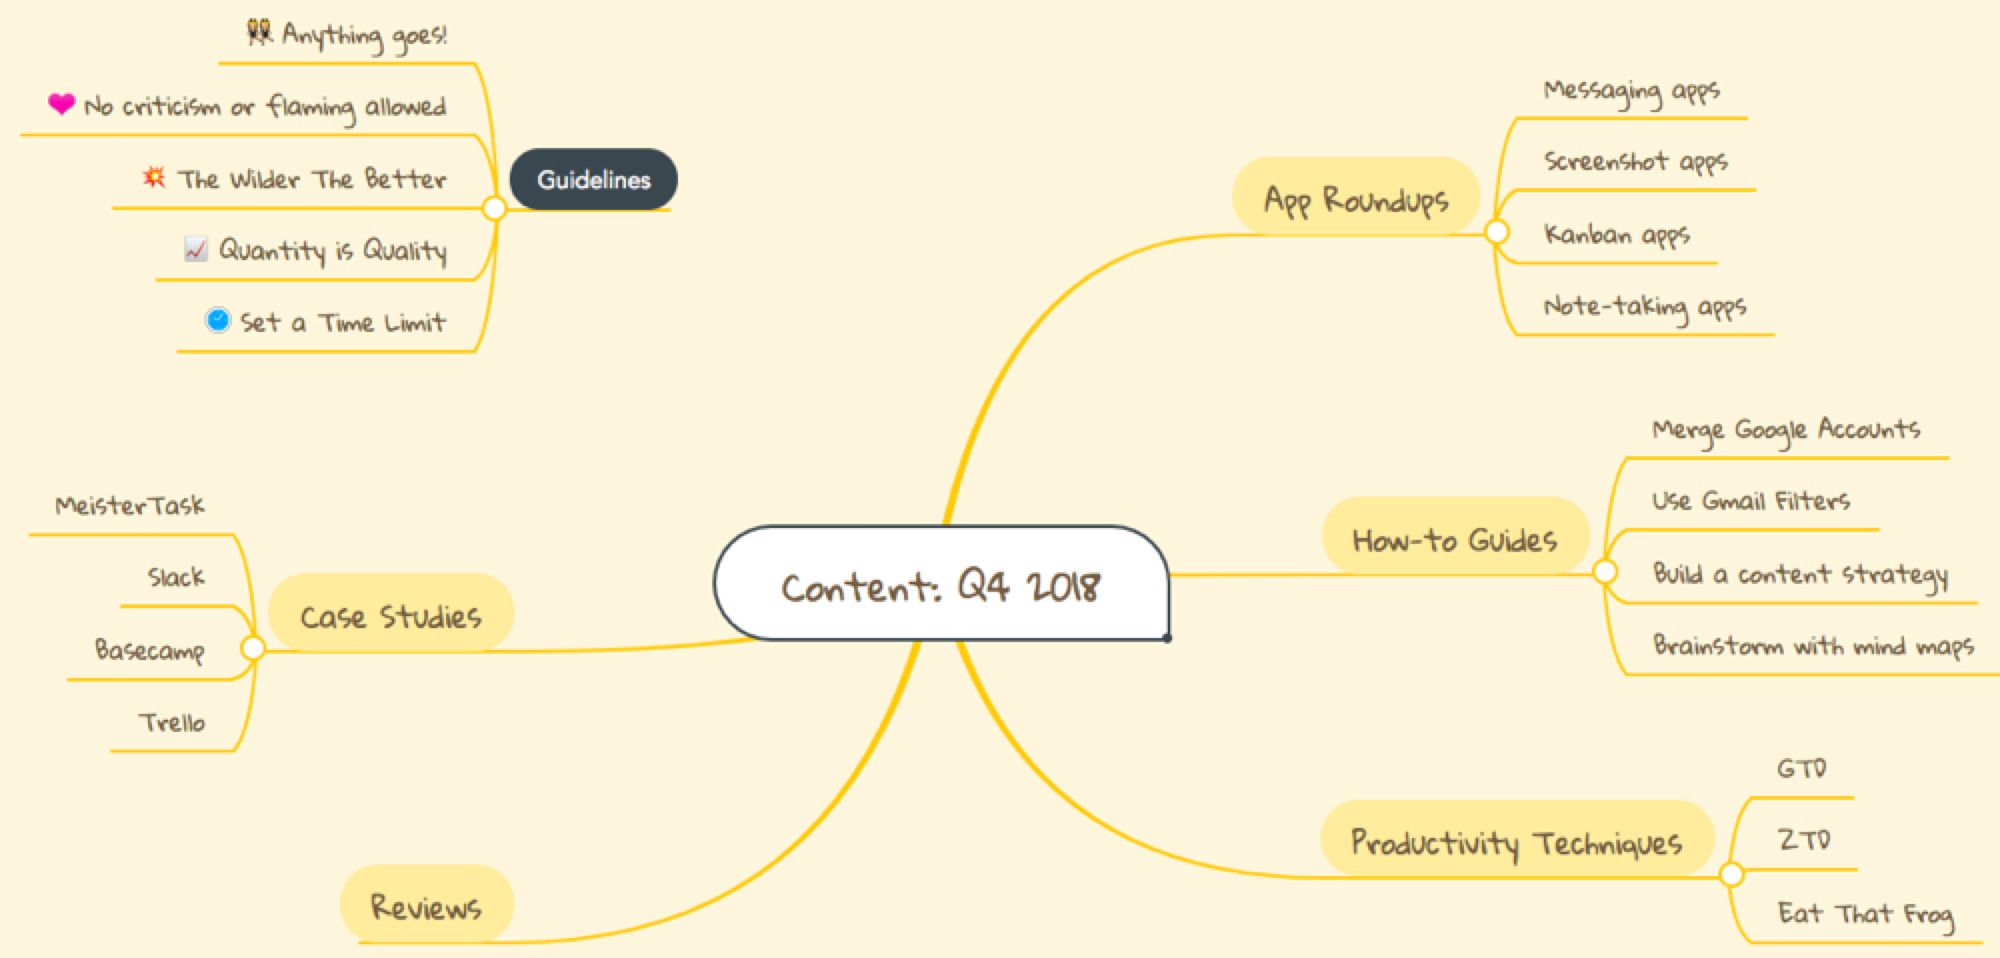
A to-do list is great when you know what exactly it is you need to do, but that isn't always the case. Sometimes, you have a big project you know you need to finish, but you need to break it down into smaller tasks and to-dos. Or you have a major goal but need to break the goal down into actionable steps.
Creating a mind map can help you generate a to-do list when you have one big to-do in mind. A mind map is a brainstorming tool where you start with a single bubble in the central—a core project or goal—and then branch off of the central circle with as many thoughts and ideas you can come up with.
You can create a mind map on paper, but there are also lots of great mind mapping apps to consider that aren't restricted to a certain size and are easy to edit and adjust. MindMeister (free for up to three mind maps) is a notable option because of its integration with kanban board app MeisterTask that lets you turn your mind map bubbles into to-dos in just a couple of clicks.
You Don't Have to Choose Just One Type of Visual To-Do List
You probably don't want to doodle a masterpiece every day when creating your to-do list, but you might want to when you're feeling overwhelmed or needing to exercise some creativity. You probably don't need to put tasks into an Eisenhower Matrix every day, but it's a good exercise when you're staring down a long list of unprioritized tasks.
The best approach to visual to-do lists is to use the different options only when it makes sense to use them. For example, I use Trello for my work assignments and sticky notes on my refrigerator for things I need to do at home, but if I'm planning a major project for either work or home, I tend to gravitate toward mind maps and spreadsheets.
If you turn your wall into a dry-erase board with whiteboard paint or subscribe to an app with a monthly subscription fee, you'll probably want to use that method fairly often. But the nice thing about most of these methods is that they're flexible and situational, so you don't have to choose just one.
Originally written by Belle Cooper and published in September 2014, this post has been updated with some additional methods for visualizing your to-do list, plus some new tools and apps that make it easier to create a visual to-do list.
Whiteboard image by Belle Beth Cooper. Sticky note to-do list image by rawpixel via Pixabay. Doodled to-do list image courtesy Elvie Studio.
from The Zapier Blog http://bit.ly/1BuJ8mN
- Get link
- X
- Other Apps
Comments
Post a Comment