Efficient automation: How to get the most out of your Zaps
- Get link
- X
- Other Apps
When I first started using Zapier, it was like a firework going off in my brain. I sought out things to automate: Time-tracking at work, invoicing, reminders to send grandma a birthday card, all of it. In my first few weeks using Zapier, I had automated workflows – which we call Zaps – with 10, 20, 30 steps in them, all trying to explore the new possibilities.
And it was great for about two minutes, until my account reached its task usage limit, and I had to face reality: My Zaps, while awesome, weren’t as efficient as they could be.
In most cases, my Zaps could have achieved the same outcome but used fewer tasks. One or two changes would've saved me money and peace of mind.
After reviewing my own Zaps, as well as troubleshooting thousands of Zaps with Zapier’s award-winning Support team, I’ve found two ways to help your Zaps use fewer tasks, allowing you to build more Zaps and save more time in the long run.
You'll need a Zapier account to implement the solutions we recommend in this article. If you don't have an account yet, it's free to get started.
What is a “task” and why does it matter?
Each plan supports a certain number of “tasks” each month. Any time a Zap successfully performs an action counts as a task, because that action is making at least one “request” to another application. That request uses a small amount of a server’s processing power, which costs money.
Learn more about tasks and Task History.
By making sure your Zaps only use tasks when they absolutely need to, you can be free to use more tasks in another Zap, automating more work without hitting a limit.
How to spot inefficient Zaps
Typically, inefficient Zaps do one of the following:
- They trigger a lot, more than you expect or even want. For example, if your Zap triggers on any new email, but you really only need emails from certain people.
- They have several actions in a row that all use the same application, or provide the same information multiple times. One example would be a Zap that creates a row in a spreadsheet, then uses an additional action to get that row’s information.
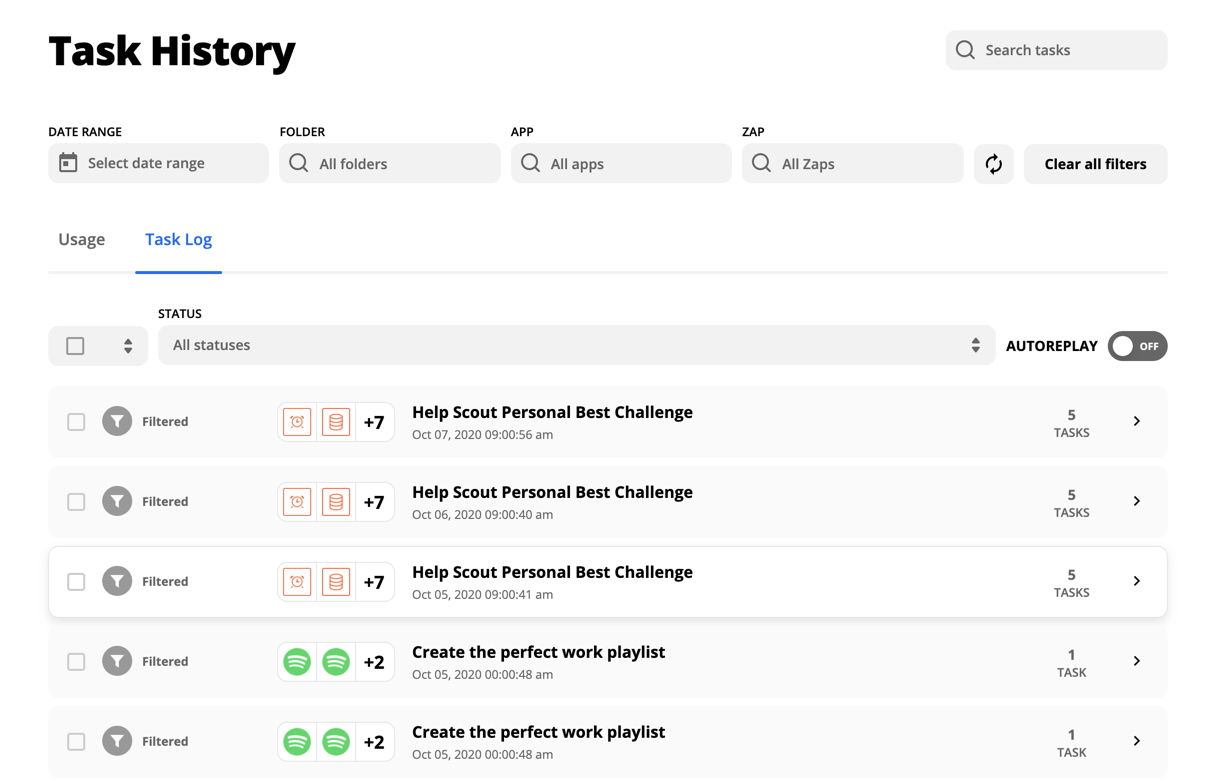
The best place to spot either of these situations is your Task History. There, you can get a birds-eye view of how many times each Zap runs, and what happens every time it does.
How to explore Task History
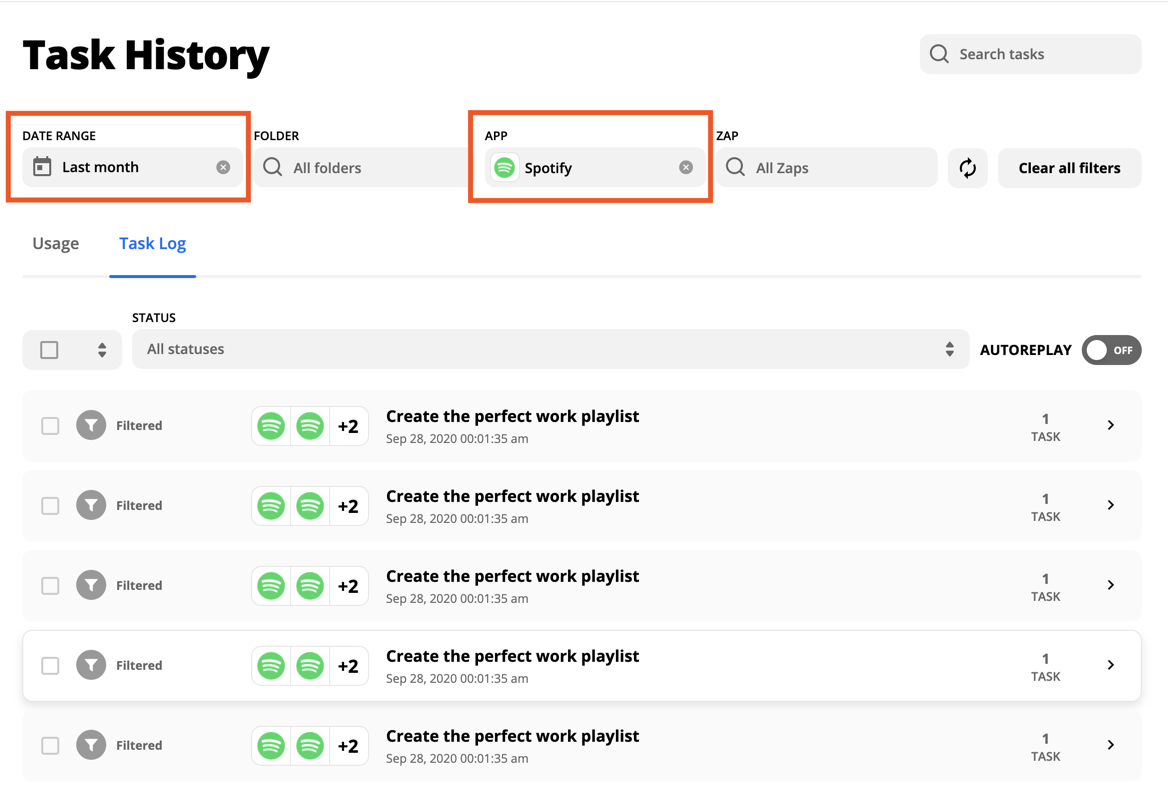
Using the options at the top of the page, you can narrow down which tasks you’d like to review. Selecting a Date Range will update the page to show tasks used within a certain time period. The App field lets you select a specific app, so that you can see which tasks are interact with it (for example, if you want to see all of the tasks related to Spotify).
You can even mix and match to see very specific tasks.
How to fix a Zap that’s running too often
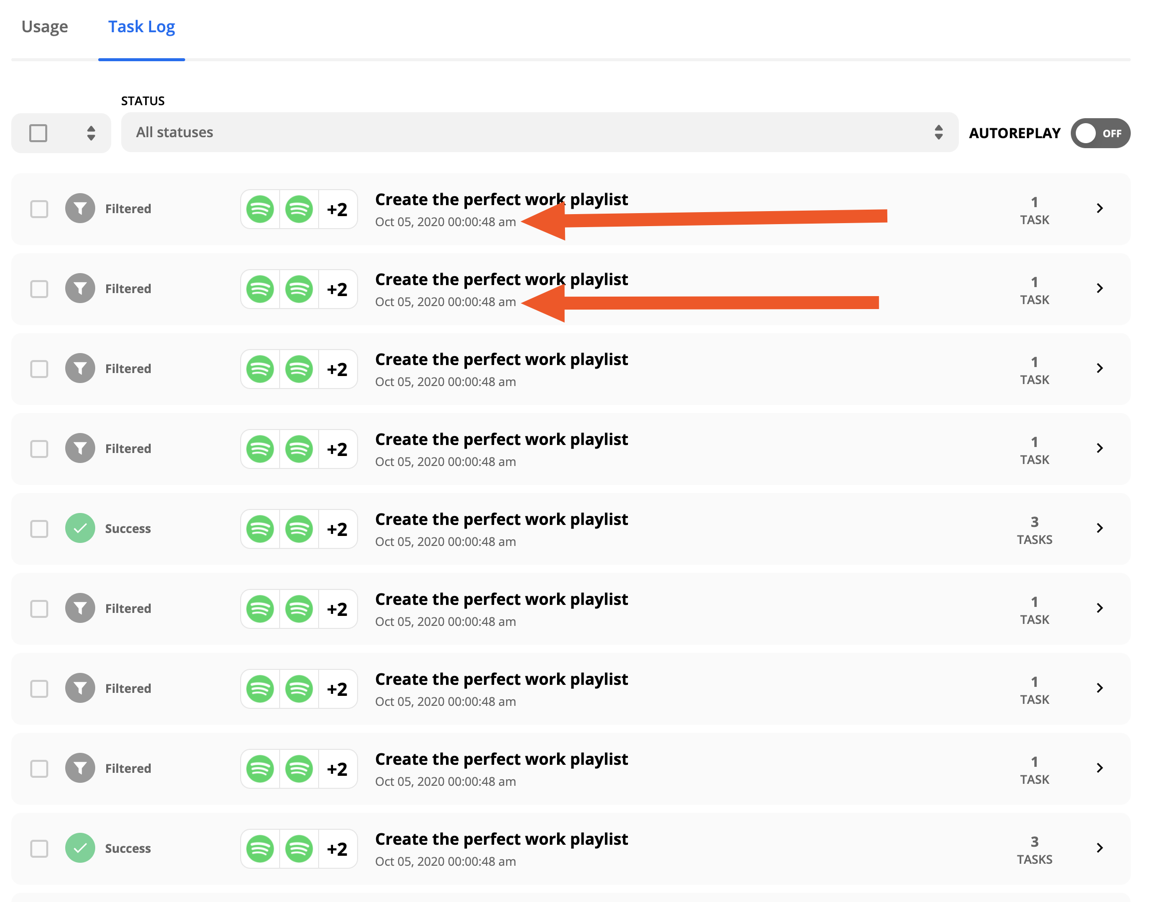
Zaps that trigger too often typically either completely overrun the first page of the Task History, or have multiple tasks that run close to the same time.
While we want to make sure that the Zap triggers any time it should, often we see the information that triggered the Zap doesn’t always need to be sent to the other actions. For example, sometimes it’s duplicate information, or information you don’t actually need. For example, if you’re using a trigger that gathers every email you receive, but you really only need the emails that have attachments.
If you notice one Zap runs much more often than you expect, it’s important to take a closer look at its trigger. Typically, Zaps that trigger a lot are using an “Update” trigger, so they prompt the Zap to run any time a change is made to something in the app.
To help make sure that tasks are only used when necessary in these cases, you can add a Filter to the Zap.
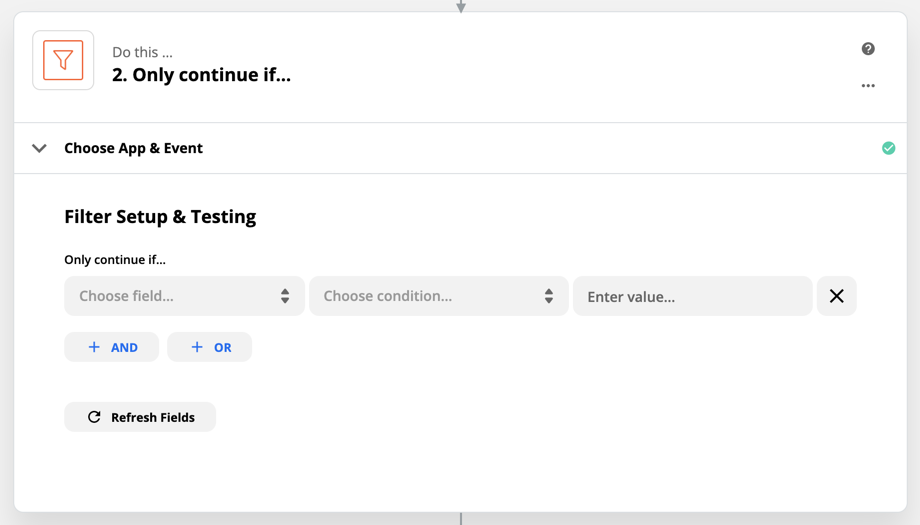
Filters allow you to set criteria that the Zap has to meet before continuing. For example, to make sure that your Zap only creates new contacts for people who provide their email address, you can update the Filter to check if the email “exists” before continuing.
You can also use the “AND” and “OR” buttons to set multiple criteria. For example, if the contact’s email exists, and they’re tagged with the “Zapier” tag.

Adding Filters to your Zaps is also a great way to prevent “Zap Loops”, another cause of Zaps using too many tasks.
Note that if a Filter’s conditions are met, the Filter itself does count as a task. But, if its conditions aren’t met, it stops the Zap from proceeding. This means that the Zap can continue to trigger frequently, but the overall number of tasks used can decrease significantly.
How to reduce Zap redundancy
Making Zaps with multiple steps feels like pouring rocket fuel on your computer, but keeping track of where information coming from and going to and sometimes requires slowing down and reviewing all of the options.
When making more complex Zaps, I often found myself adding more actions than I needed, trying to ensure that I had access to all of the data I wanted. For example, adding a “Search” action to get information from a spreadsheet row, even though I had just created that row with a “Create” action in the previous step.
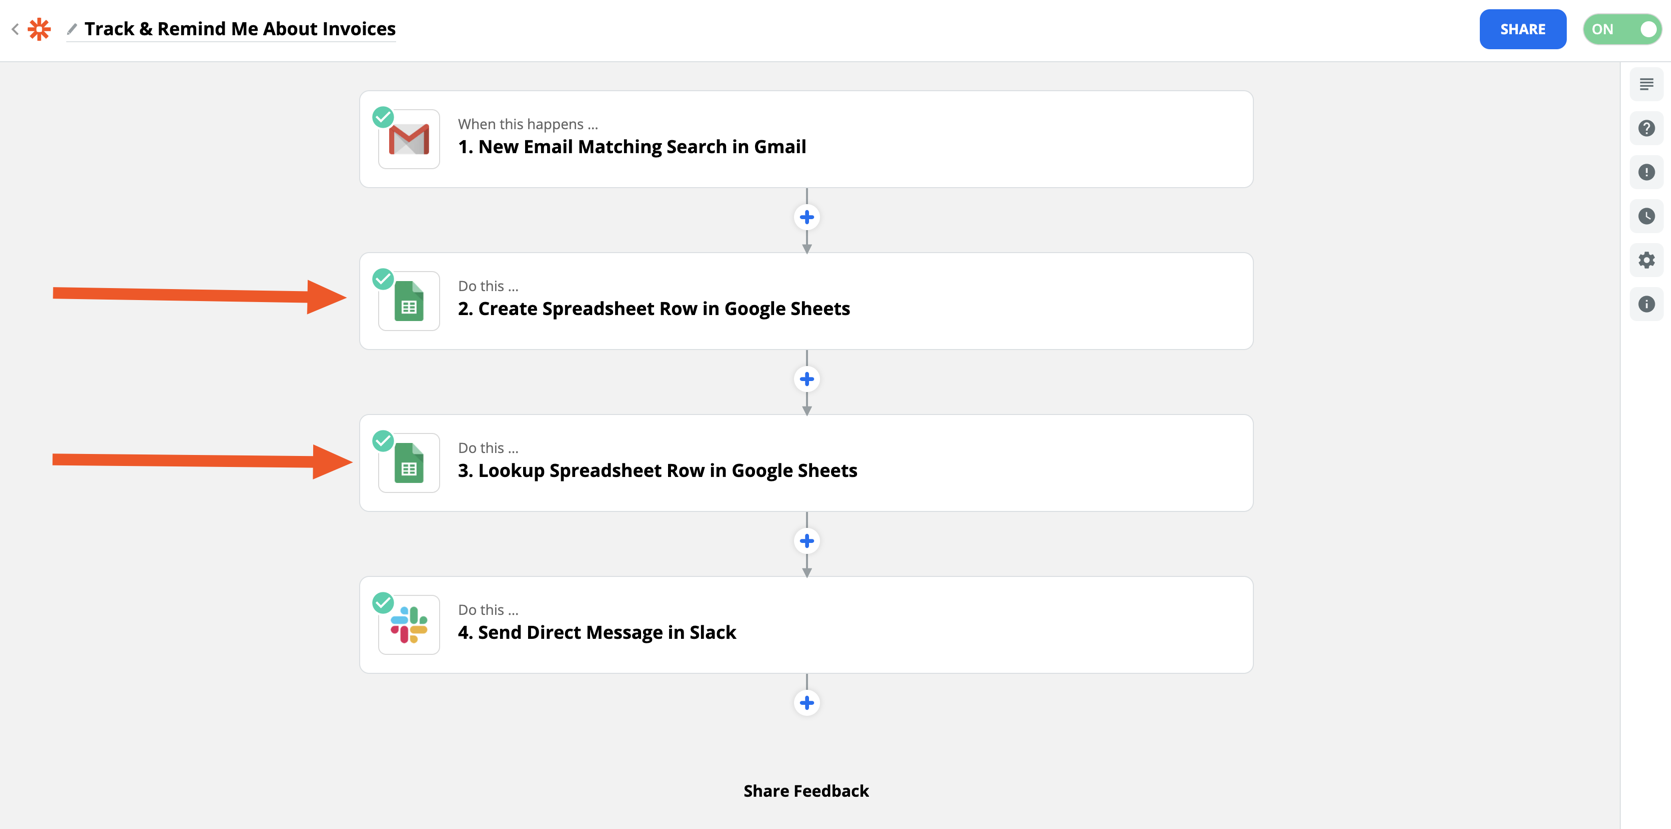
When a Zap sends information to another app, usually that app sends information back, and sometimes you can use that information to reduce the number of “Search” steps in your Zap.
There are two ways to see what an app sends back to the Zap:
If the Zap has already been set up and runs smoothly, open the Task History and check out the “Data Out” tab in each action.
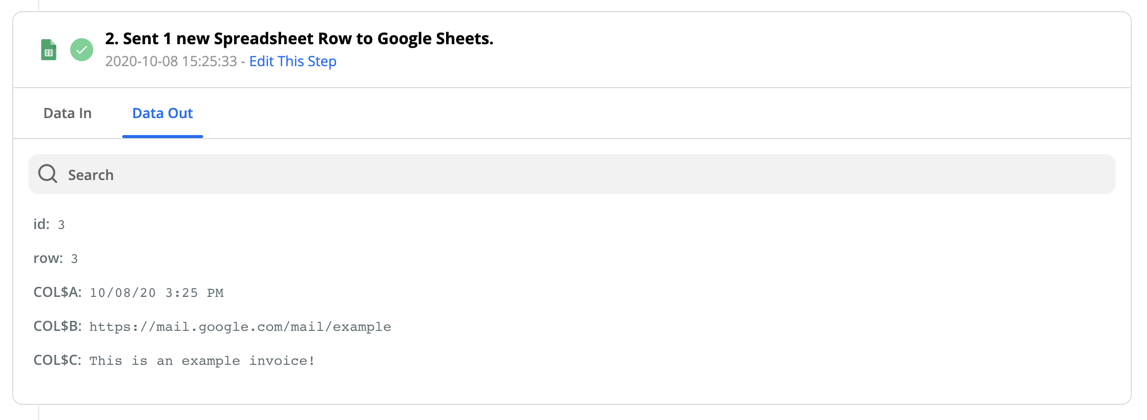
“Data Out” is all of the information that the Zap receives back from an app. For example, when an action sends a new row to Google Sheets, that app sends back information about that row, whether it was added successfully, and what it looks like now. Even though an action may sound like it’s only sending information one way, most actions receive just as much as (if not more than) they give.
If you’re still working on the Zap in the Zap Editor, head to the “Send Data” section of an action, where you can test it. Note that whenever you test an action Zapier will send the information to the action app, so make sure you review your sample data before you test it.
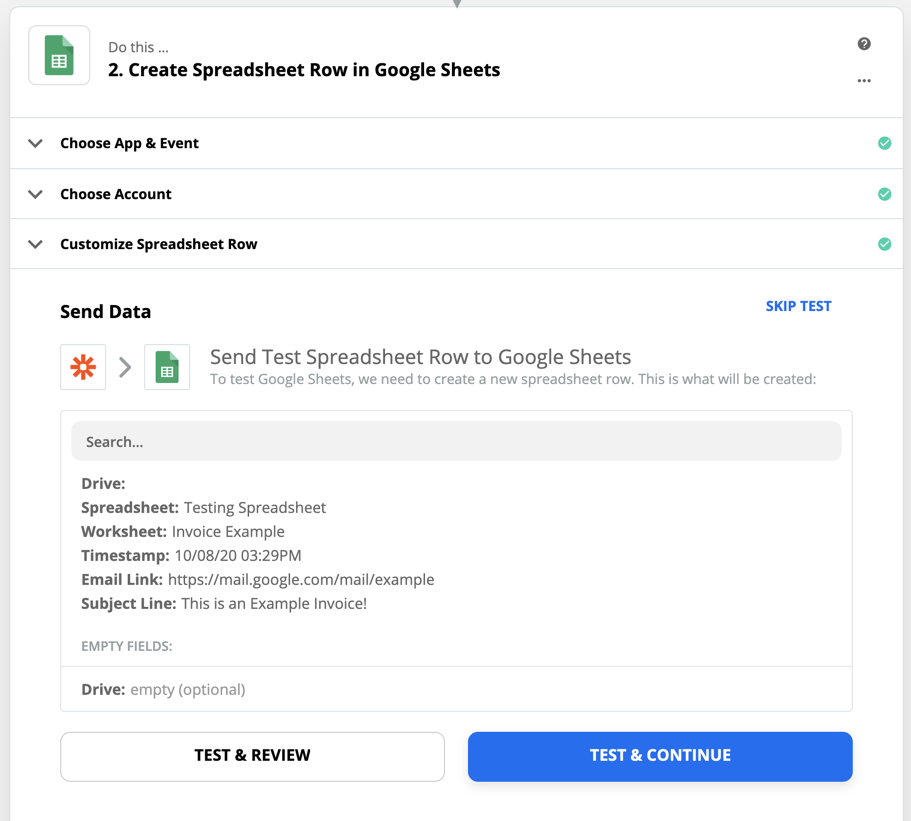
Click Test & Review to send the sample data you’ve added to the action, and the screen will update to show the app’s response. That helps you see exactly what information the action provides, so that you can determine whether or not an extra “Search” action is necessary.
Is your test not working as expected? You may need to test the Zap’s trigger again.
What if none of those things apply to me?
That’s great! That may mean that your Zap is already as efficient as possible. If you have a sneaking suspicion that a few tasks can be saved still, here are a few other tips:
- Are you using Paths? See if you need a Lookup Table instead.
- Try out Zapier Manager to turn your Zaps on/off automatically.
- Only need your Zap to run at certain times? Check out the Schedule by Zapier trigger.
- Use Storage by Zapier to keep track of how many times a Zap has triggered.
from The Zapier Blog https://ift.tt/34QHHpE
- Get link
- X
- Other Apps
Comments
Post a Comment