Blogging is an outstanding way to get your voice out and be heard. This is especially true for brands looking to boost awareness to an audience outside of their local reach. It can also be an opportunity to network with other individuals within your niche. For a recent post on my blog, Constantly Striving, I reached out and networked with quite a few amazing individuals in the blogging stratosphere for a roundup post with advice for those new to blogging.
Their responses turned into a post, 23+ Successful Bloggers Share their Best Advice, which saw an awesome amount of positive feedback, referral traffic, and shares!
However, the biggest problem I faced was sending out emails to every single person on my outreach list. The solution was automating my email prospecting and outreach.
What is a roundup post?
Now, before we get to our solution, let's understand the problem and why it was important to solve it.
I spend a lot of my time finding ways to help other bloggers find success through various tips and tricks. For this post, I wanted the tips to come from the industry experts' mouths. That's when the idea of a roundup post hit me. I would collect advice from the experts, and instead of sharing it piece by piece, I would create one massive guide that would benefit beginner bloggers who need it the most.
Roundup posts aren't only beneficial for those reading it—they also help the creator and participants by:
- Boosting brand awareness
- Bringing in referral traffic
- Creating valuable backlinking opportunities
- Establishing an authoritative voice for all involved
- Establishing trust between the creator and their readers since they aren't afraid to feature other experts
Automation eased our email prospecting and outreach
The first step was reaching out to experts to see who would be available to speak with me and provide some helpful advice. While I could have simply sent out individual messages to each industry expert and influencer on my list, that would take too much time.
Automation helped me find contact information for the experts I wanted to speak to, and to validate them, so I knew the messages I sent wouldn't bounce back. Automation also allowed me to send out bulk messages that were still personalized for each person I contacted.
Zapier is an online automation tool that allows users to connect their favorite apps and services to create streamlined workflows, called Zaps. Users can link two or more apps to automate recurring tasks—perfect for automating email prospecting and outreach.
You'll need a Zapier account to use the workflows in this piece. If you don't have an account yet, it's free to get started.
Here's how I put Zapier to work, inspired by my friends at Ahrefs, to help me reach out to each of my prospects in an easy, efficient manner.
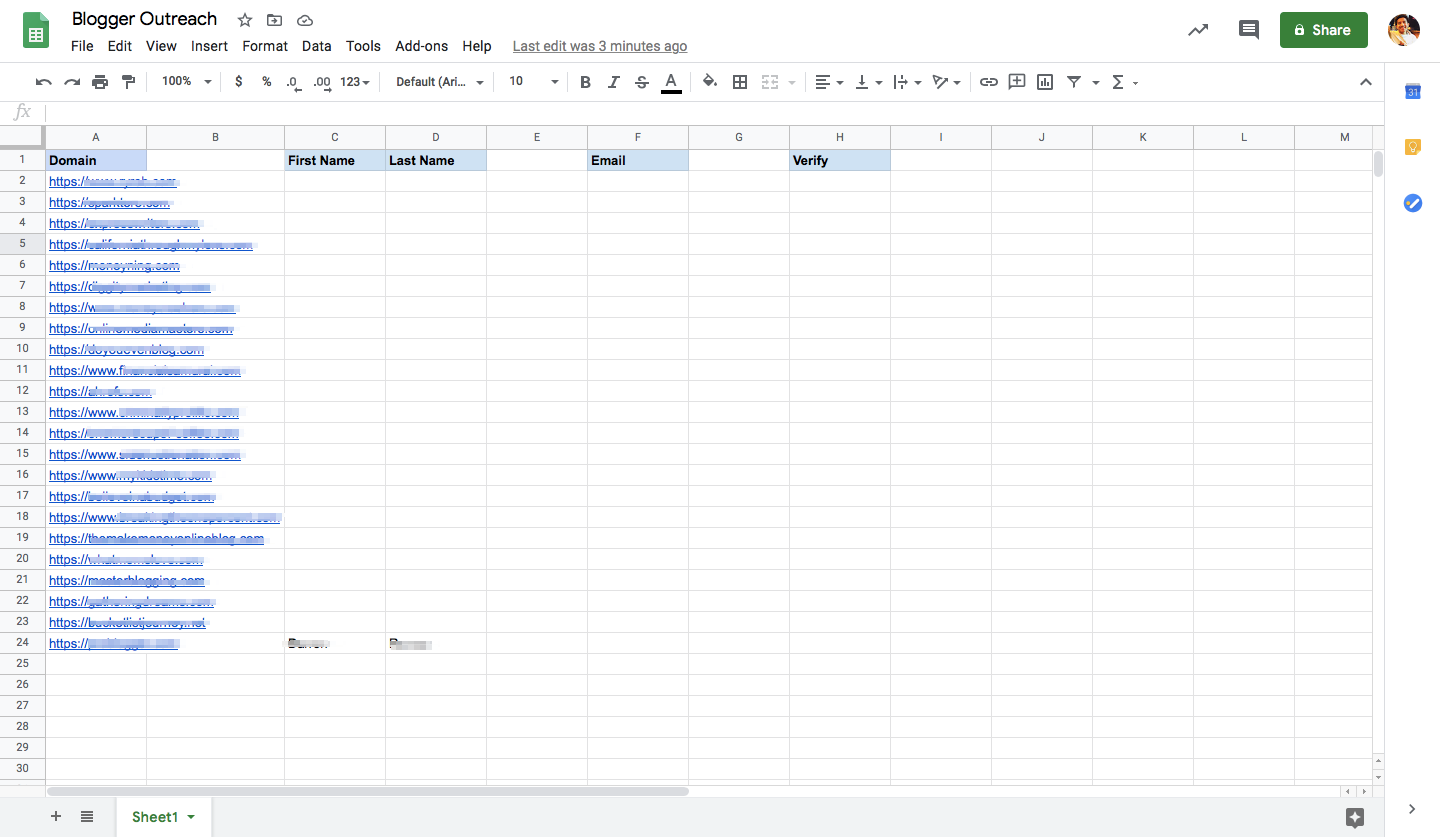
Create a new Google Sheet
I started the process by creating a new Google Sheet and labeling the columns according to information I know I'll need, including:
- The website domain of the professional I wanted to speak to (in this case, the owner of the blog/expert)
- Their first and last name
- Their email address
- A final column that would help me sort out verified emails from non-verified ones
Then I went ahead and filled in the “Domain” column with the website domains of all my potential prospects. Also, I made sure to include the first and last name of each person, as we will be using this information to test our workflow.
Important Note: Once we finish creating our entire Zapier workflow and turn on the Zap, we’ll enter the first and last names of all of our prospects in the appropriate columns. This will trigger the entire workflow to begin.
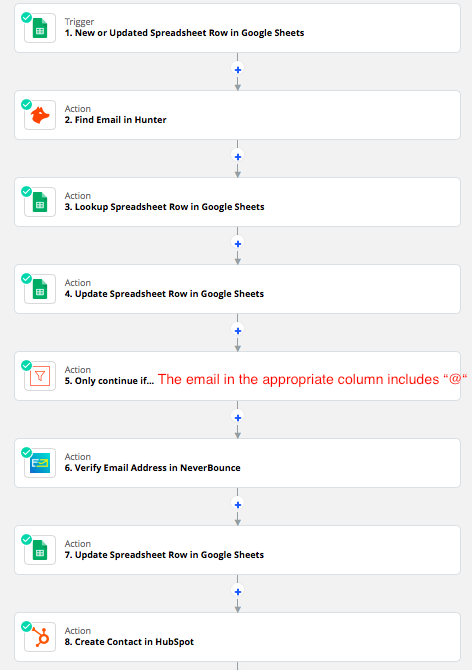
With this set up, it was time to begin building my Zap.
First, I selected a Google Sheets trigger for a new or updated spreadsheet row. Then I moved on to the next steps.
Use Hunter to find email addresses
As each new name is entered into the spreadsheet, it kicks off the next step in the Zap, which uses the email finder program, Hunter, to help locate the founder's email address. To do this, we use the name and the domain that is entered into the spreadsheet.
Note: Be sure to follow all applicable rules around cold emailing prospects and give people ways to opt out of continued communication.
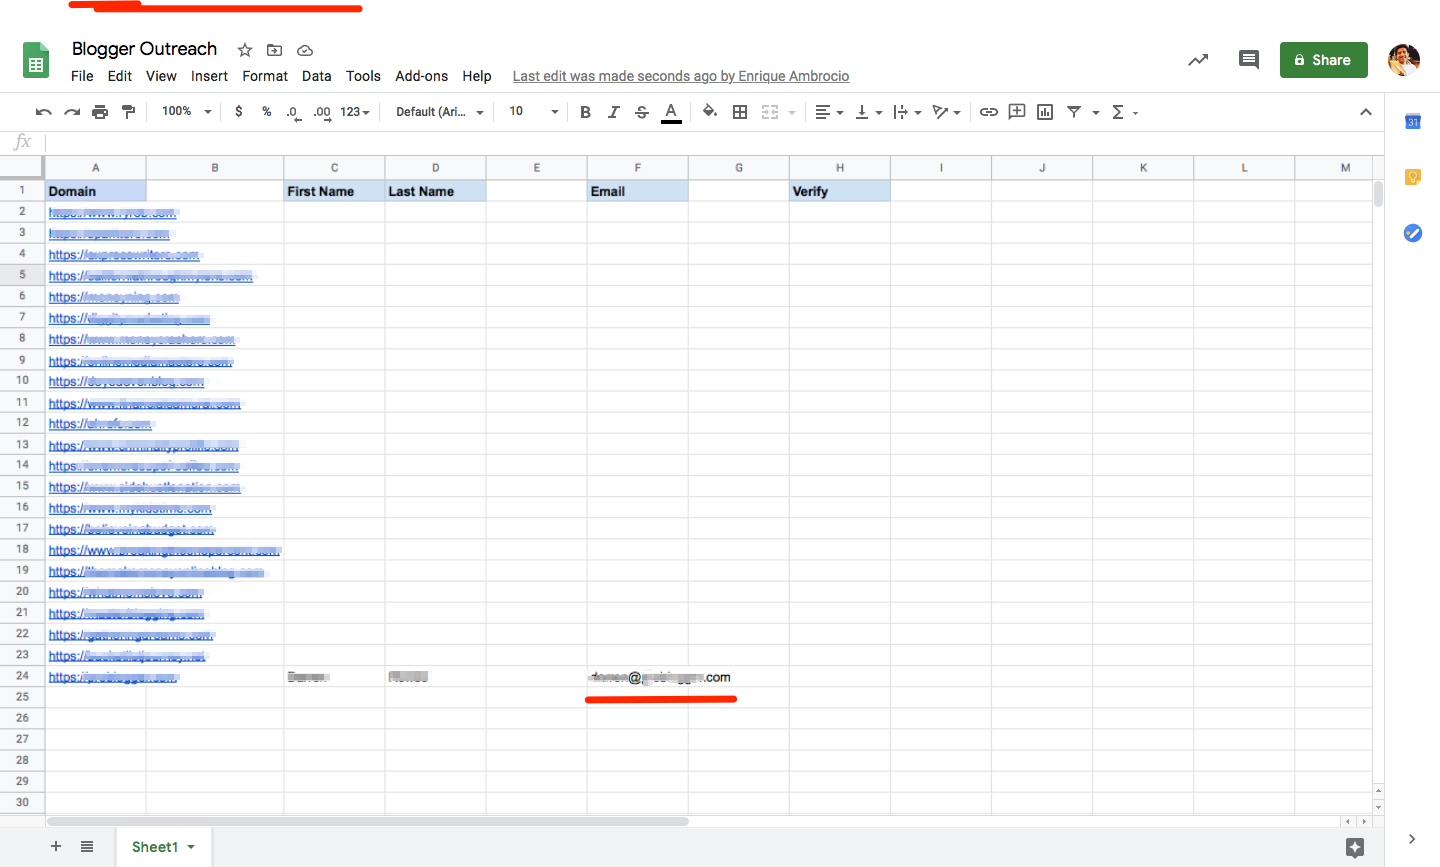
Update my Google Sheet
Once the email has been located and has triggered the next Zap, it will look up the founder's name in our spreadsheet and then update the spreadsheet to include the relevant email address in the correct column.
This is how my spreadsheet will change:
Once every name has been processed, we move on to a Filter step.
A filter step ensures only valid emails continue
To create a condition that must be met before the Zap continues, we're adding a filter so only some email addresses are passed through to the next steps. In this case, we're stating only emails that include the @ sign are allowed, verifying the emails as valid.
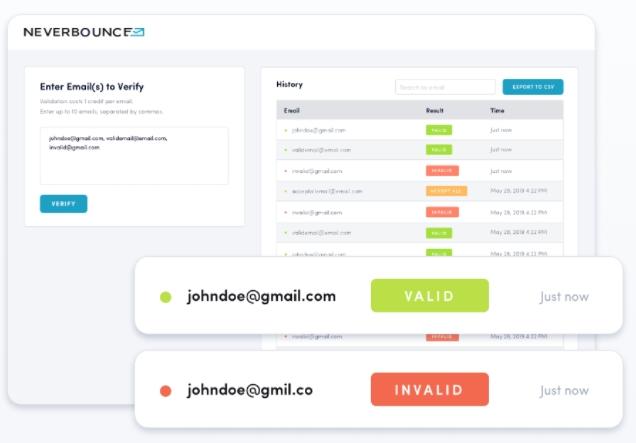
Verify emails with NeverBounce
Once the emails have been entered, all the emails that follow the condition we set above will be sent to the NeverBounce app, which allows us to check for and verify that each email address is legitimate.
Update our Google Sheet
Once emails have gone through the validation process, their verification status is updated in our spreadsheet's "Verify" column.
Emails that have been verified appear on our spreadsheet as either "valid" or "catchall."
Valid emails are email addresses that go "somewhere," as in, they are linked to an account. However, that doesn't mean they are going where you really want them to. Catchall emails are often [emails owned by businesses](https://ift.tt/38SA6ti] that want to ensure they are receiving emails intended for them.
Create contacts in HubSpot for verified email addresses
Now, before we transfer all of this data over to our email service provider, we set one more condition in our workflow that filters out all potentially invalid emails. In our case, we set this step to only pass emails with valid and catchall addresses to our email service provider.
With contacts in HubSpot, we'll be able to design, optimize and send emails to everyone on our list.
Our results
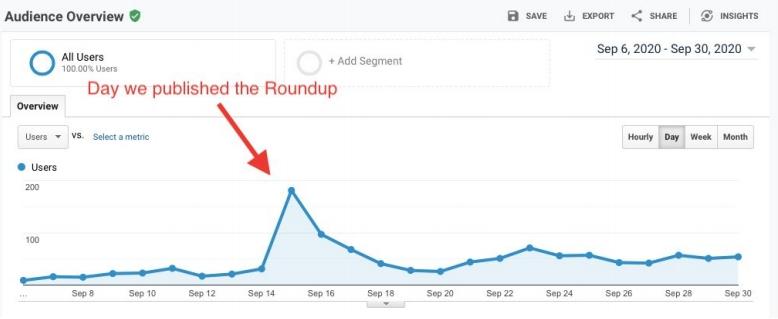
For my roundup, I was able to get 23 experts in blogging to provide advice to share with my audience of new bloggers. I was able to share their wisdom in the post and in our social media channels. Even better, several of the experts we included in the blog shared the piece with their own followers.
Automating this process turned what felt like a very daunting task into a manageable project that led to a successful piece on my site.
Because these experts shared our blog with their followers, this helped us reach a larger audience than we had initially expected.
The idea of automating email prospecting and outreach may seem like a complicated one if you've never done it before. However, once you've taken the time to familiarize yourself with an automation tool such as Zapier, you'll find that the intimidation factor completely disappears.
Once you get the hang of setting up your workflows, you'll never look back!
from The Zapier Blog https://ift.tt/2UDh81c


Comments
Post a Comment