Job hunting? Streamline your job sources in an RSS feed with Zapier
- Get link
- X
- Other Apps
Job searching is terrible. You sign up for job alerts with different companies you admire, as well as a ton of email newsletters in the hopes that a perfect job will fall into your inbox. And then, you scour LinkedIn, Twitter, Slack communities, and other job boards—while obsessively refreshing your email inbox for new jobs and recruiter emails.
I've been there. This was my routine for eight months after I was laid off from a previous job. While I was pretty strategic in my job search despite my circumstances, looking back, I could've made my job search easier.
I could've combined all of my job sources into a single RSS feed so I only had to check one place for new listings. Lesson learned.
If you're currently looking for a new job—whether you were laid off or just need to look for something better—this tutorial is for you. I'm going to show you how you can use Zapier to combine your favorite job sources into one RSS feed.
Zapier is a tool that helps you automate tasks between web apps. Our automatic workflows—which we call Zaps—send information from one app to another so you can stop worrying about copying and pasting and focus on more meaningful work. Check out this Zapier demo to learn more about how it works.
Why an RSS feed?
When I worked as a journalist, my coworkers were impressed with my ability to stay on top of the latest developments. My secret: RSS feeds.
RSS feeds are the unsung heroes of productivity, in my opinion. RSS (or Really Simple Syndication) feeds are online files that contain details about every piece of content a website publishes. When you use an RSS reader app, you can catch up on any of your favorite news sites or blogs that have an RSS feed.
We'll be using RSS by Zapier to create a personalized RSS feed.
Learn more about how to use RSS feeds.
Before you begin
You need some sort of RSS reader app, which will help you organize RSS feeds from your favorite sites in one place. I'll be using Feedly in this tutorial, but you can use whatever app you'd like.
Set up your RSS reader app so you have at least one section for job-related feeds. Most RSS reader apps allow you to organize your feeds by topic. Once this is set up, open your RSS app and have it ready on standby. You'll need it in later steps.
Not sure which RSS reader app to use? Here's our round-up of the best free RSS reader apps.
You'll also need to set up a free Zapier account if you haven't already.
Because we'll be combining various sources into an RSS feed, there will be different instructions depending on where the job listing is coming from. Jump to the section that's most applicable to your situation:
Job newsletters and emails
If you're searching for a job right now, I bet you're checking your email obsessively. After a while, it can get exhausting. Unfortunately, some company job boards will only send you alerts for new jobs by email. Or perhaps you're subscribed to a newsletter that rounds up the latest job postings in your industry.
Some companies have RSS feeds for job listings—such as Zapier—but many default to email digests. We'll cover how to automatically add them to an RSS feed, so the only emails you need to worry about are from recruiters.
Here's how to set it up:
- If you don't already use an RSS reading app, sign up for one.
- Click the Use this Zap button below to use our template (and create a Zapier account if you haven't already).
- Connect Gmail and customize your search criteria.
- Create and customize your RSS feed.
- Test your Zap.
- Add your email RSS feed to your reader app.
- Turn on your Zap.
We'll be using this Zap template—a pre-made automated workflow—for this section:
Connect Gmail and customize your search criteria
Click the Use this Zap button above to get started. You'll be directed to the Zap editor, where you'll be prompted to select your Gmail account. If you've connected Gmail to Zapier before, select your account from the dropdown menu.
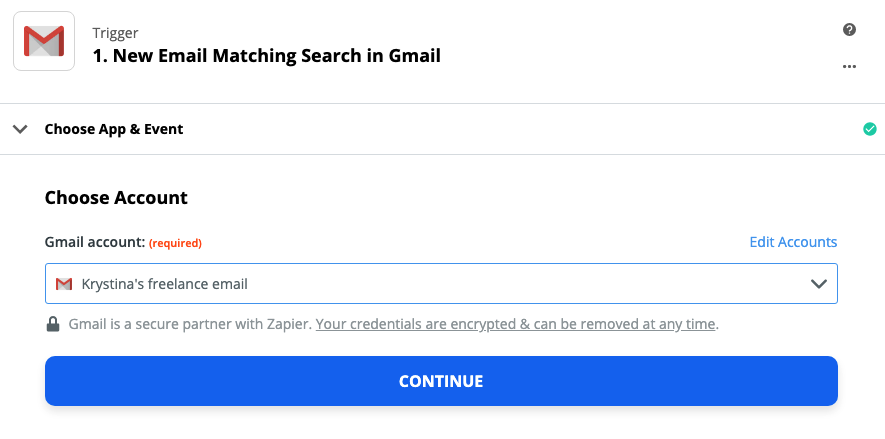
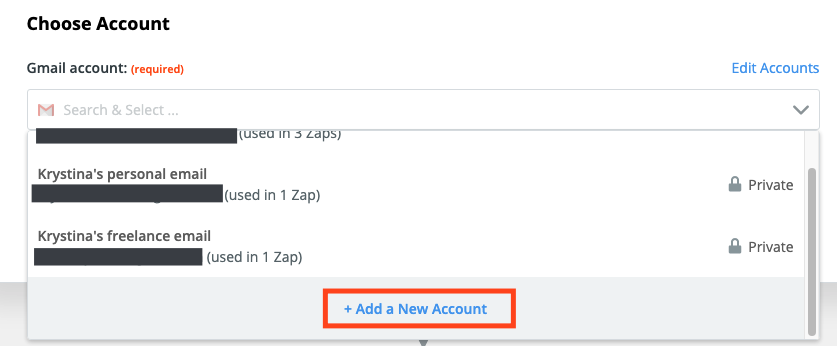
If this is your first time, click on the dropdown menu and click + Add a New Account. You'll sign in to your Google account and give Zapier permission to access your Gmail.
Once you've connected your account, click Continue.
For each app you connect, Zapier will ask for a general set of permissions which allows you to be flexible with your Zaps. The only actions Zapier takes on your app accounts are those a given Zap needs to accomplish what you've set up.
Next, type in the criteria under Search String you'd like Zapier to use when a new email comes in. For example, if you only want your Zap to trigger when you receive a new email from a specific person, you'll type in the person's name or email. The same search operators you'd normally use in Gmail work here. By default, Zapier will trigger on emails in all folders. To limit results to your inbox, include the in:inbox search operator.
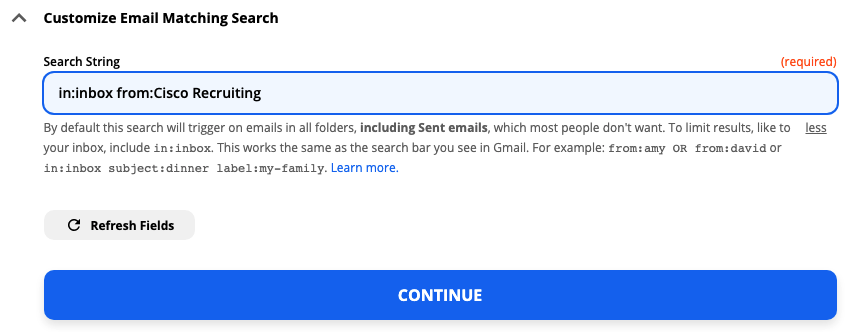
Click Continue when you're done.
Now we'll test our trigger. Zapier will find the most recent tweet, according to the Gmail search criteria we set in the previous step. Zapier will use this test information in later steps to create the rest of our Zap. Click Test trigger.
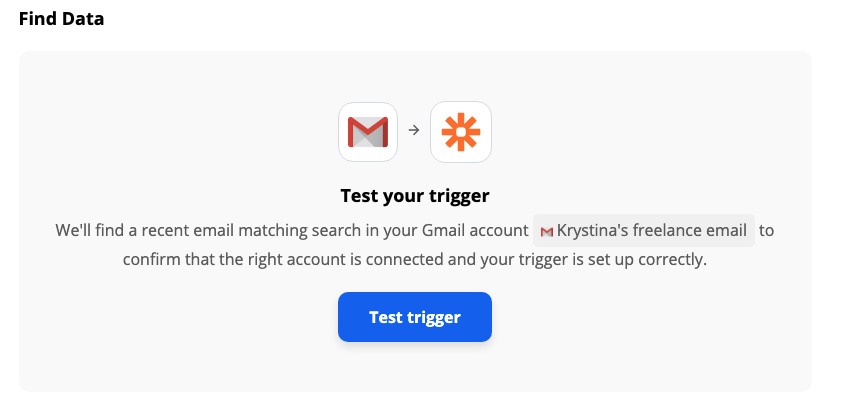
Review the test information. If Zapier isn't pulling the right emails or can't find an existing email that meets your search parameters, go back to the previous step, double-check your search operators, and retest.
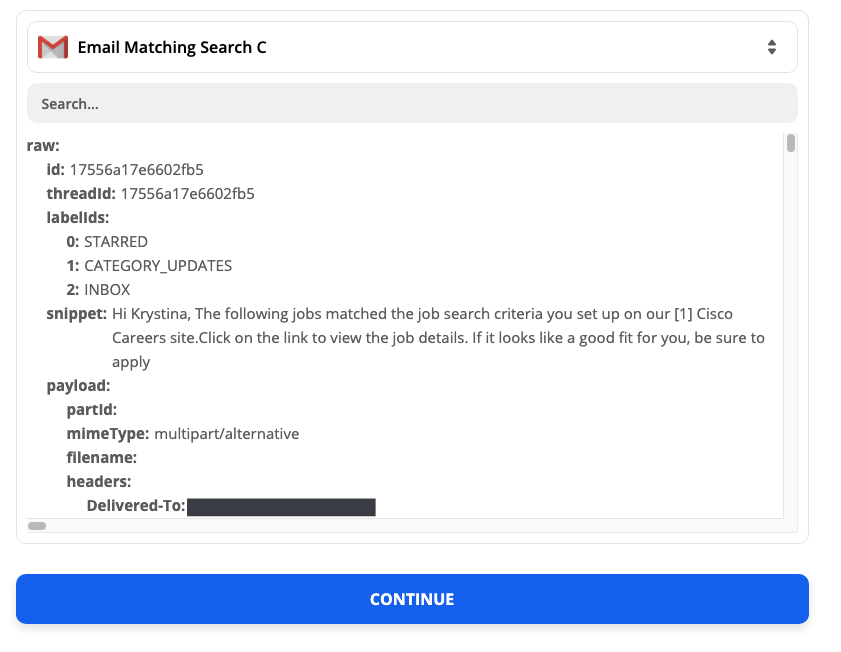
If your test information looks correct, click Continue.
Create and customize your RSS feed
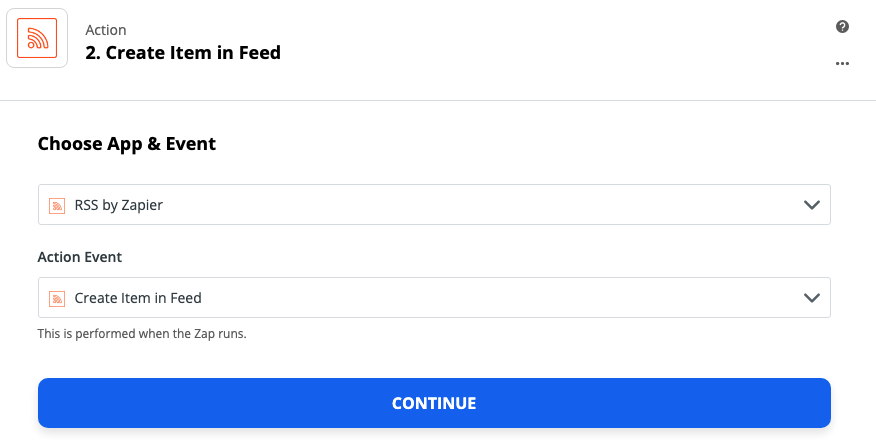
The Zap template will pre-select the action app and event—the thing your Zap will perform once it's triggered. Click Continue.
Now we'll customize our feed URL and title. Under Feed URL, type in a short slug. Use an easy descriptor to remind yourself what this feed is all about.

We'll need this URL in a later step, so open up any text editor—it can be Google Docs, TextEdit, Microsoft Word, or whatever you'd like. Click Copy next to your feed URL.

The URL will be copied to your clipboard. Now, paste it in your text editor.

We'll come back to this link later. Toggle back to the Zap editor. Under Feed Title, give your feed a name. You can call it whatever you'd like.
If you're using the Zap template, it will automatically fill the Item Title, Source URL, and Content fields.
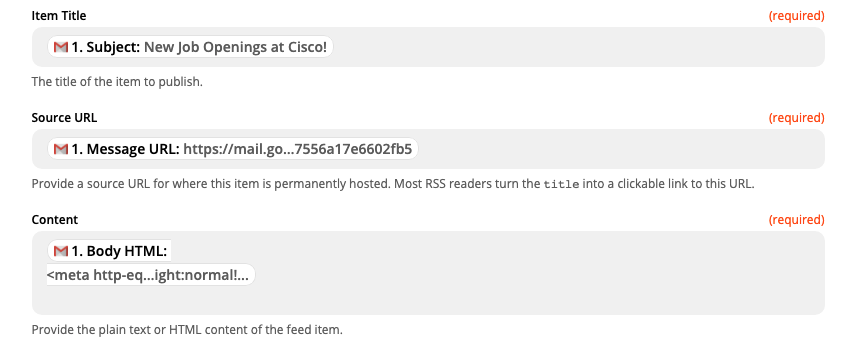
The Item Title will appear as the article headline in your RSS reader. The Source URL is the clickable link or button your RSS reader will direct you to read the rest of the content. The Content field will already have the email body selected in HTML format.
If you'd like to add or change any of this information, feel free to do so. Just click on the field and delete what you don't want. You can type in text, which will appear the same every time your Zap runs. If you'd like the information to vary depending on the content of the email, select a Gmail field from the dropdown menu.
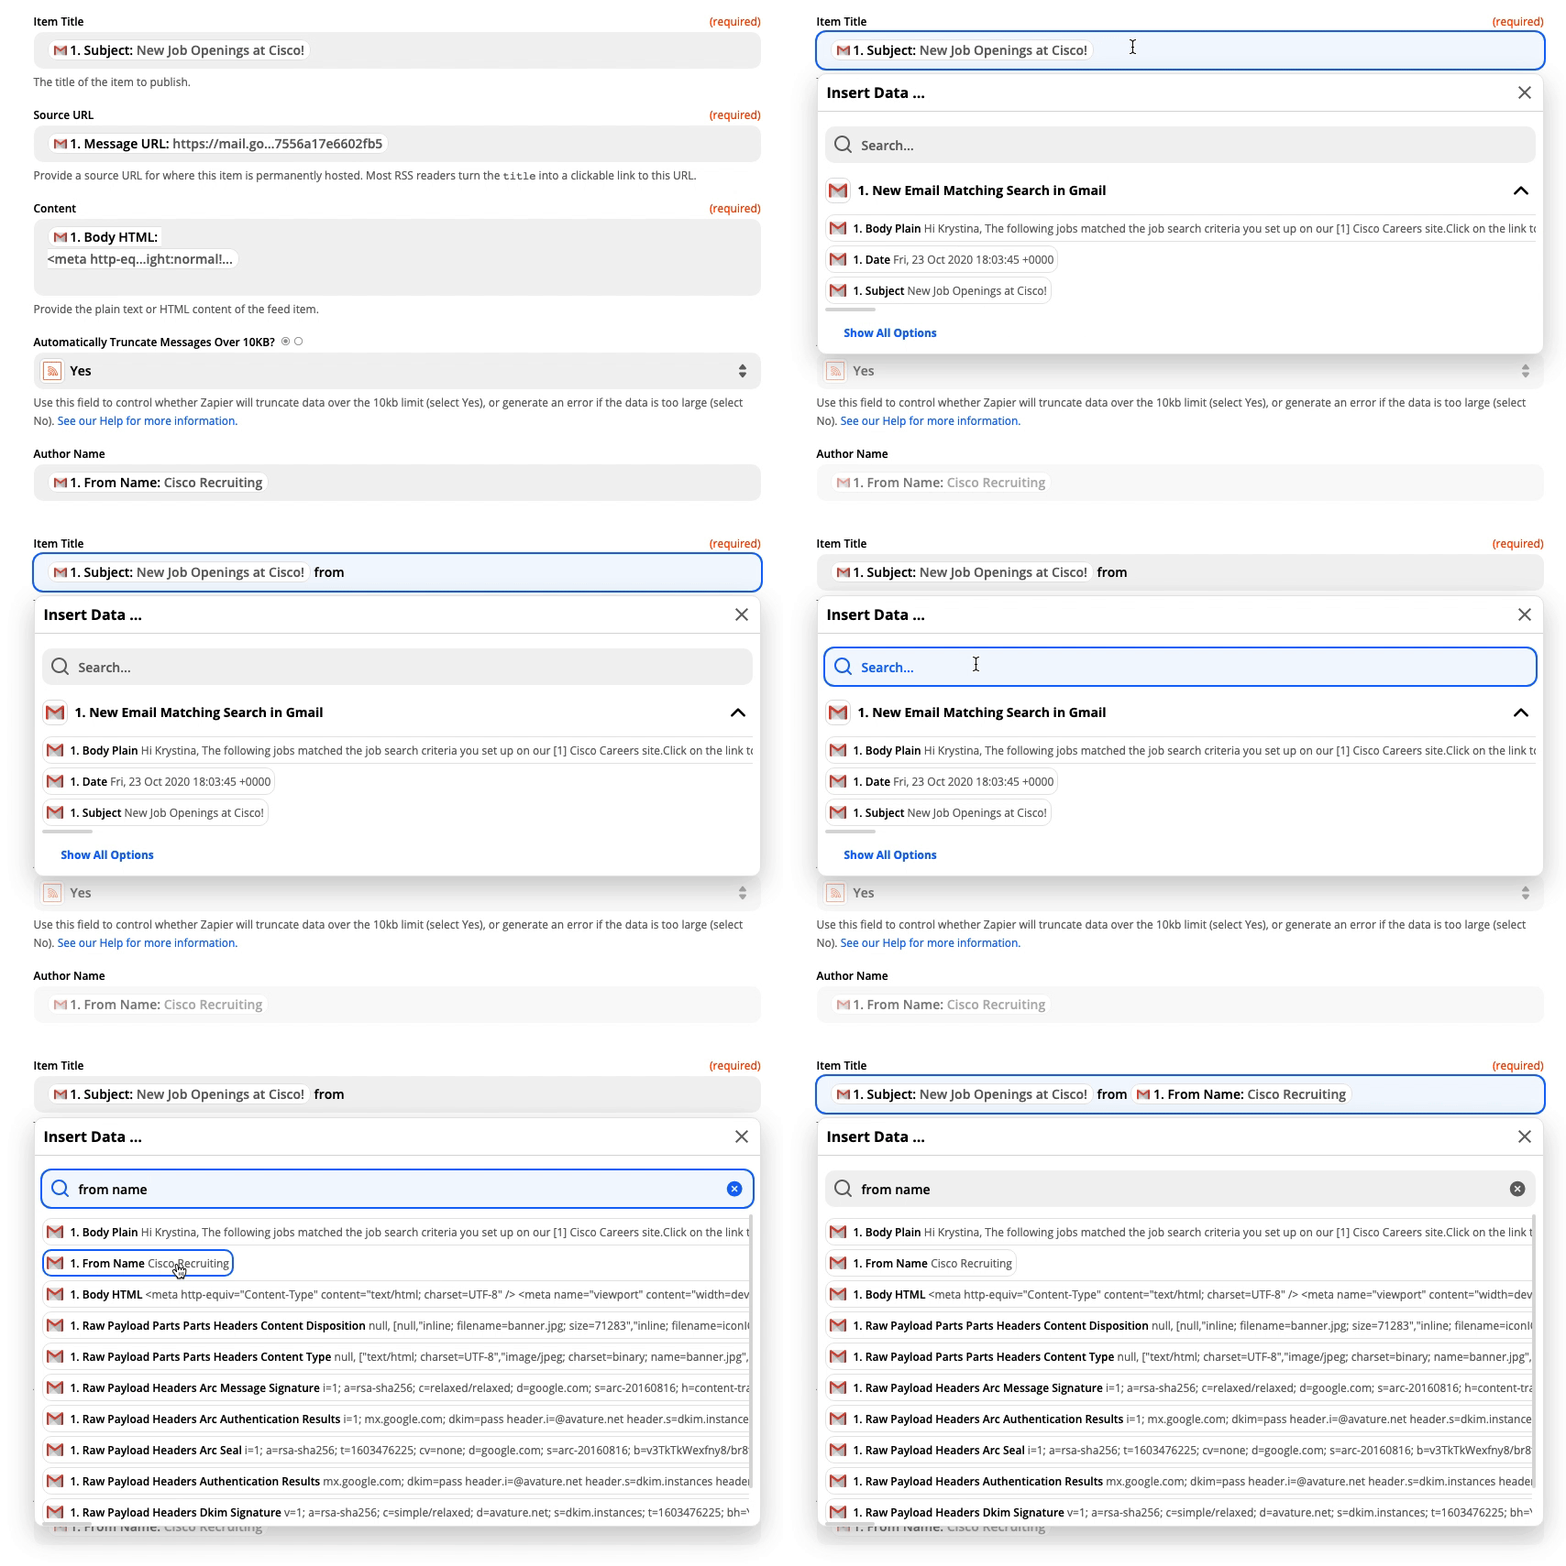
In this example, I want to change the Content field to show my email content in plain format. I deleted the default and selected the Body Plain option from the dropdown menu.
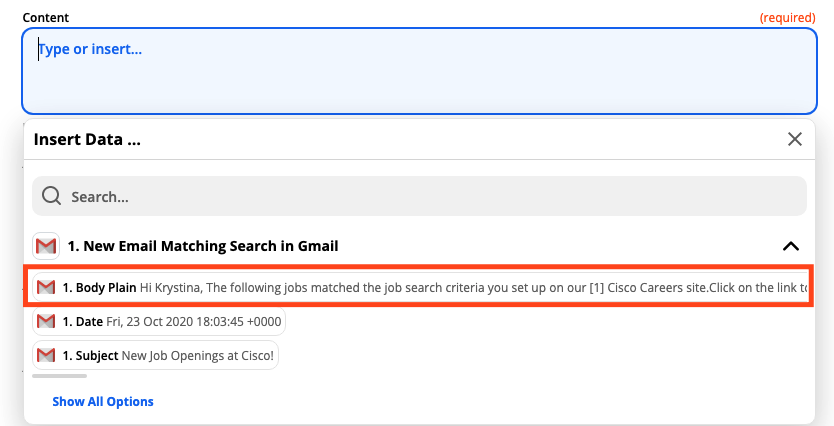
When you map a piece of data—such as a contact name—what you see in the editor is a placeholder. This placeholder data will only be used by our Zap when we test it. Once the Zap is turned on, real data from Gmail (or any app you select) will be used when your Zap runs.
Learn more about field mapping in our Zapier quick-start guide.
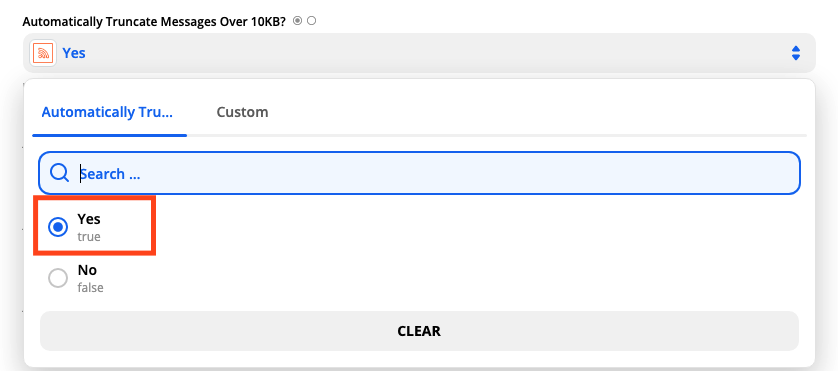
Under Automatically Truncate Messages Over 10KB?, click on the dropdown menu and select Yes. This ensures we don't hit an error if we have a particularly lengthy email.
The template will pre-fill the Author Name and Author Email fields. Under the Pubdate field, you can type in "now." Once you've customized your RSS feed item to your liking, click Continue.
Test your Zap
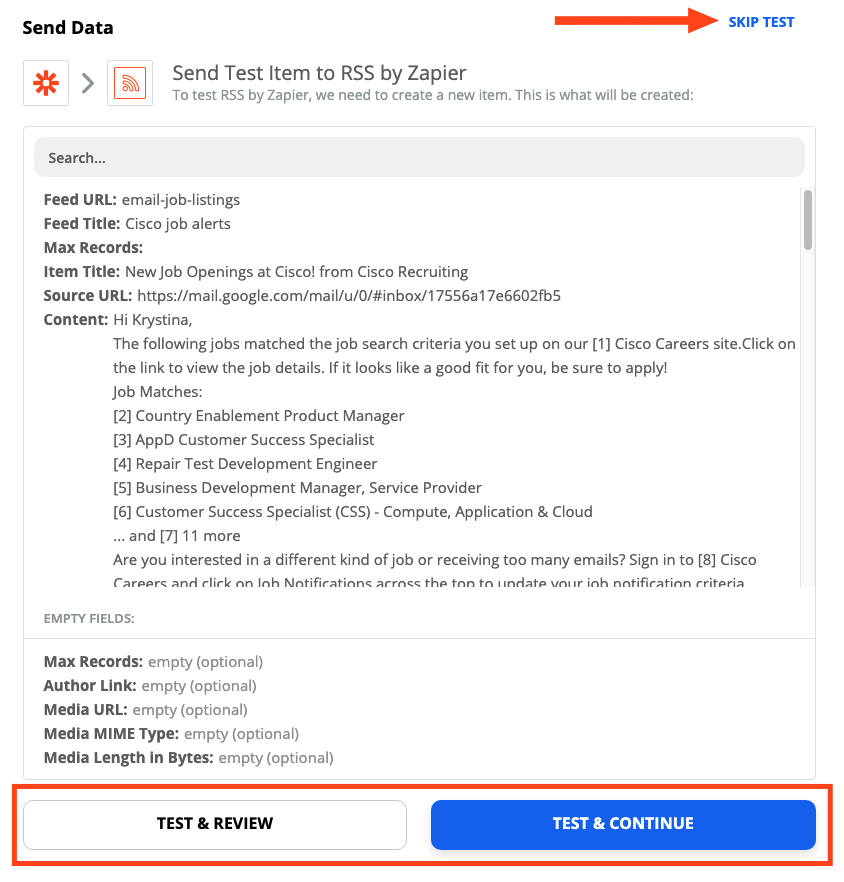
Now, let's test our Zap to make sure it's working. Zapier will add a new email that meets our search criteria to our newly-created RSS feed.
You can skip this test if you'd like by clicking Skip Test located at the top-right corner. However, if you want to make sure specific information is showing up correctly, or it's your first time using an RSS reader, you should test it.
Click any of the test buttons to continue.
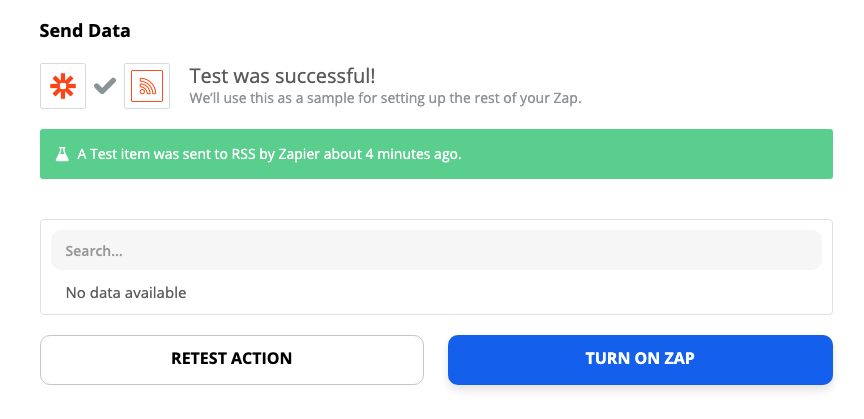
You'll be greeted with this message if the test worked.
Let's check our RSS reader to see how it looks.
Add your feed URL to your RSS reader app
We'll need to add our RSS feed URL to our reader app. Earlier, you copied your email job listings feed URL into a text editor. Toggle to that window and select and copy that link.

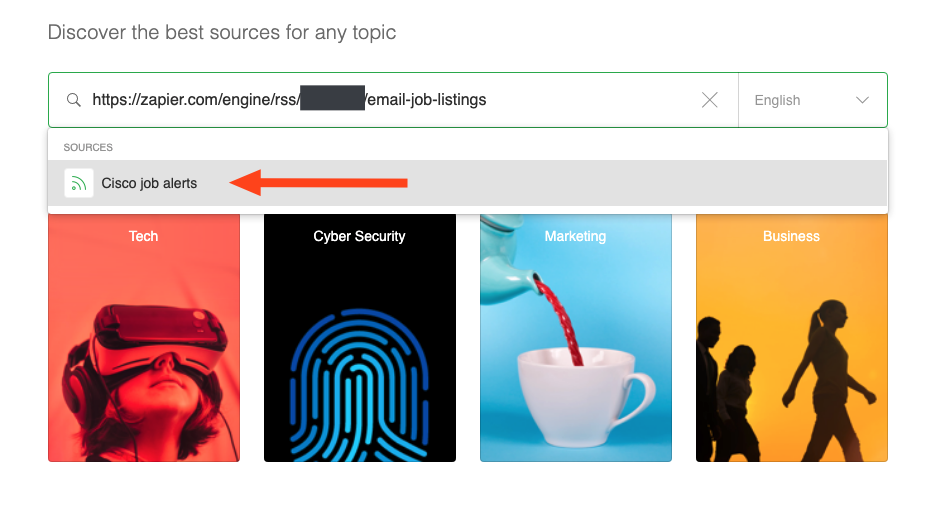
Open your RSS reader app. Each app will have a different method of adding new RSS feeds. Add your feed link, according to your app's instructions, to your job search folder or section. Here's how it looks in Feedly:
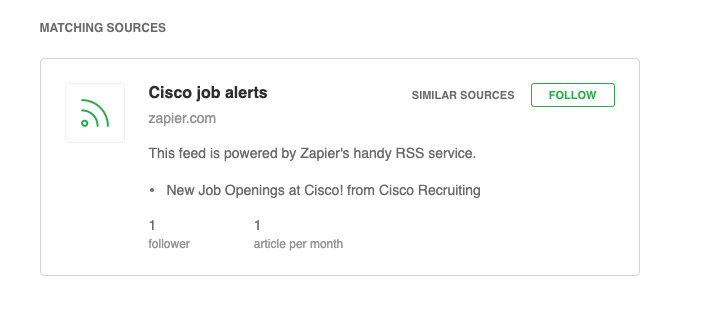
And here's how our entry looks in our jobs feed.

Click through to the article and make sure everything is working how you want it. If something doesn't look right, you can go back to the Zap editor and make adjustments to the previous steps.
Once you're happy with everything, don't forget to turn on your Zap! Toggle to the Zap editor and click Turn on Zap…
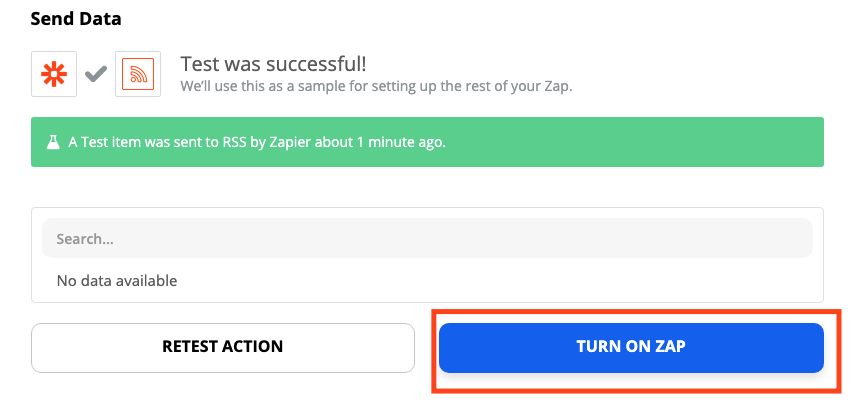
…or the slider located at the bottom of the editor.

Twitter searches
Depending on your industry, there may be a popular hashtag people use to publicize new jobs or a Twitter account that aggregates job postings from your field. Twitter can be a mess, so adding the most relevant Twitter content to an RSS feed will save you time and sanity.
Here's how to set it up:
- If you don't already use an RSS reading app, sign up for one and have it open in another window.
- Click the Use this Zap button below to use our template (and create a Zapier account if you haven't already).
- Connect Twitter and customize your search criteria.
- Create and customize your RSS feed.
- Test your Zap.
- Add your feed URL to your RSS reader app.
- Turn on your Zap!
We'll be using this Zap template for this tutorial:
Connect Twitter and customize your search criteria
Click the Use this Zap button above to get started. The template will take you to the Zap editor to begin creating your Zap.
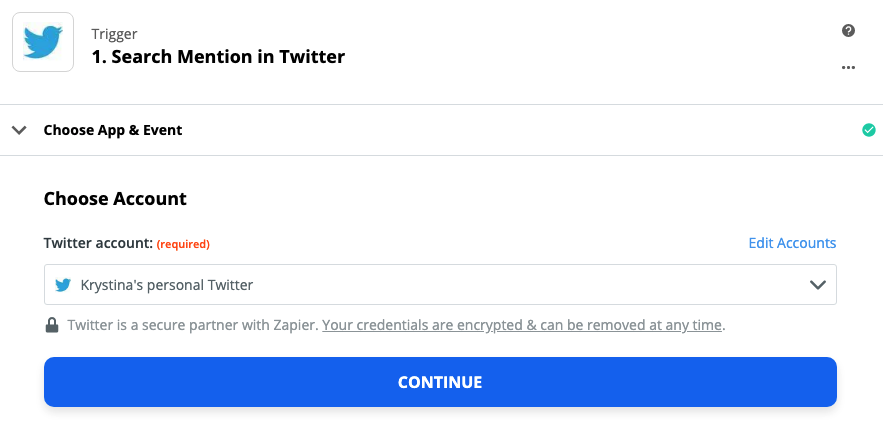
You'll be prompted to select your Twitter account. If you've connected Twitter to Zapier before, click on the dropdown menu to select your account. Otherwise, click +Add a New Account to give Zapier permission to access Twitter. Once you've selected your account, click Continue.
For each app you connect, Zapier will ask for a general set of permissions which allows you to be flexible with your Zaps. The only actions Zapier takes on your app accounts are those a given Zap needs to accomplish what you've set up.
Next, we'll customize our Twitter search so tweets that meet specific search criteria trigger—or start—our Zap. In this example, I've typed in the name of a Twitter account I'd like to get tweets from, but you can use more complex search operators as well. The limit is 10 keywords and operators.
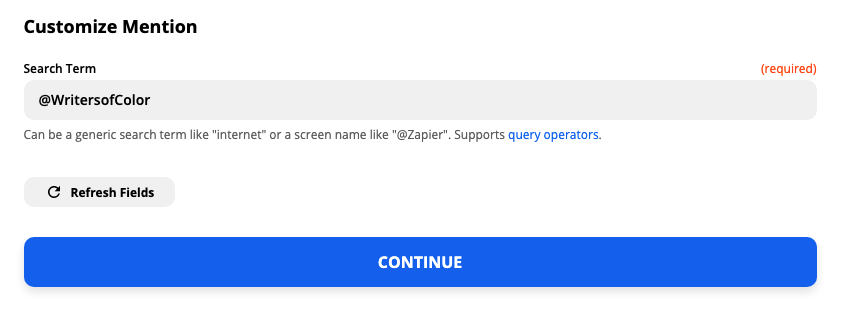
Note: The search will only return tweets from public accounts published in the past 7 days.
Once you've typed in your search criteria, click Continue.
Now we'll test our trigger. Zapier will find the most recent tweet, according to the Twitter search criteria we set in the previous step. Zapier will use this test information in later steps to create the rest of our Zap. Click Test trigger.
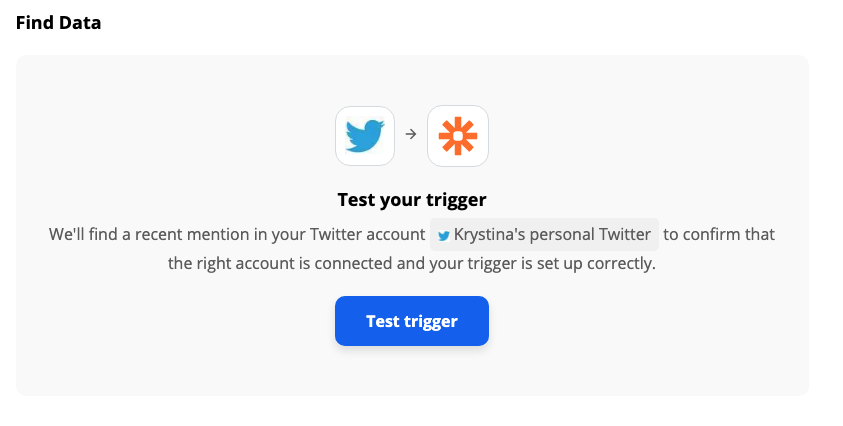
If Zapier isn't pulling the right tweets, go back to the previous step and double-check that your search operators are correct. If your test information looks correct, click Continue.
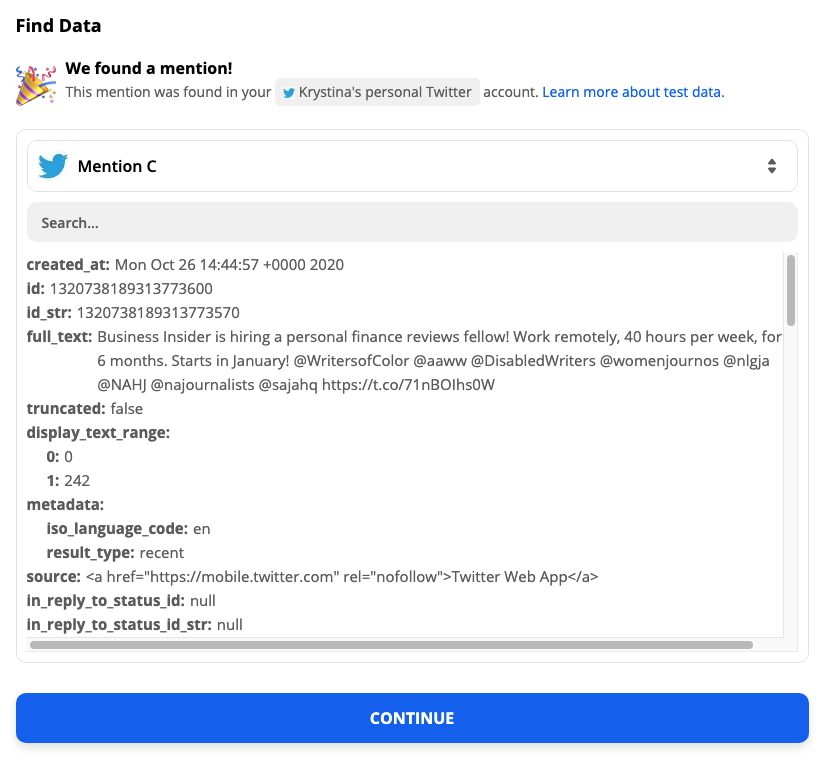
You can add a filter step—available under our paid plans—if you only want your Zap to run under certain conditions. For example, if you don't want retweets to trigger your Zap. Read more about how to set up a filter step.
Create and customize your RSS feed
The template will already pre-select the action app and event for you, so click Continue.
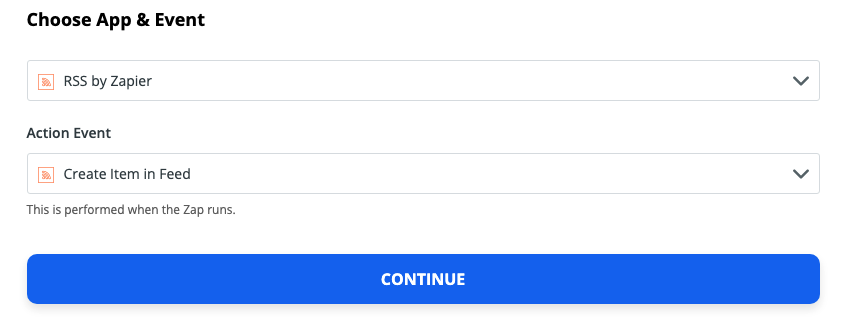
Next, we'll customize our feed URL and title. Under Feed URL, type in a short slug. Acceptable characters are letters, numbers, and hyphens. I recommend using an easy descriptor that will remind you what's in this feed.
We're going to use this URL in a later step, so open up any text editor—it can be Google Docs, TextEdit, Microsoft Word, or whatever you'd like. Now, click Copy next to your feed URL.

This will automatically copy the URL to your clipboard. Now, paste it into your text editor.

We'll come back to this later.
Toggle back to the Zap editor, where we'll customize what our tweets will look like in our RSS feed. Under Feed Title, type in what you'd like to call your feed.

Under the Item Title field, the Zap template will automatically pre-fill with the Twitter username. In your RSS reader app, this will show up as an article headline. You can always change this if you'd like.
To do so, click on Type or insert… and delete the pre-selected Twitter field. You can type in text, which will appear the same every time your Zap runs.
If you'd like the information to vary depending on the content of the Tweet, select a field from the dropdown menu. (Click Show All Options if you'd like more fields to choose from.) The options available in the dropdown menu is information Zapier pulled in when we tested our Twitter search earlier.
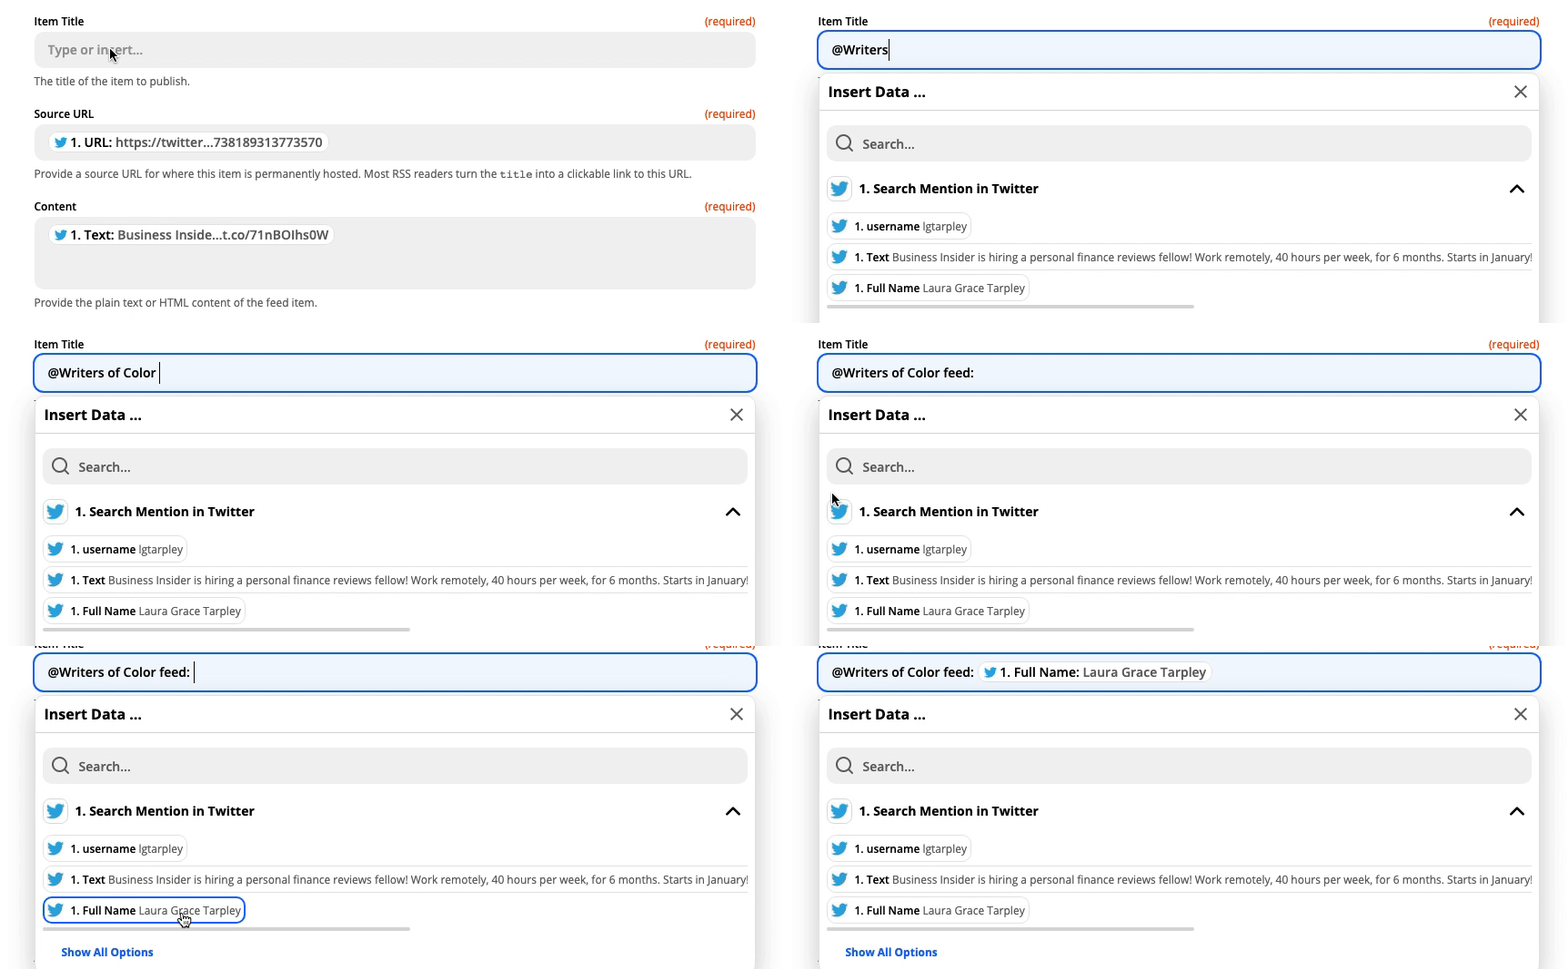
Learn more about field mapping in our Zapier quick-start guide.
Under the Source URL field, the Zap template pre-fills this with the Twitter user's URL. In your RSS reader app, this will appear as a "read more" link or button. If you'd rather link to the specific tweet, click on Type or insert… and delete the existing field. In the dropdown menu, click on Show All Options, scroll down until you see URL, and click on it.
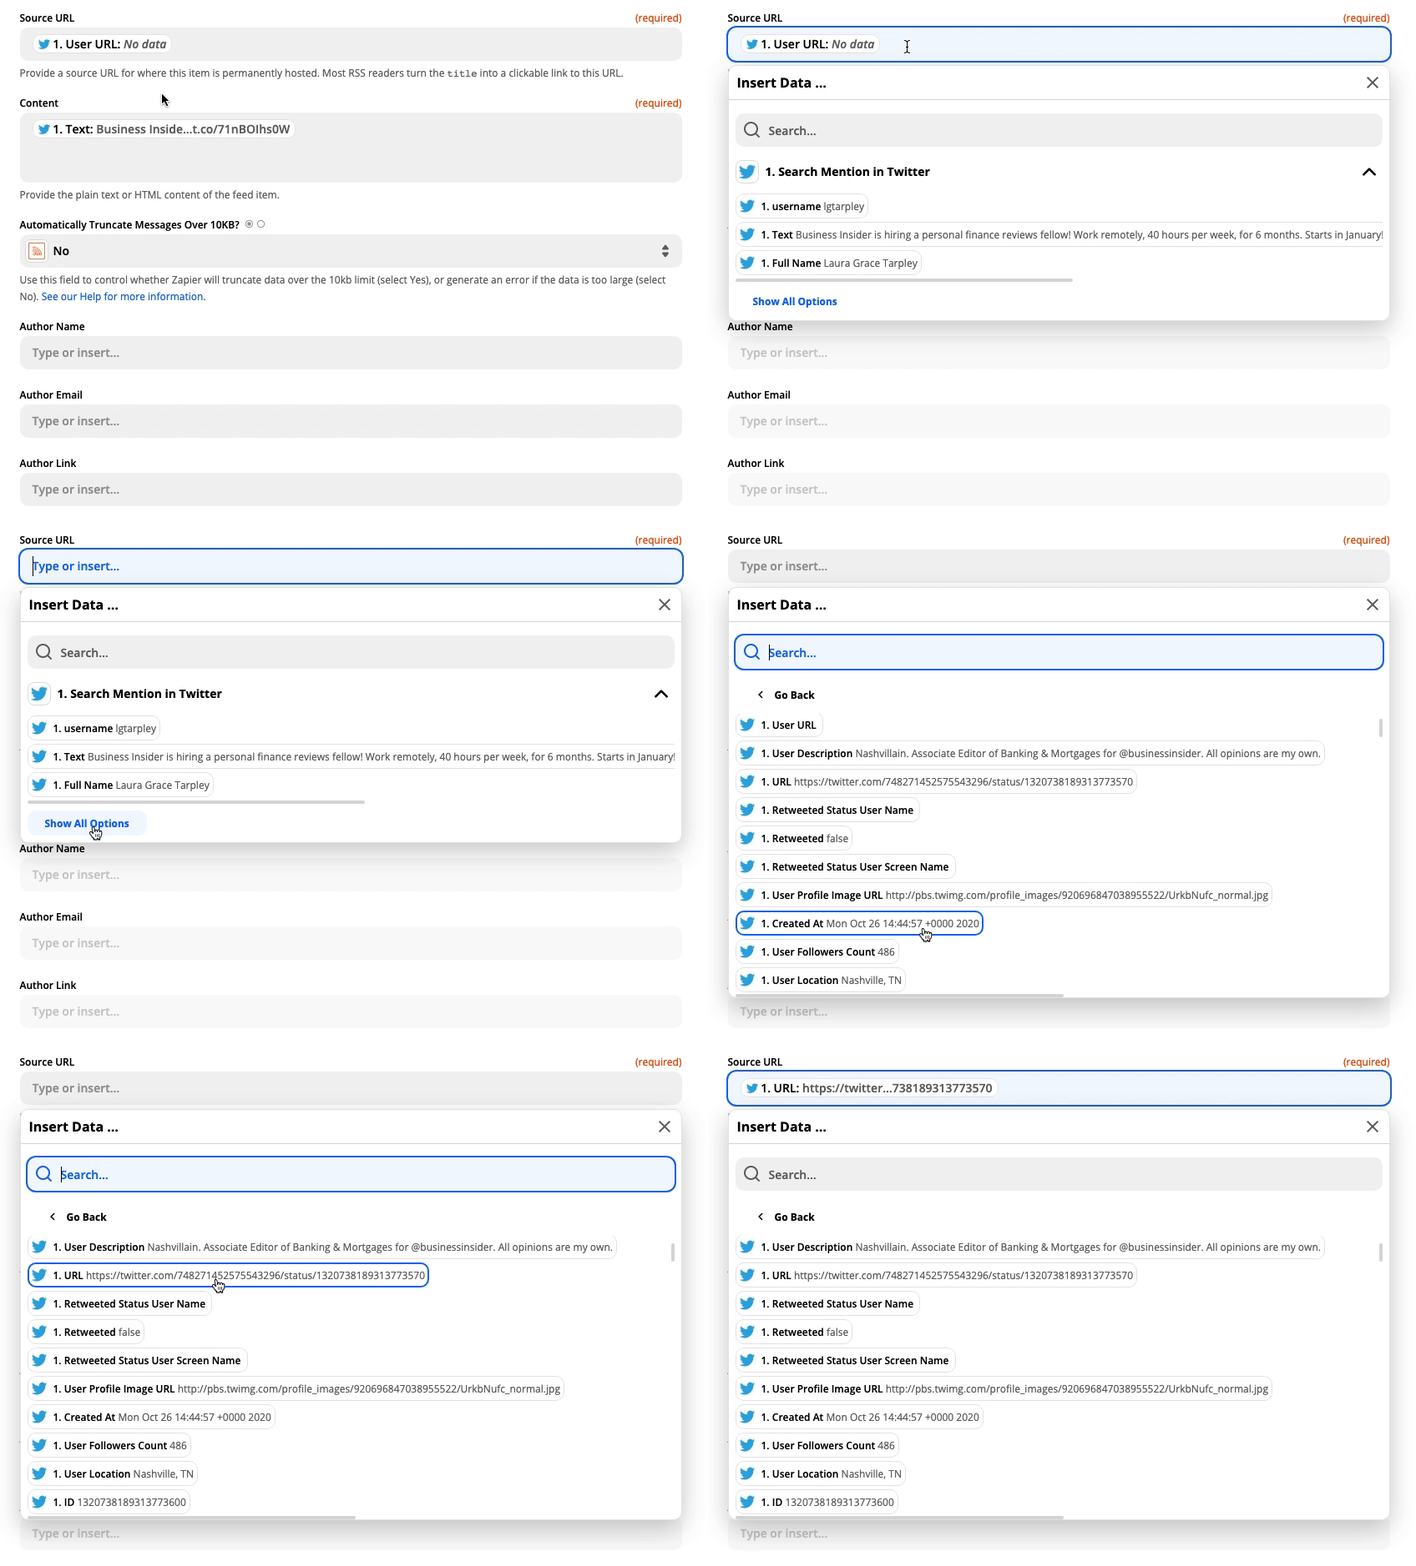
The Content field will already have the text of the tweet selected. If you'd like to add anything else here, feel free to do so.
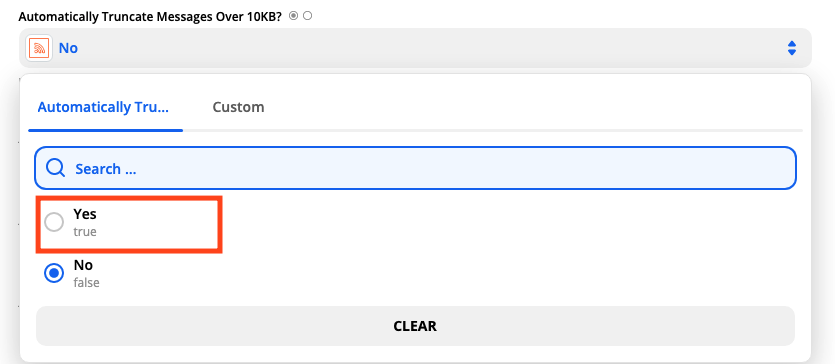
Under Automatically Truncate Messages Over 10KB?, click on the dropdown menu and select Yes. While it's highly unlikely any Twitter content will be over 10KB, this is just to ensure we don't hit an error with a particular tweet.
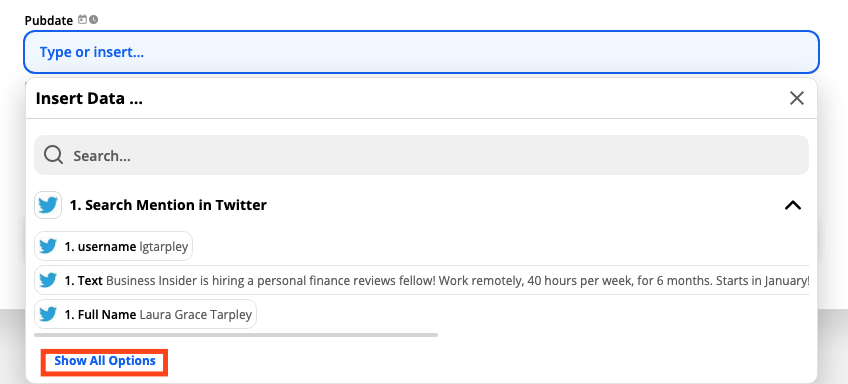
You can leave the Pubdate field alone if you'd like. Since my sample is actually a retweet, I want a little more specificity. If you're Type A like me, click on Type or insert… to bring up the dropdown menu. Click Show All Options, scroll down until you see Created At, and click on it. This is the timestamp of the tweet.
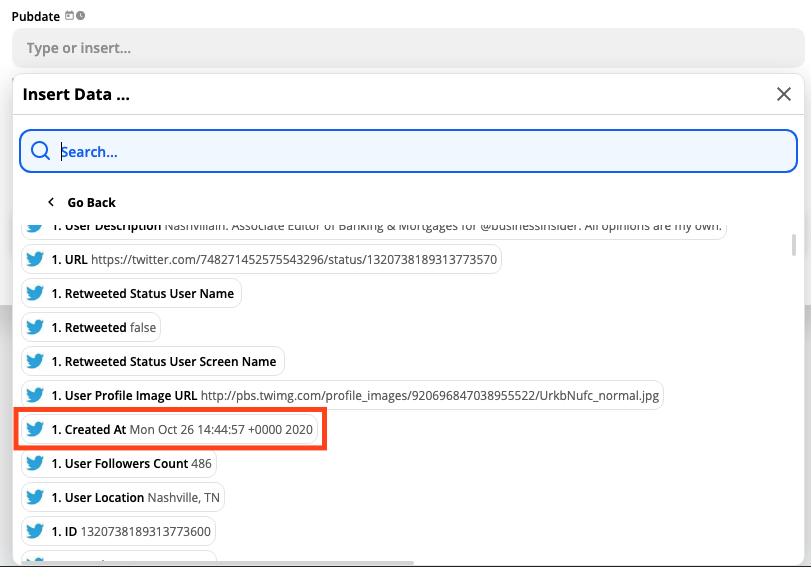
Once you've configured this step to your liking, click Continue.
Test your Zap
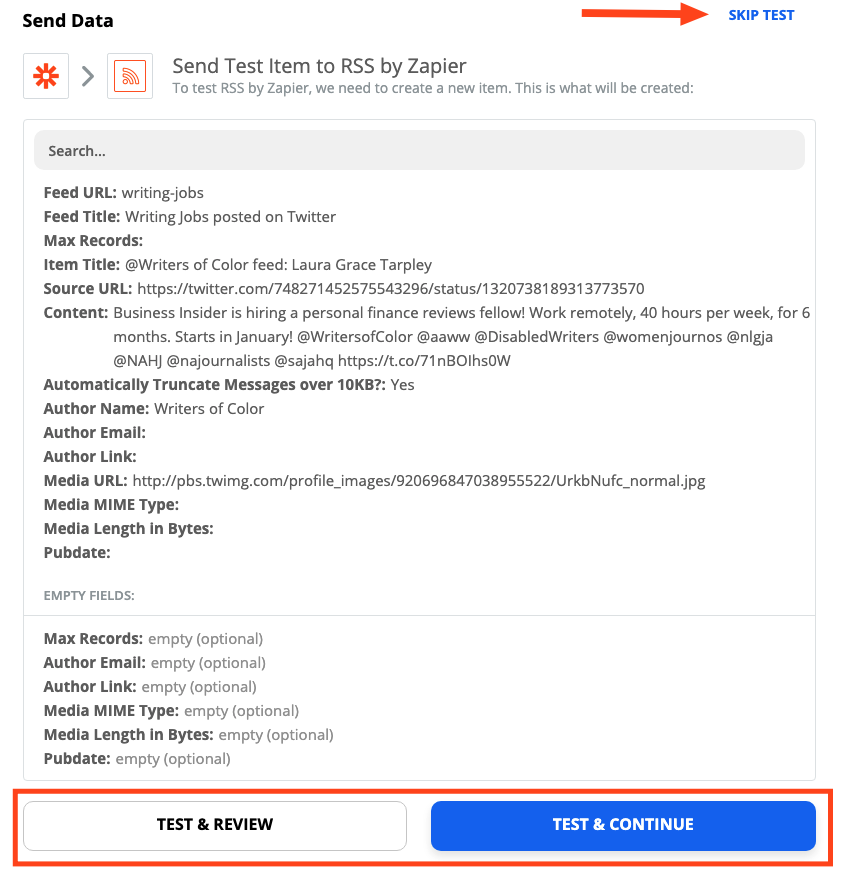
Now it's time to test our Zap to make sure it's working. Zapier will add a new tweet, according to our search criteria, to our newly-created RSS feed.
You can skip this test if you'd like by clicking Skip Test located at the top-right corner. However, if it's your first time using an RSS reader or you want to make sure everything is showing up correctly, it's always a good practice to test. Click any of the test buttons to continue.
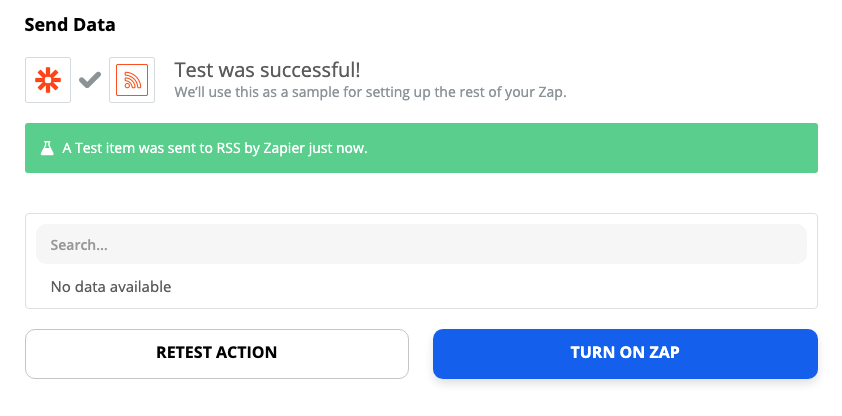
If everything works, you'll see a Test was successful! message. However, we can't really see if that's the case. We'll know for sure in the next step.
Add your feed URL to your RSS reader app
We need to add our RSS feed URL to our reader app to know if our test Zap really worked. Remember how I had you copy and paste a URL into a text editor earlier? Toggle to that window, select and copy that link.
Open your RSS reader app. Each app will have a different method of adding new RSS feeds. I'm using Feedly, so I'll click on the plus sign on the left-hand side to Add a new source.
Paste your feed link. Your RSS app should generate a preview of your newly-created feed. Add it to your section of choice. (As you can see, I follow a lot of RSS feeds.)
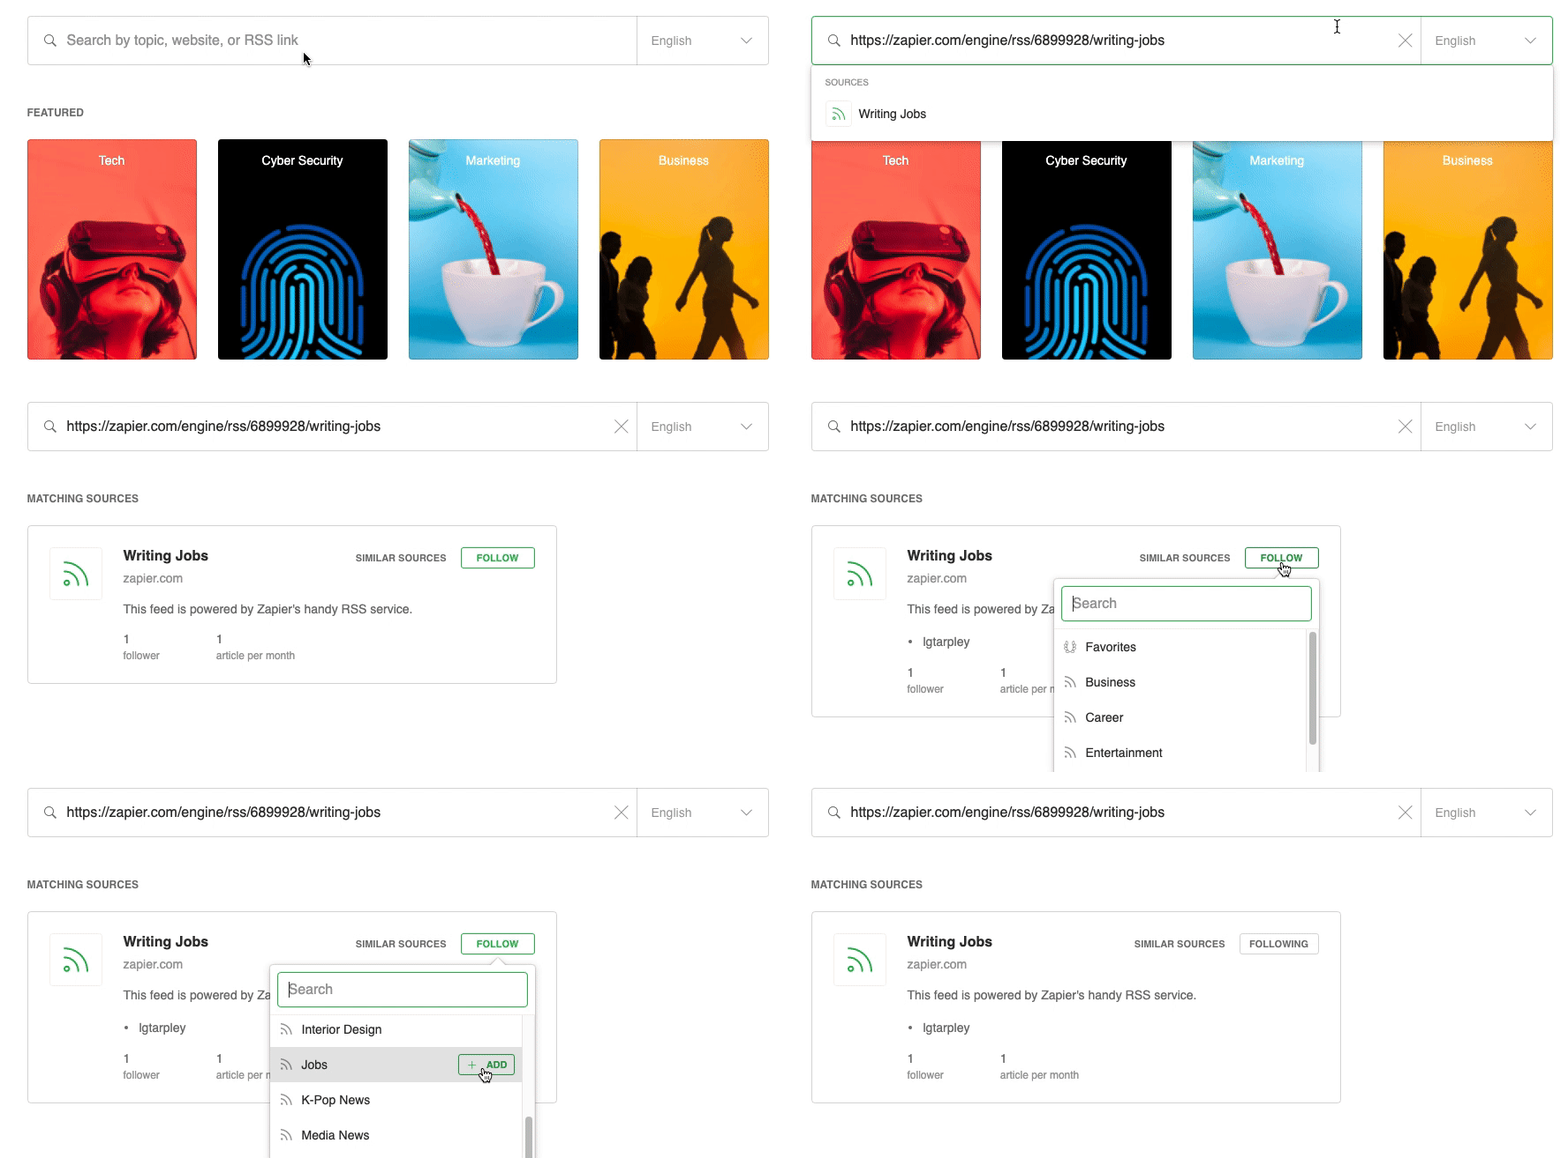
And here's how our test Zap looks.
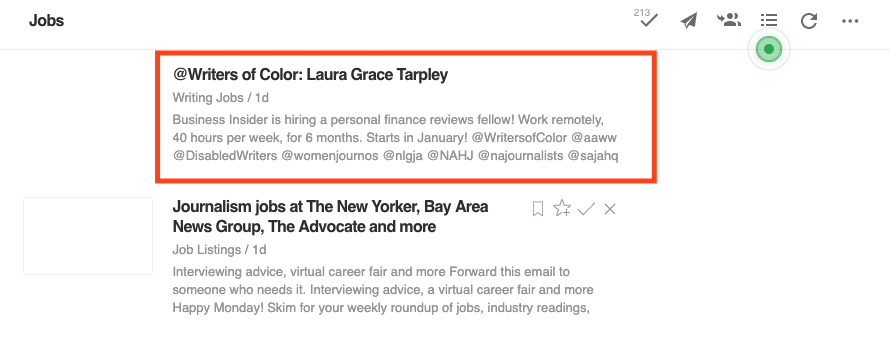
If I click through on the link, it'll take me to the original tweet.

Don't forget to turn on your Zap! Toggle back to the Zap editor and click Turn on Zap…

…or the slider at the bottom of the Zap editor.

Slack messages
Slack and other chat apps are becoming a popular gathering place for professional communities. Depending on the workspace, there may be a jobs channel where workspace members are encouraged to share job posts. This Zap will add Slack channel messages to an RSS feed. While we use Slack in this example, you can substitute with any team chat app Zapier integrates with.
Here's how to set it up:
- If you don't already use an RSS reading app, sign up for one.
- Click the Use this Zap button below to use our template (and create a Zapier account if you haven't already).
- Sign in to your Slack workspace when prompted and select the Slack channel you want to follow.
- Create and customize your RSS feed.
- Test your Zap.
- Add your feed URL to your RSS reader app.
- Turn on your Zap.
Connect and customize your Slack workspace
Click the Use this Zap button above to get started. In the Zap editor, you'll be prompted to connect to your Slack account. Click on the dropdown menu. If you've connected Slack to Zapier before, the workspace you previously connect will appear in the dropdown menu. If you'd like to connect a different workspace, click +Add a New Account.

This will trigger another pop-up window, in which you'll grant Zapier permission to access your Slack workspace. If you're a member of multiple workspaces, click on the dropdown menu located at the top right-hand corner to toggle to the correct workspace. Click Allow.
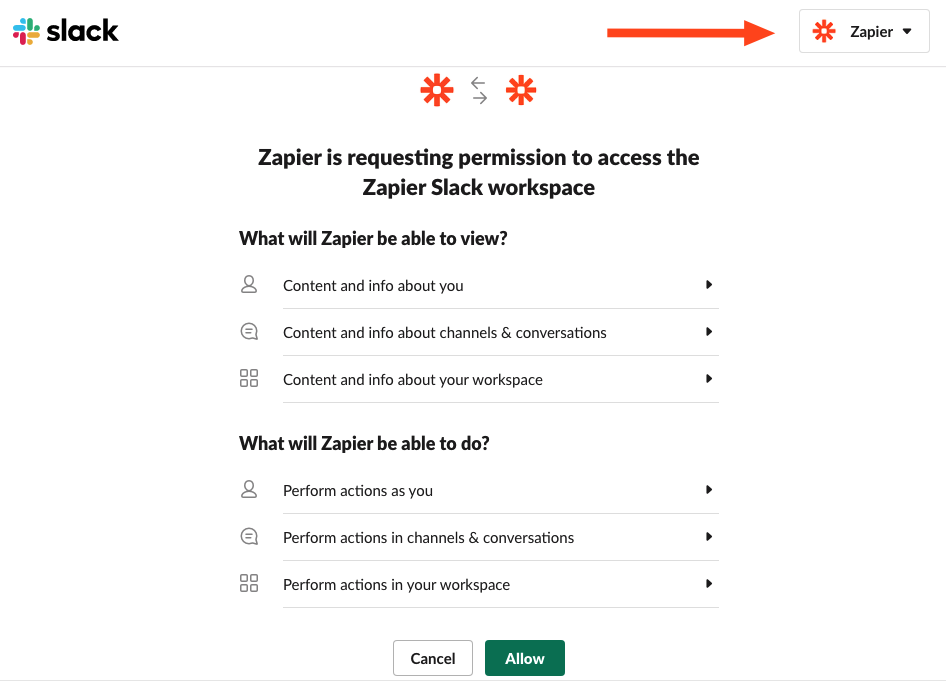
Note: Some Slack administrators may disable members from adding additional apps to the workspace.
Once you've connected your account, click Continue.
Next, we'll choose which Slack channel will trigger our Zap whenever there's a new message. Click on the dropdown menu under Channel and select the desired channel. If the channel has bot messages you want your Zap to ignore, select No under Trigger for Bot Messages.

Click Continue.
You can add a filter step—available under our paid plans—if you only want your Zap to run under certain conditions. For example, if you're only interested in Slack messages that mention "project manager". Read more about how to set up a filter step.
Now we'll test our Slack trigger. Zapier will try to find the most recent message in the Slack channel we selected earlier. This sample information will be used in later steps to finish creating our Zap. Click Test trigger.
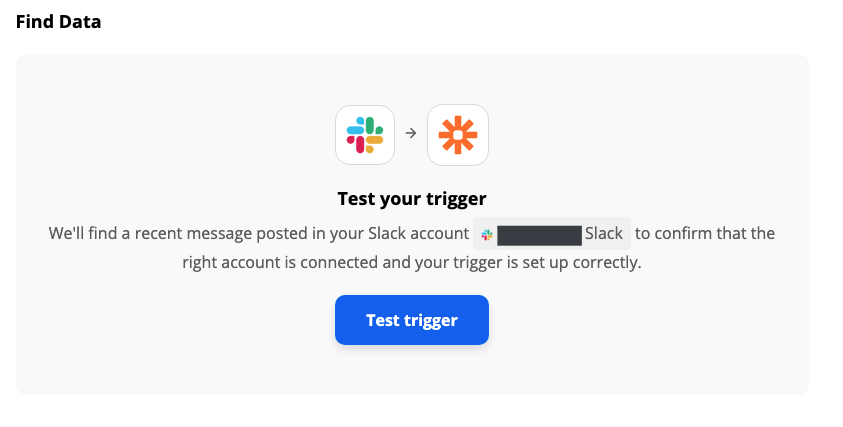
If your test information looks correct, click Continue.
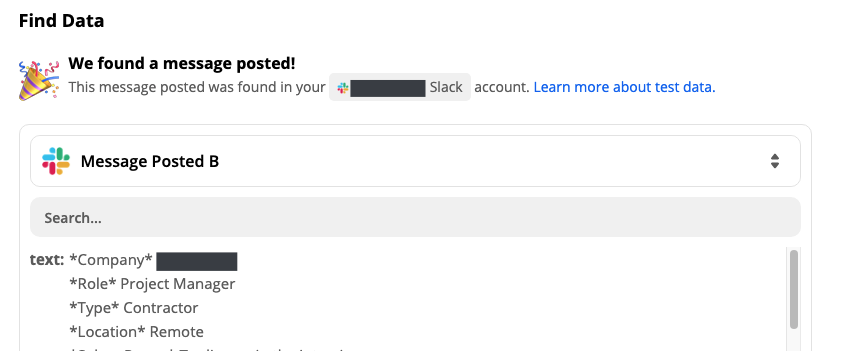
Customize and create RSS feed
The Zap template will already pre-select the action app and event for you, so click Continue.
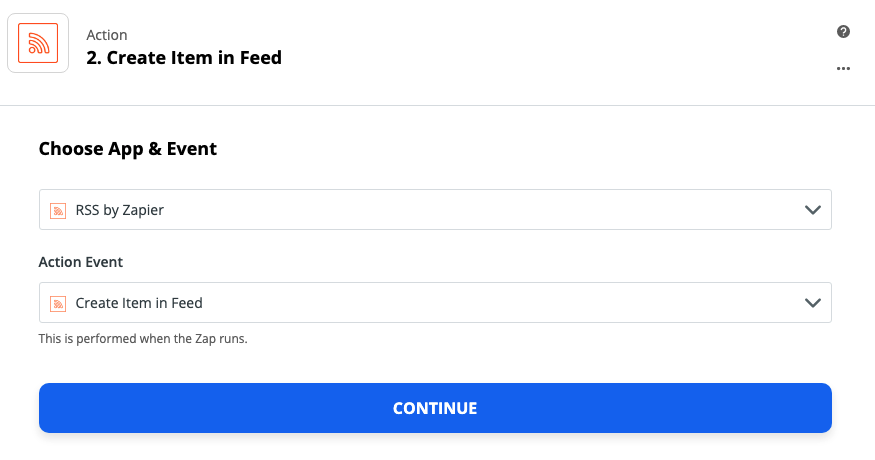
Next, we'll customize our feed URL and title. Under Feed URL, type in a short slug. Use an easy descriptor to remind yourself what this feed is all about.
We'll need this URL in a later step, so open up any text editor—it can be Google Docs, TextEdit, Microsoft Word, or whatever you'd like. Click Copy next to your feed URL.

The URL will copy to your clipboard. Now, paste it in your text editor.

We'll come back to this later.
Toggle back to the Zap editor. Under Feed Title, you can call your RSS feed whatever you'd like.
Under the Item Title field, the Zap template will automatically pre-fill with "New post by" and the Slack username the message came from. In your RSS reader app, this will appear as an article headline.

You can always change this if you'd like. To do so, click on Type or insert… and delete fields or text you don't want. You can type in text, which will appear the same every time your Zap runs.
If you'd like the information to vary depending on the content of the Tweet, select a Slack field from the dropdown menu. This is information Zapier pulled in when we tested our Slack trigger earlier. If you'd like more fields to choose from, click Show All Options. In this example, I selected the Team Name field.
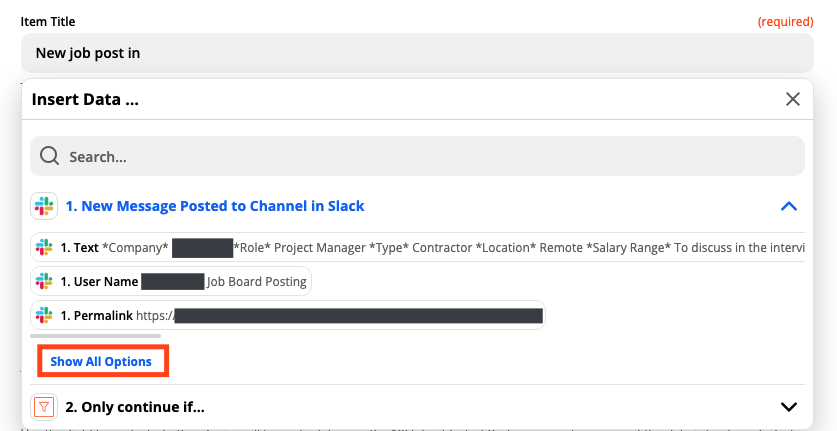
The Source URL field is typically where an RSS reader will turn into a clickable link. This will usually be a link to the full article. In this instance, we want to link to the specific Slack message. Click Type or insert… and select the Permalink field.
The Content field will already have the text of the Slack message selected. If you'd like to add anything else here, feel free to do so.
Under Automatically Truncate Messages Over 10KB?, click on the dropdown menu and select Yes. This ensures we don't hit an error with a Slack message.

The template will pre-fill the Author Name and Author Email fields. Under the Pubdate field, you can type in "now." Once you've customized your RSS feed item to your liking, click Continue.
Test your Zap
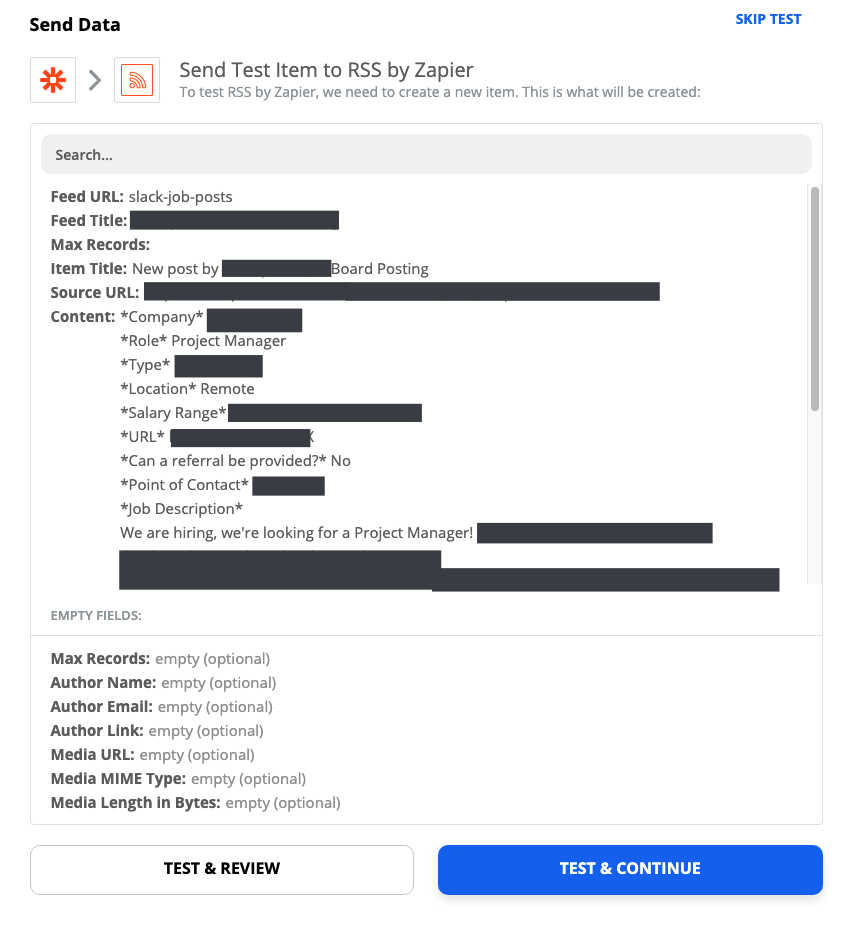
Now, let's test our Zap to make sure it's working. Zapier will add a new message from our desired Slack channel to our newly-created RSS feed.
You can skip this test if you'd like by clicking Skip Test located at the top-right corner. However, if you want to make sure specific information is showing up correctly, or it's your first time using an RSS reader, you should test it.
Click any of the test buttons to continue.
You'll be greeted with this message if the test worked.
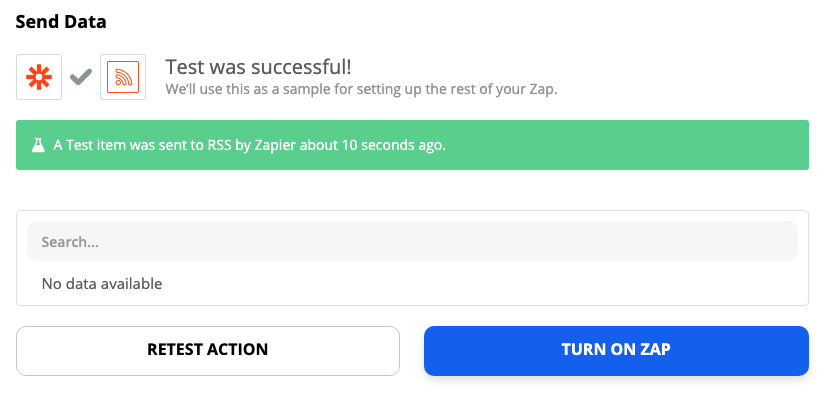
However, we need to verify that our test worked by checking our RSS reader app.
Add your Slack feed URL to your RSS reader app
We'll need to add our RSS feed URL to our reader app. Earlier, you copied your Slack feed URL into a text editor. Toggle to that window and select and copy that link.

Open your RSS reader app. Each app will have a different method of adding new RSS feeds.
Paste your feed link, according to your app's instructions.

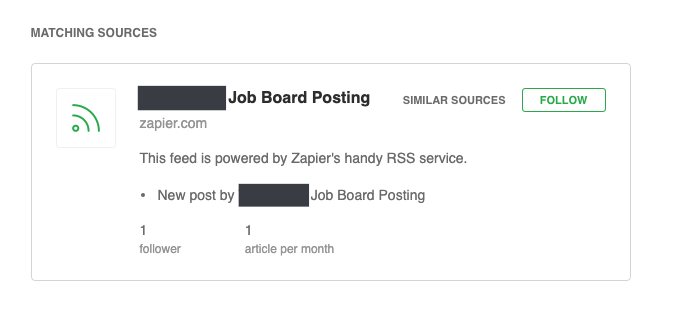
Your RSS app may generate a preview of your newly-created feed. Add it to the section or folder of your choice.
Don't forget to turn on your Zap. Toggle to the Zap editor and click Turn on Zap…

…or the slider located at the bottom of the editor.

Related reading:
from The Zapier Blog https://ift.tt/35bYJP9
- Get link
- X
- Other Apps
Comments
Post a Comment