4 time-saving Gmail settings you didn't know you needed
- Get link
- X
- Other Apps
There was once a time when responding to emails didn't occupy its own double block on your schedule. But endless email is the reality now. Since you can't control the number of emails you receive, your best bet is to make it as easy as possible on yourself to respond. (And yes, you need to respond.)
Here are four quick tweaks you can make to your Gmail settings to shave off a few clicks here and there. Because when you multiply here and there by the number of emails you get a day, it makes a dent.
1. Send and archive with one click
Whenever you click Send on a reply, the message you just sent stares you in the face. You inevitably read it over and over, waiting for your subconscious to tell you that, yes, that was a very good email. Plus, you need an extra click to archive the message (which you do because obviously your inbox is perfectly pruned).
The solution: choose the Send & Archive option under General in your settings.

After you save the changes, the default option will be to send the email and immediately archive it, saving you both a click and some unnecessary time spent worrying that you spelled "its" wrong.

And for those of you who undo almost every email you send at least once (hi), don't worry—you can still do that if you realize you got a little too click-happy.
2. Default to reply all
Before I go any further, I want to acknowledge that reply all is one of the great menaces to society. Having said that, especially in professional contexts, it's often the way to go.
How many times have you accidentally replied to just the sender, only to realize the other folks cc'd on the email should have been included? Then you have to write another email adding the cc'd folks back in (and probably forgetting again, only to have to do it a third time).
Instead, select Reply all as your Default reply behavior under General in your settings.

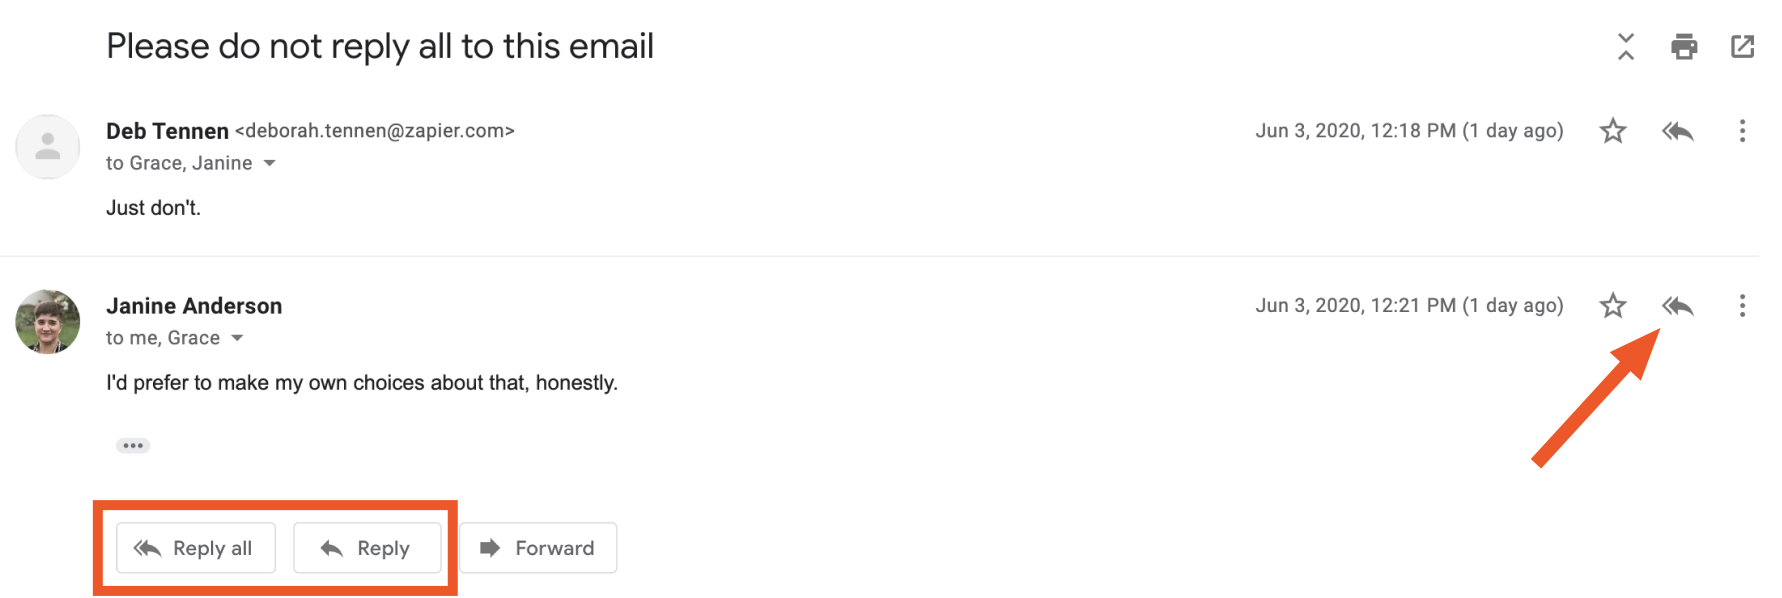
Once you save the settings, on any email with more than one recipient, your default reply option at the top of the email will be reply all. It'll even swap the order of the reply options at the bottom of the email.

Use the power wisely.
3. Enable the reading pane
Part of Gmail's appeal is that it's visually sleek, but that sleekness can come at the expense of extra clicks. So if you wake up to an inbox full of emails and want to be able to scan them without clicking into each one, enable the reading pane under Inbox in your settings.

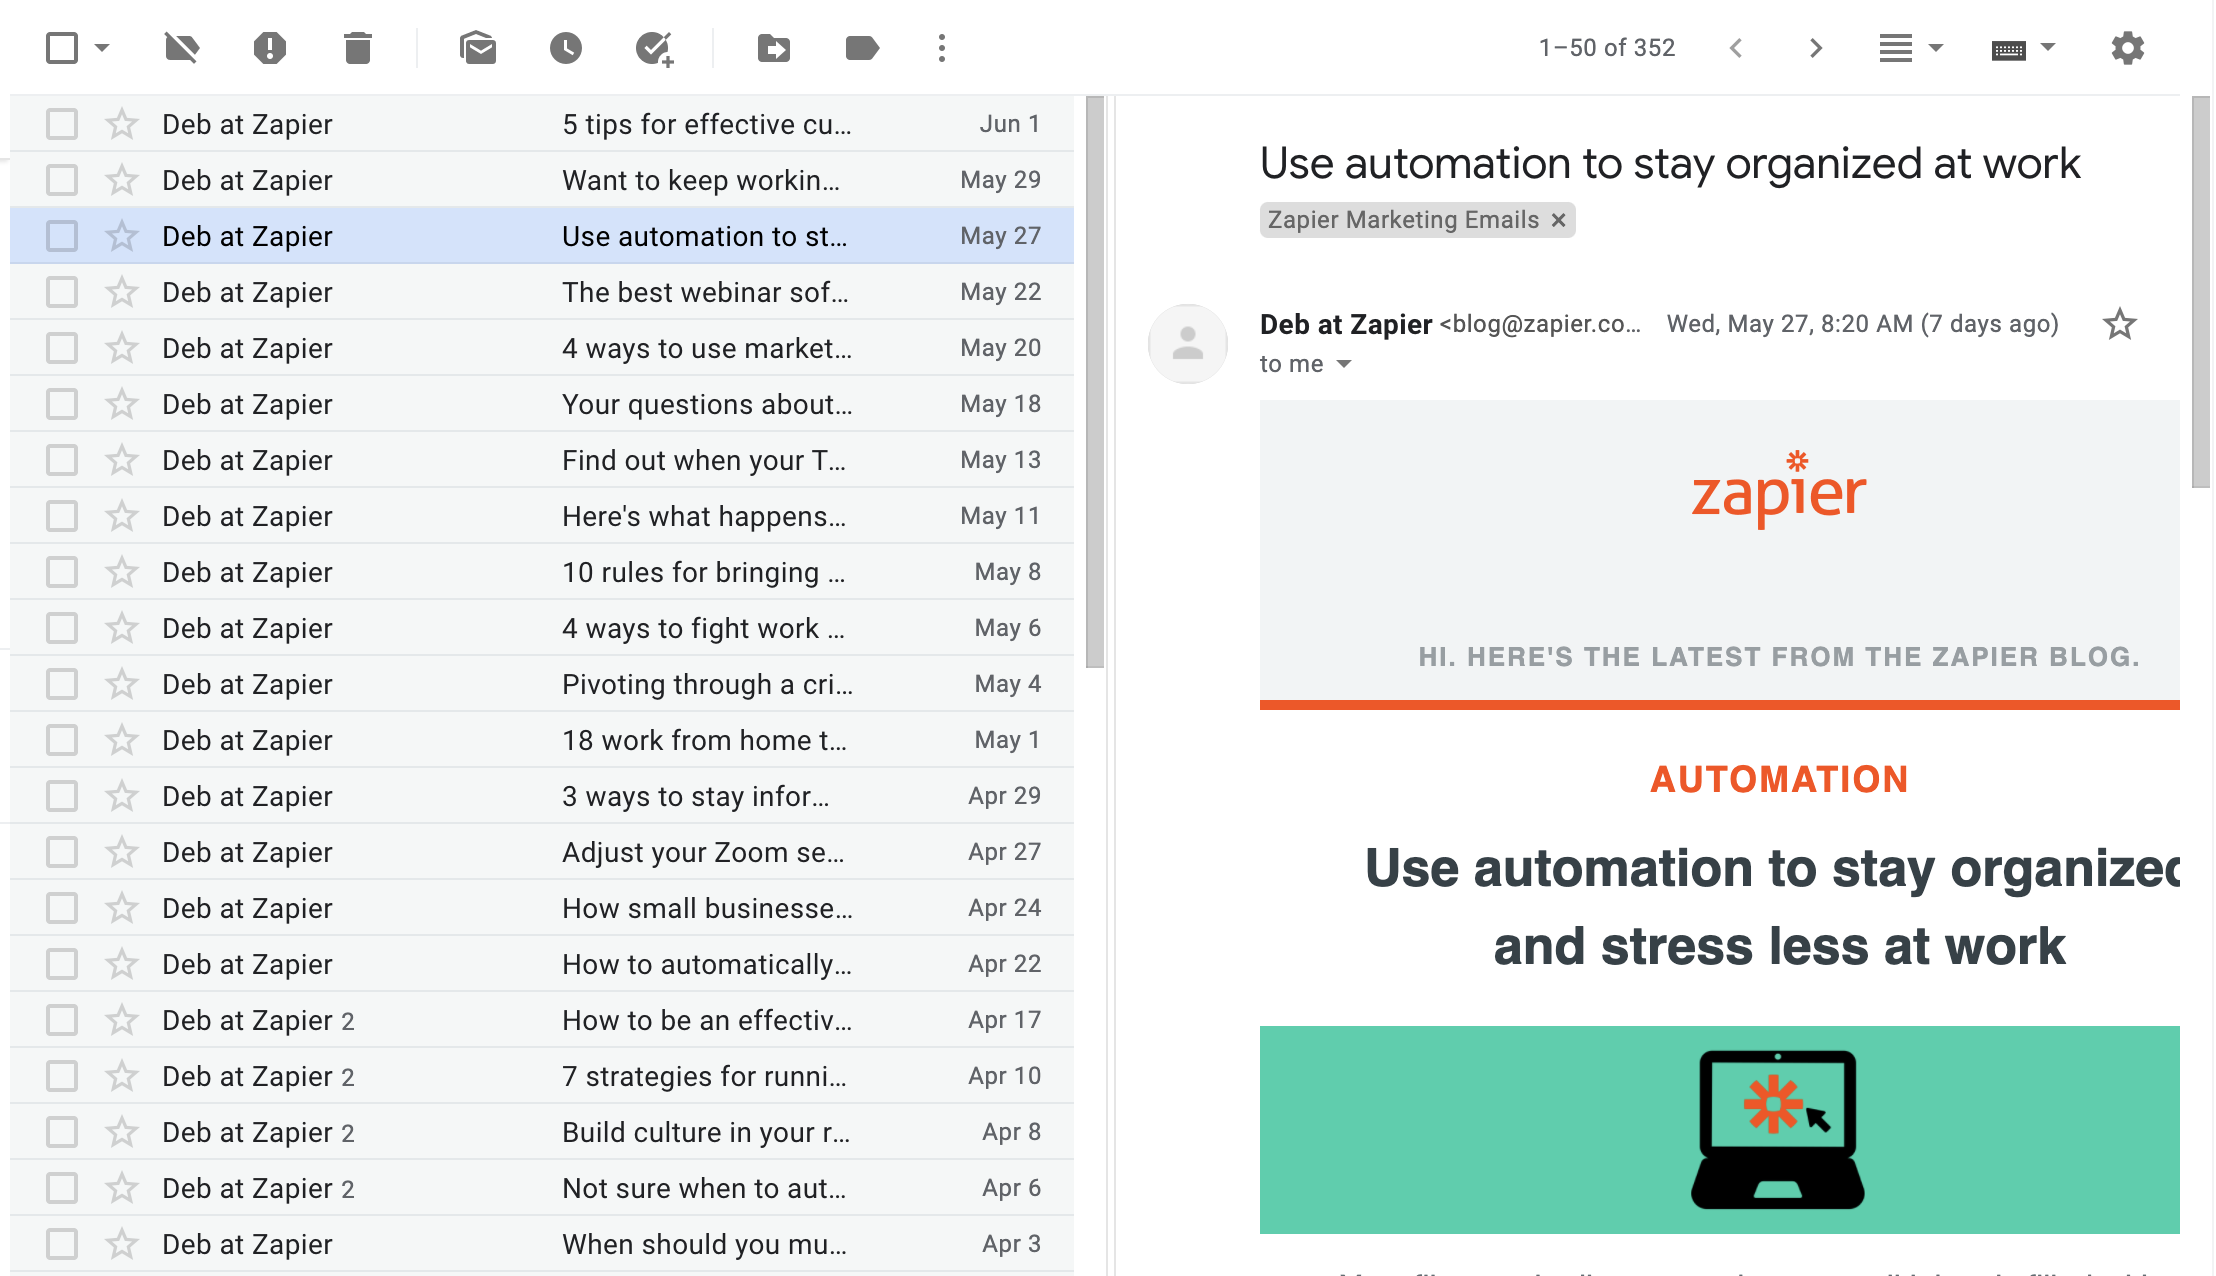
Decide where you want to the preview to appear (I prefer Right of inbox), and then save your changes. The reading pane makes Gmail look a bit more like Outlook, allowing you to see the content of each email as you use your keyboard arrows to navigate through your inbox.

You can also choose how long an email needs to be in the preview before it's marked as read. I find three seconds to be the sweet spot, but if you tend to linger a bit longer on messages, you can change it up. You'll find that option under the General tab in your settings.

You can even control the reading pane from within your inbox. Click the reading pane icon in the top right to turn it on and off, or click the dropdown arrow next to it to change where the preview appears.

4. Use templates to create auto-replies
I'm a big fan of Gmail templates. They're great on their own, but you can take them a step further by using them as auto-replies. Instead of selecting the template you want to insert for any given reply, create a filter that will do it automatically based on rules you set in advance.
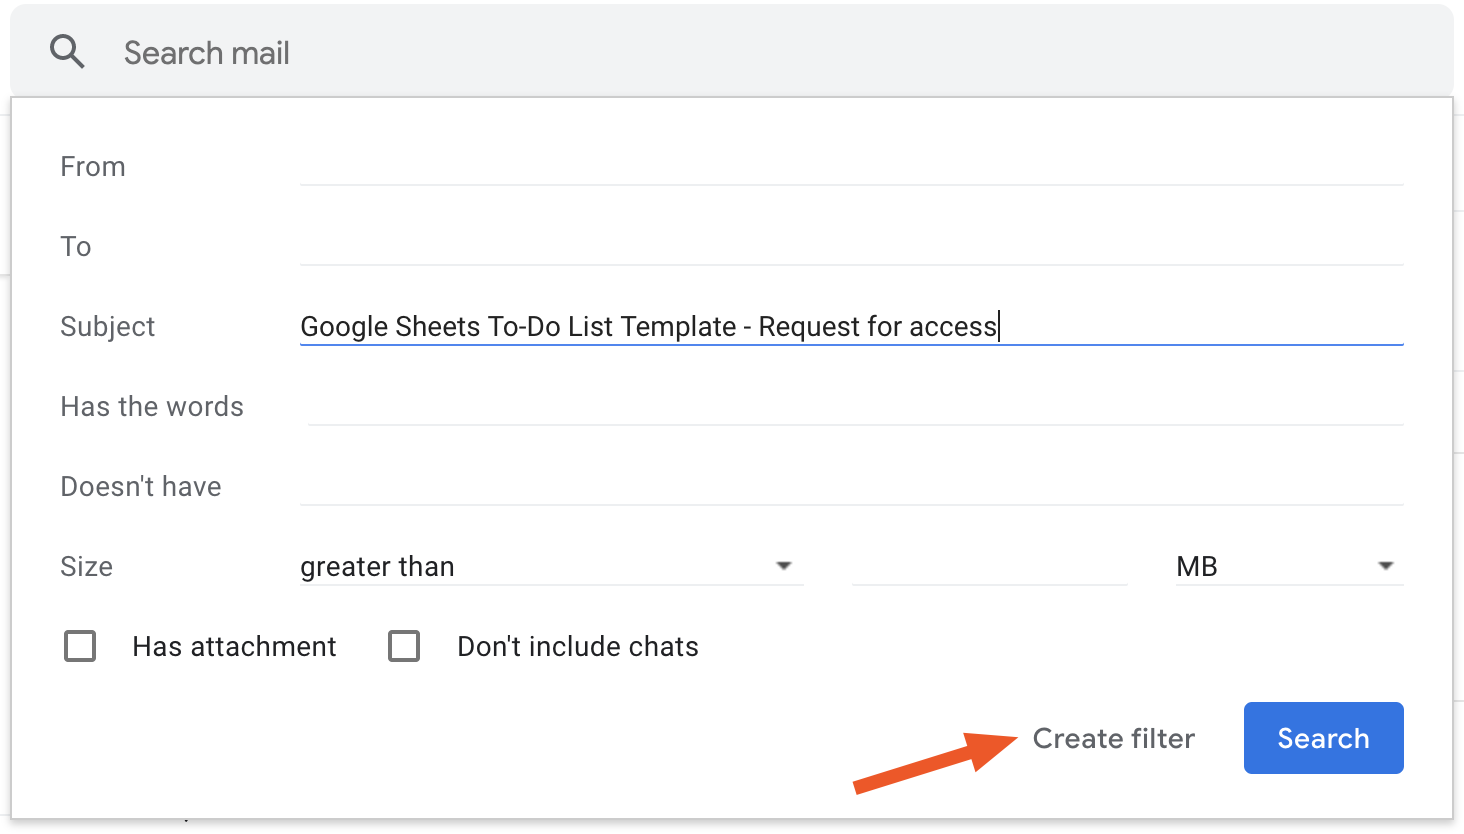
Here's the thing: this only works if you're really sure that any email matching your filter will require the selected response. I use it, for example, to tell people who request edit access on my Google Sheets to-do list template that they can click File > Make a copy to use it for themselves. I can be pretty sure that any email I get with the subject Google Sheets To-Do List Template - Request for access needs that response.
Under Filters and Blocked Addresses in your settings, click Create a new filter. Then you can set the rules for almost anything: the sender, the size of the email, the subject line, words from the body of the email. Then click Create filter.

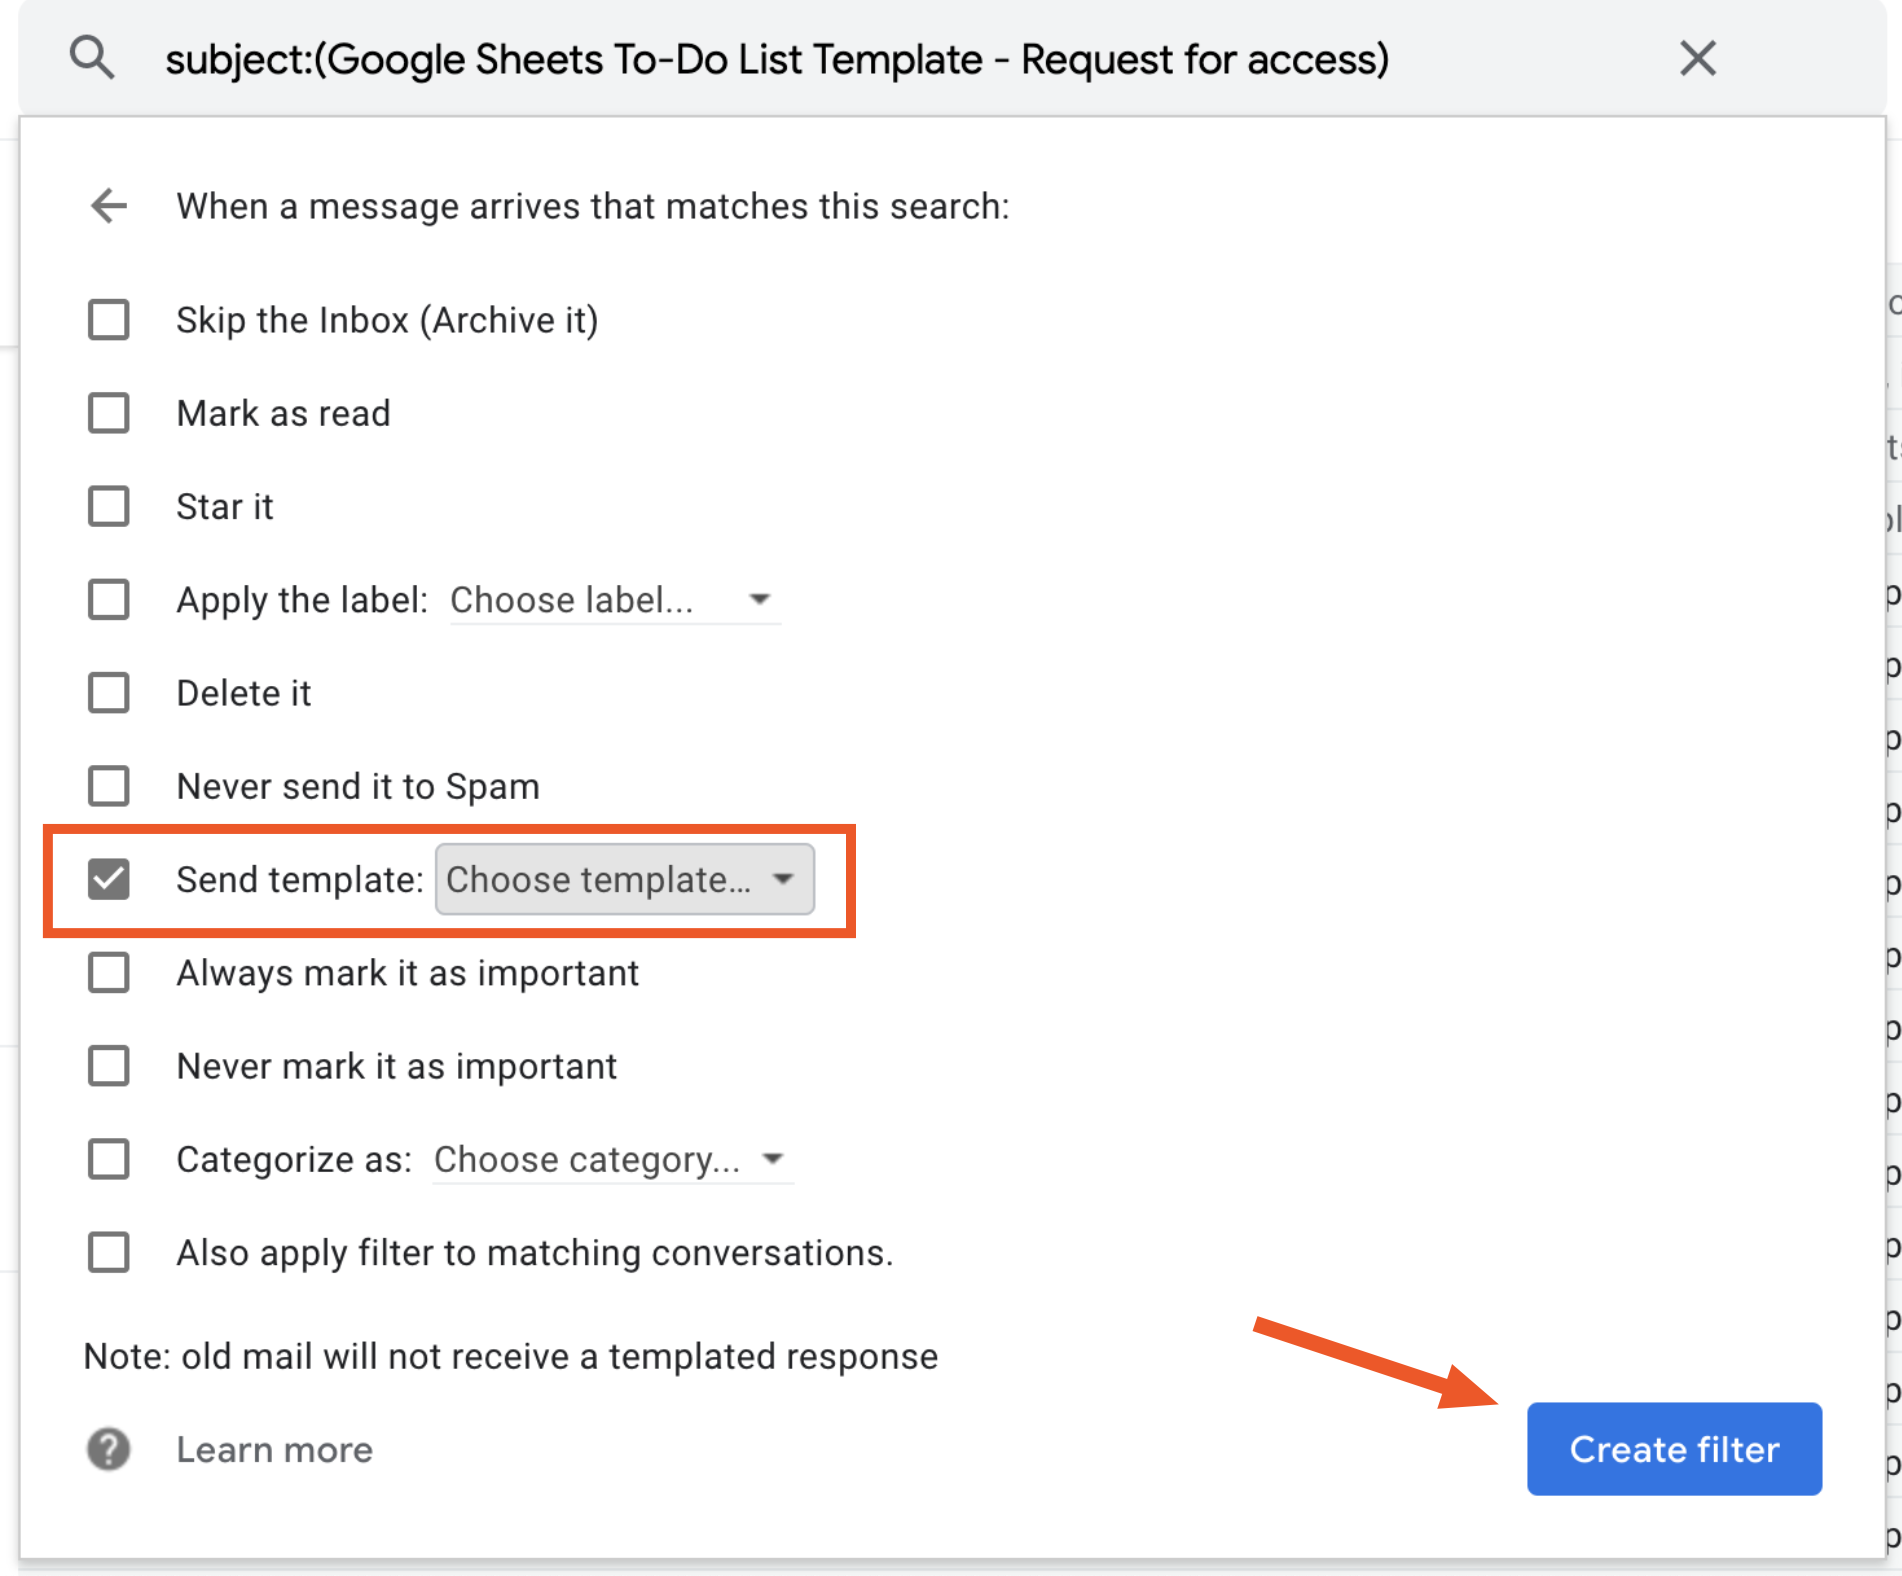
Next, you'll be able to choose the action; in this case, it's Send template. Select the template you want to send as a reply, and click Create filter again.

Gmail will automatically send that template to anyone whose email matches the parameters you set for your filter.
If you need a more customized auto-reply, you can use Zapier to automatically reply to emails with customized messages (including things like the name of the sender). Here are some example Zaps—our term for automated workflows—that you can set up to forward or reply to emails based on the contents of messages you receive.
Save even more time by setting up filters for the most common types of messages you receive. Here's how to organize your inbox with Gmail filters.
Now that you've saved a few seconds on every email you reply to, think about what you'll do with your newfound time. The world is your oyster—don't waste it clicking around your inbox.
from The Zapier Blog https://ift.tt/3dzlmyV
- Get link
- X
- Other Apps
Comments
Post a Comment