How to Create and Autopopulate a Google Docs Template
- Get link
- X
- Other Apps
Google Docs templates save you from reinventing the wheel every time you need to create a similar-but-not-quite-the-same doc. Now, with Zapier, you can automate the template editing process, sending information from the other apps you use most into your Google Docs templates. You'll be able to automatically create new Google Docs from an existing template without lifting a finger.
When to Use Zapier to Create a Document from a Template
Even when you use a Google Docs template, you're still taking time to fill in the blanks. And if you do it enough, the few minutes it takes each time can add up. You need to find the source information, copy it over to the template, and then double and triple check that it's right.
Zapier automates the process, saving you time—and decreasing the opportunity for human error.
For example, you may need to create new sales and marketing documentation on the regular. Each time you need to create an invoice or an RFQ, you're copy/pasting information from one database into the document. When there are a lot of fields to fill in, it adds up. Or maybe you have a meeting notes template that needs to be populated with the names of attendees. Now, Zapier can find the information in your first app—say, QuickBooks or Google Calendar—and automatically populate your template for you, without sacrificing formatting.
In this tutorial, we'll walk through one specific example, but remember that you can use this process to fill in a Google Docs template based on information in any of the 1,000+ other apps supported by Zapier.
How to Automatically Create a Document from a Template
Here, we'll show you how to autopopulate a Google Docs offer letter template, using information from your HR software.
Before you start, you'll need to be sure that your document template exists in Google Docs. You can use a pre-made template supplied by Google Docs, or you can create your own. If you need help getting started with templates, here's a quick tutorial.
IMPORTANT: In order to create a fillable template in Google Docs, any text that you want to replace with information from another app needs to be formatted like this:

Make sure you have the double braces on both sides and that there are no spaces between words. Here's what our offer letter template looks like wth that formatting in mind.
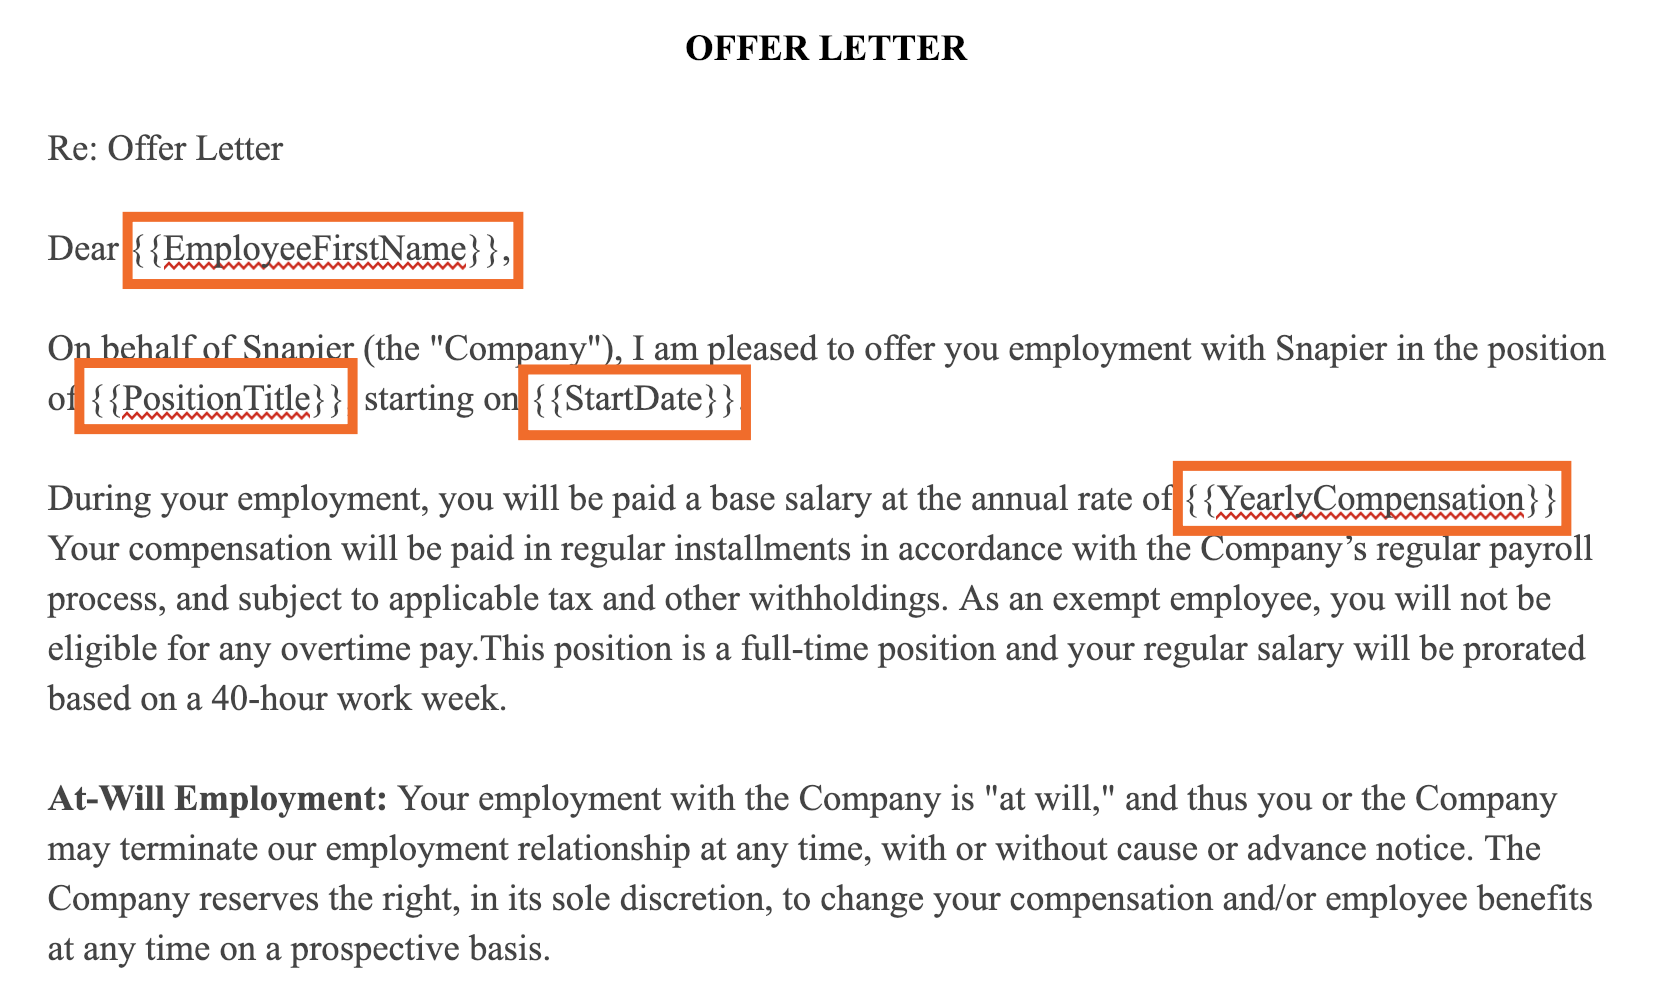
Now you're ready to create your Zap—our term for an automated workflow.
Step 1: Create a new Zap.
Once you have a Zapier account, click the Make a Zap button in the top right, or go directly to the Zap editor.
Step 2: Set up your trigger.
Select your trigger app from the list. In this case, we'll use Breezy HR.
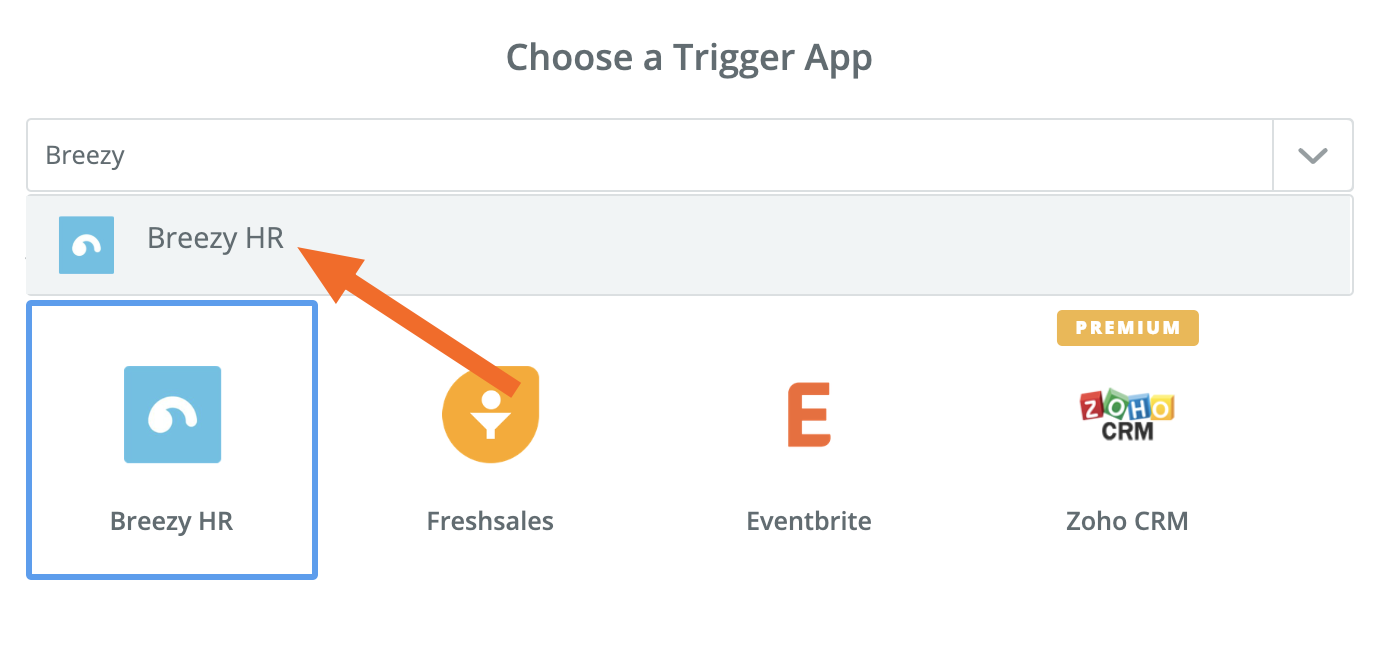
Step 3: Select your specific trigger.
What needs to happen in order to start this workflow? In this case, we want to populate the offer letter whenever a candidate is moved to the "Made Offer" stage in our HR software. So we'll choose New Candidate in Stage.
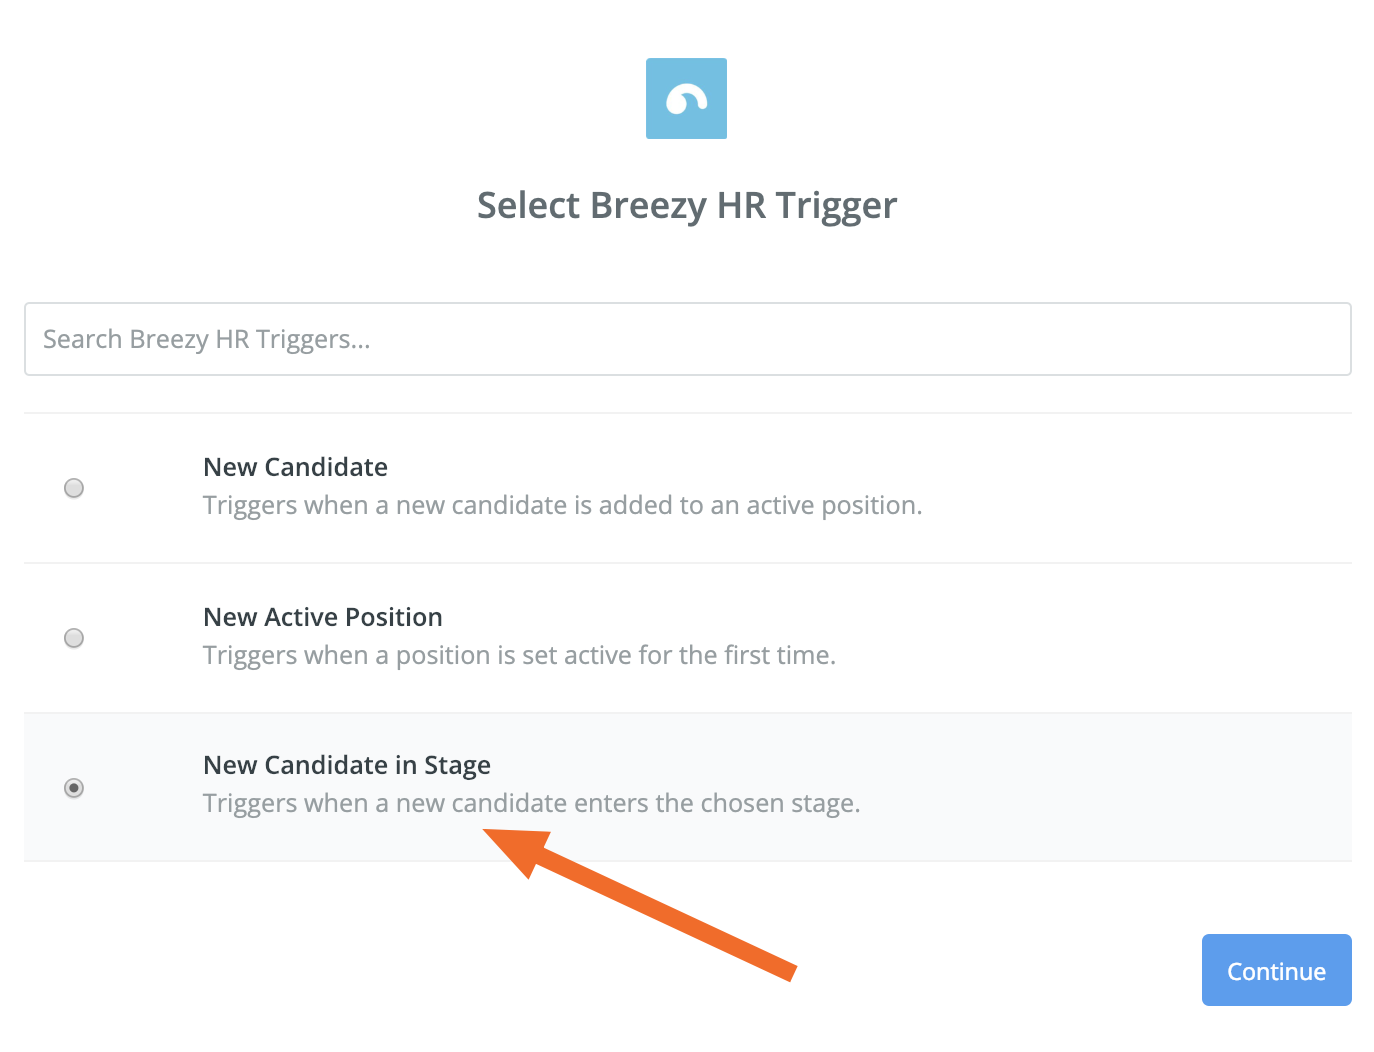
Click Continue.
Step 4: Connect your account.
Select the account you'd like to connect. If you've never connected this account before, you'll need to enter your credentials.
Step 5: Select the specific options for the trigger.
Here, we're telling Zapier to only kick off the workflow for a specific job position ("Chocolate Taster") and candidate stage ("Made Offer").
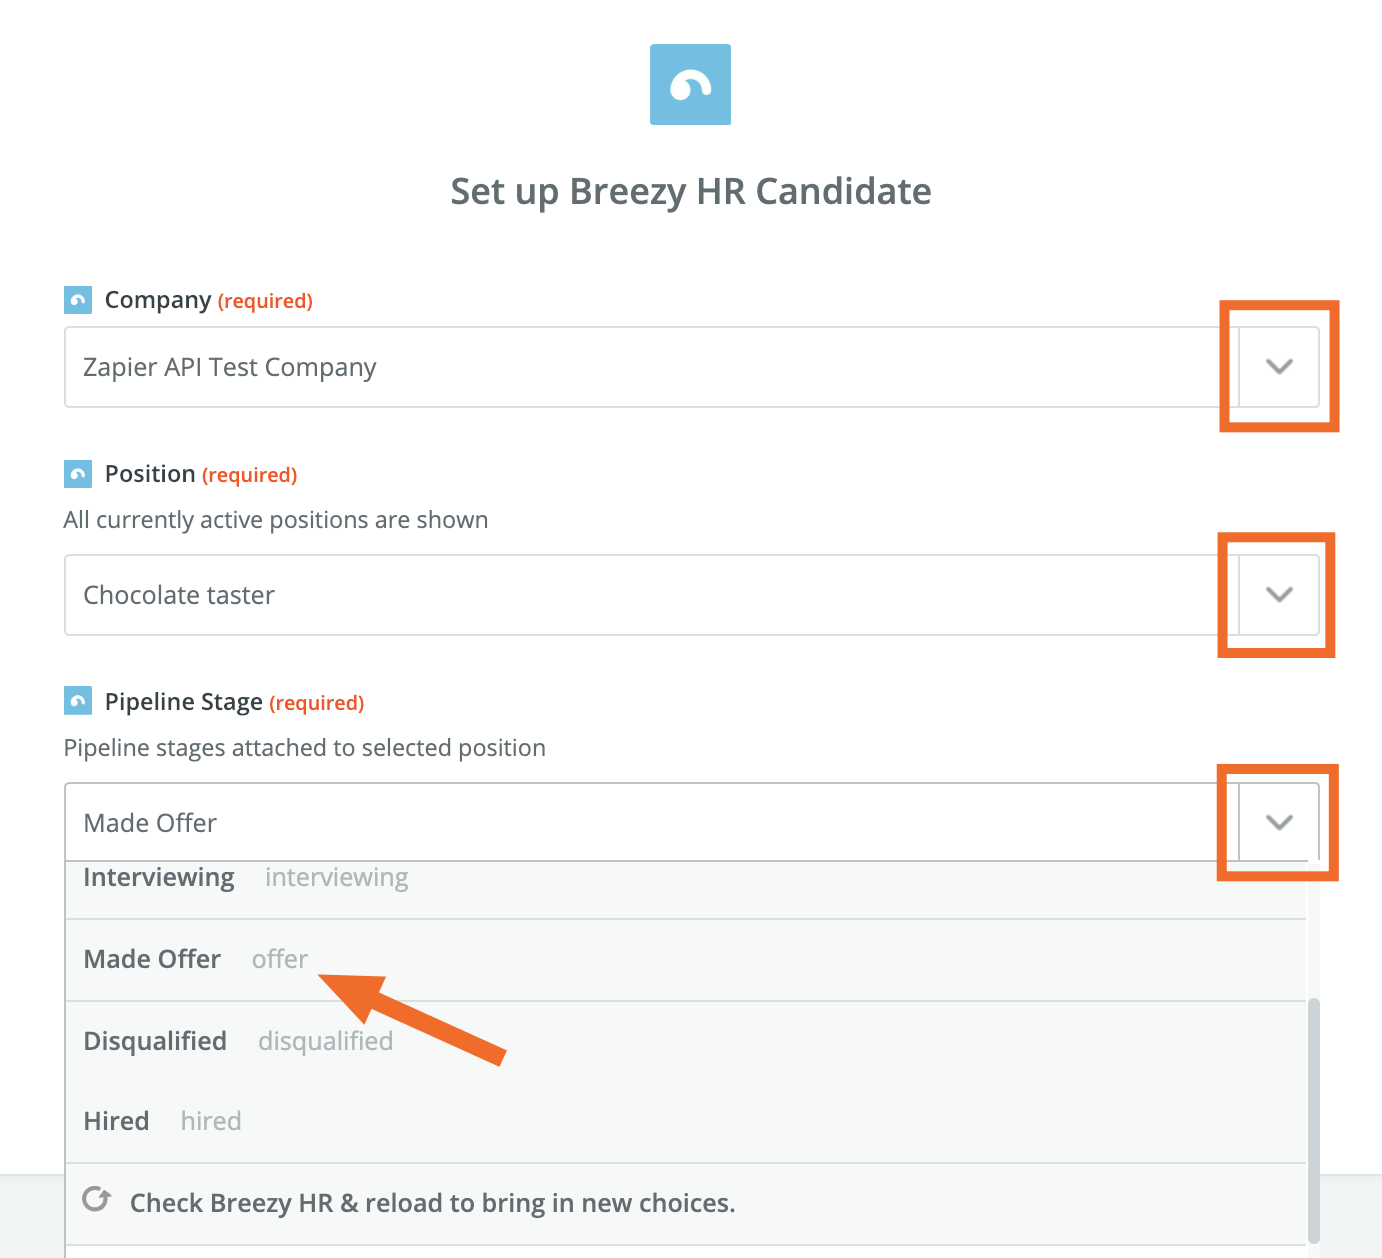
Step 6: Test the trigger.
Make sure you have an entry in your trigger app that has all the information you might want to send to your document template. For example, here, we'll want to be sure Breezy HR includes a candidate recently moved to "Made Offer" that contains at least the first name, start date, position title, and yearly compensation—i.e., the parts of the template we want to fill in.
Then, you'll use that sample to test the step. Follow the instructions, and click Continue.
Step 7: Add an action step.
Click the plus sign, and select Action/Search.
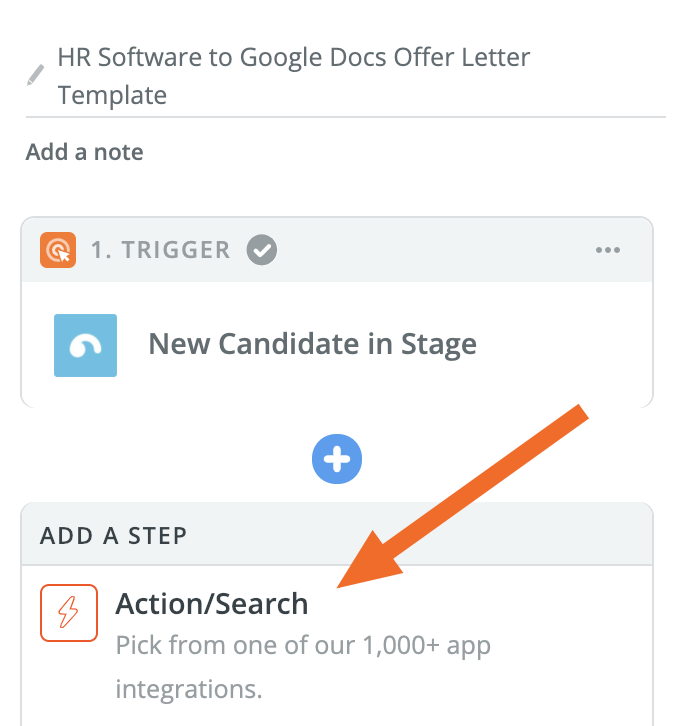
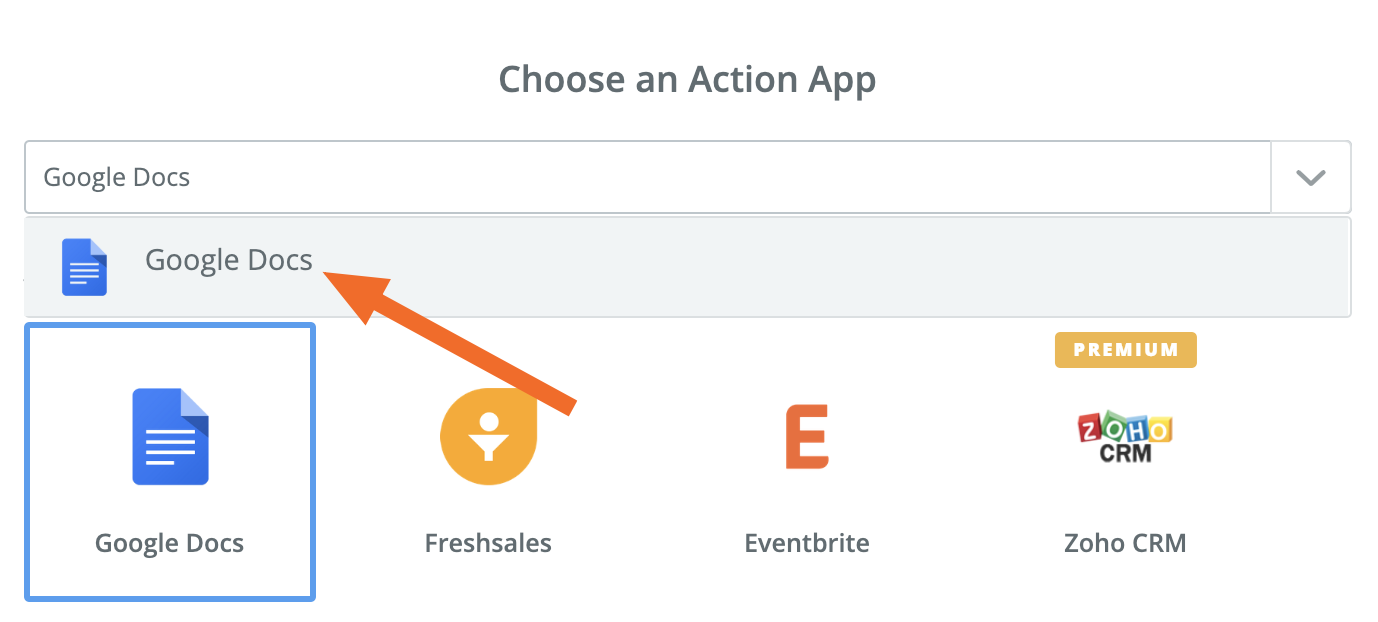
Step 8: Select Google Docs as your action app.
Now it's time to send that information to Google Docs. Select Google Docs as your action app.
Step 9: Select the action.
Here, you'll select Create Document from Template as the action.
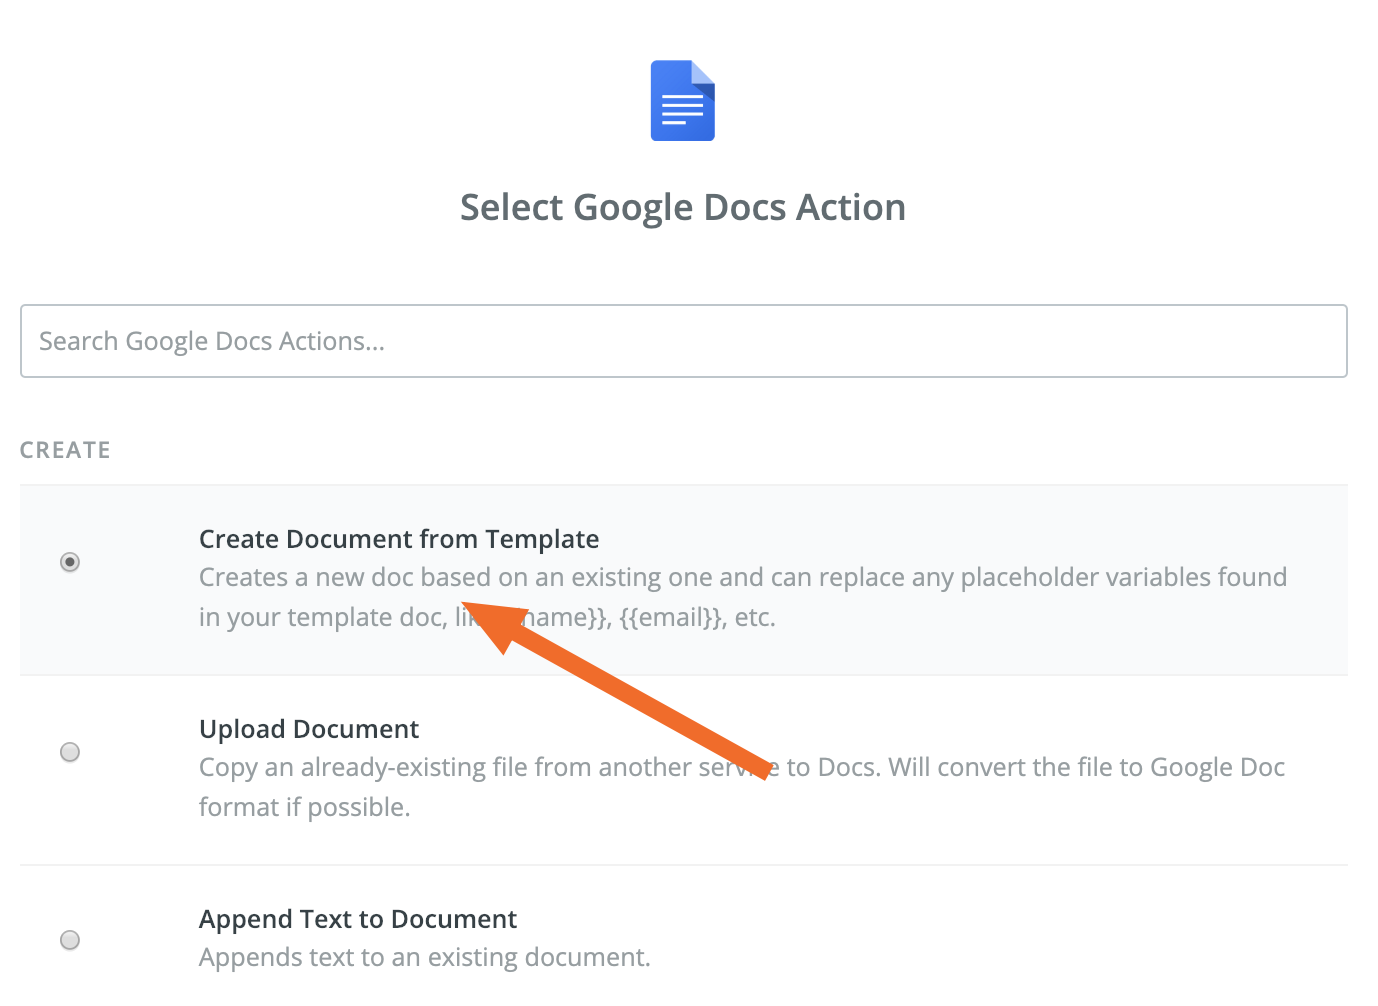
Click Continue.
Step 10: Connect your Google Docs account.
Just like you did with your trigger app, you'll need to connect your Google Docs account to Zapier.
Step 11: Map the information into your Google Docs template.
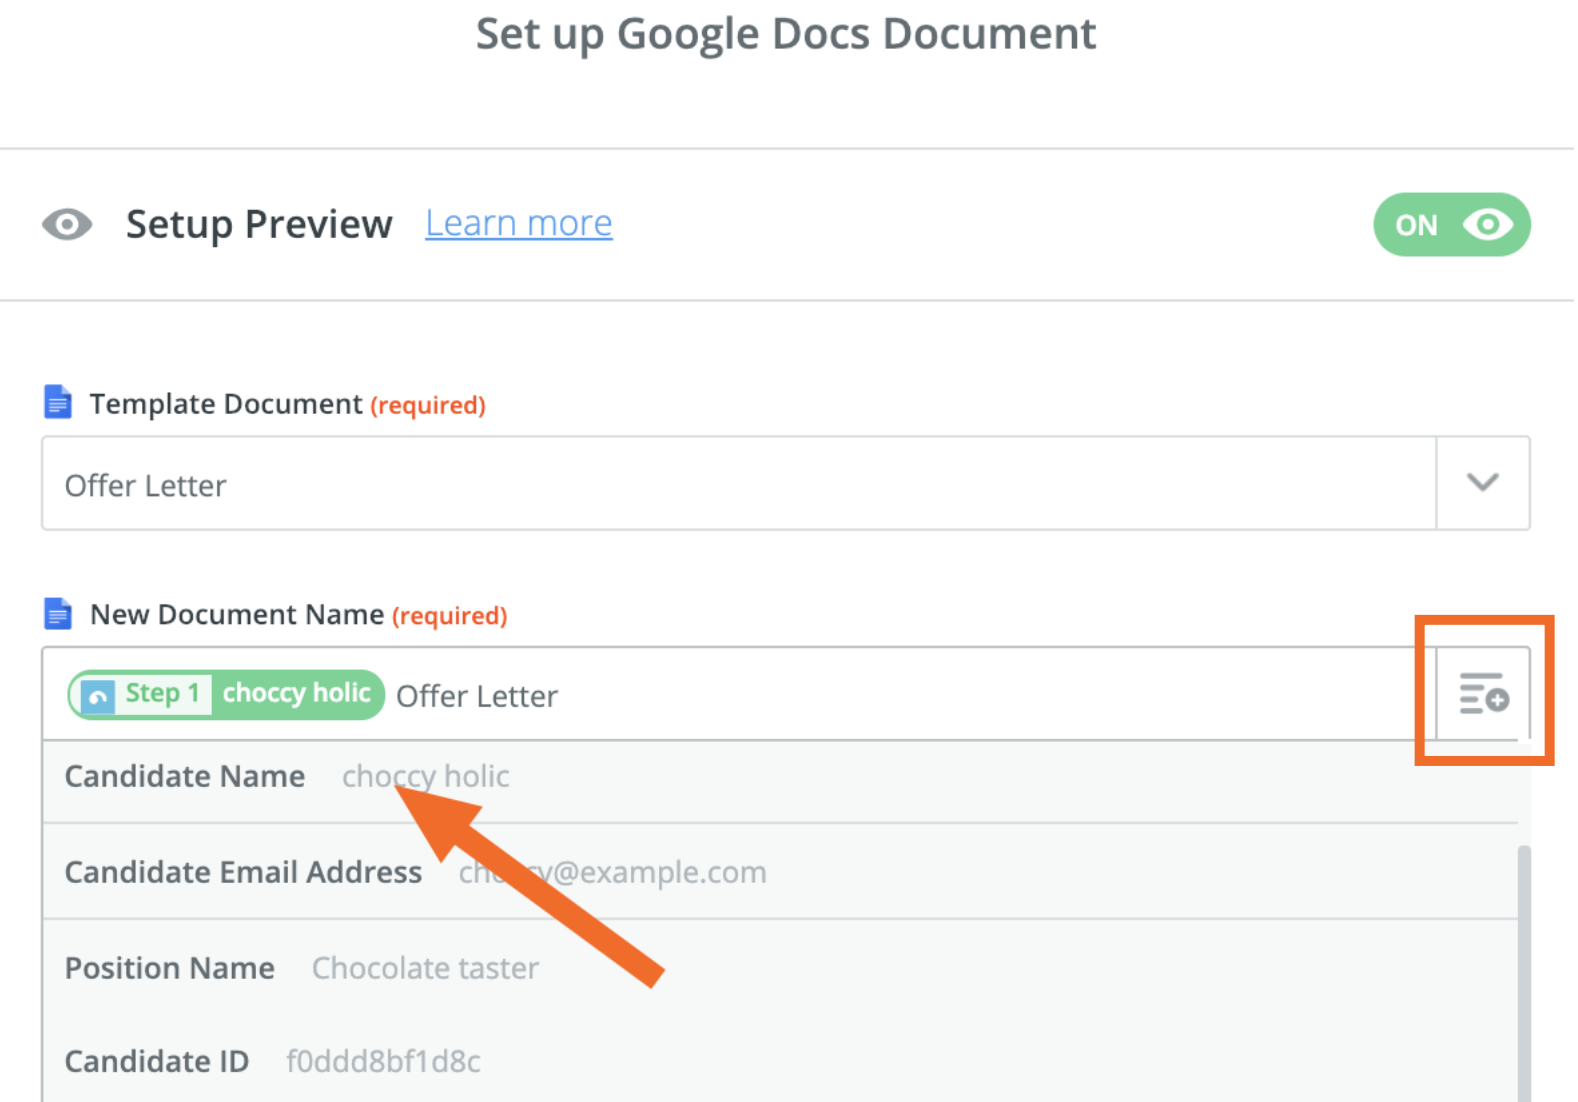
First, select the Google Docs template you want to use from the dropdown menu.
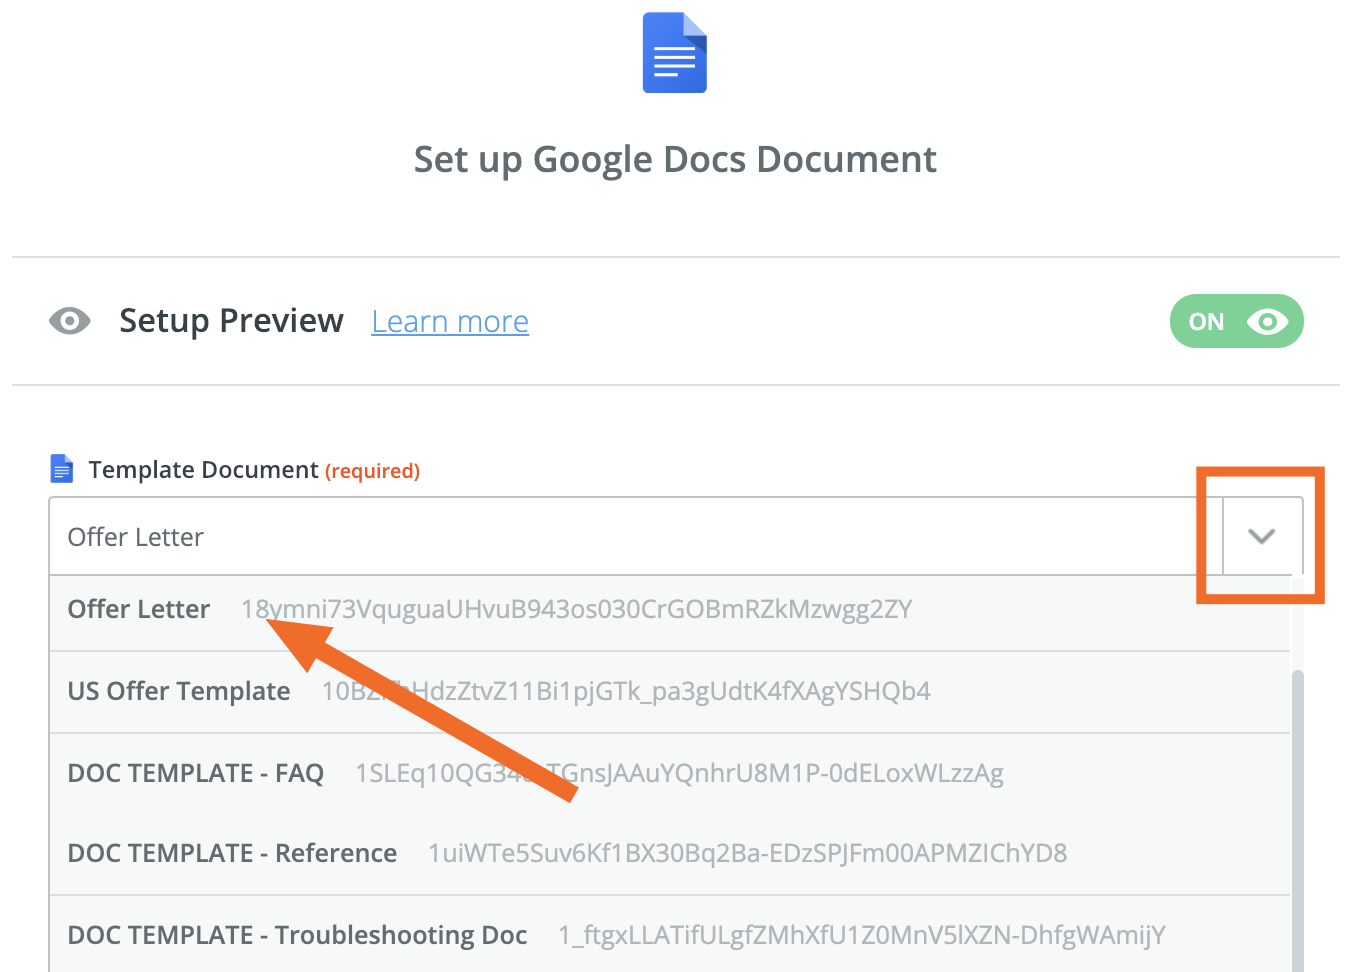
Then, name the template. You can name it dynamically based on information in your trigger app by clicking the plus sign next to the field and selecting the information. Here, we're naming the document "[Candidate Name] Offer Letter," where [Candidate Name] will change depending on the information in Breezy HR.
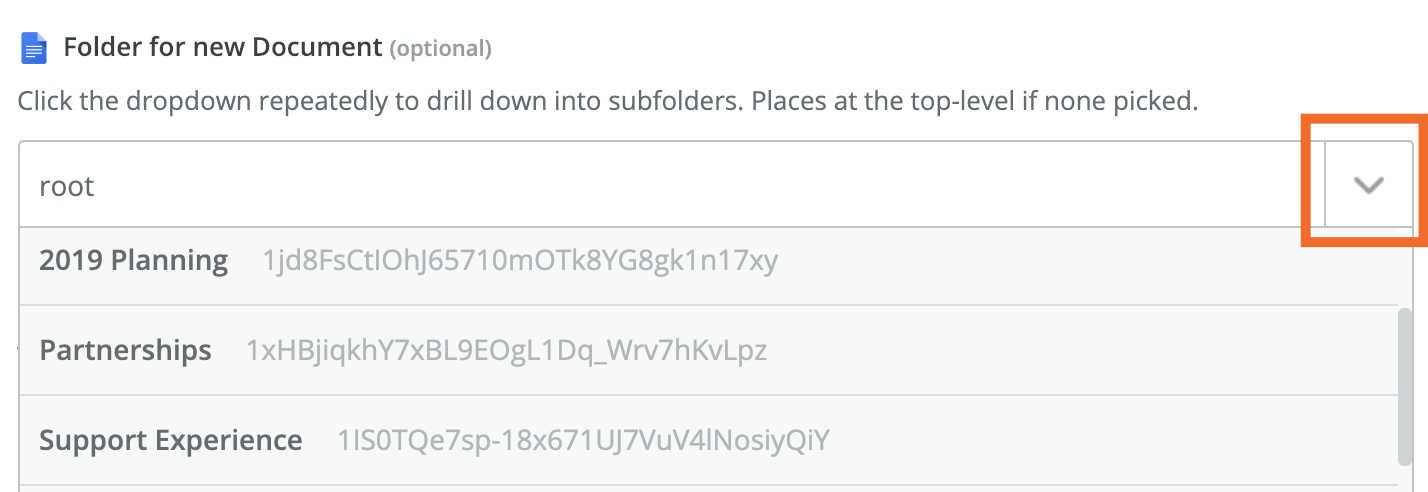
By default, your filled-in template will be saved in your root folder in Google Drive, i.e., not nested within a folder. If you want to put it in a specific folder, click the dropdown and select the folder. To put it in a subfolder, click the dropdown again and select the subfolder.
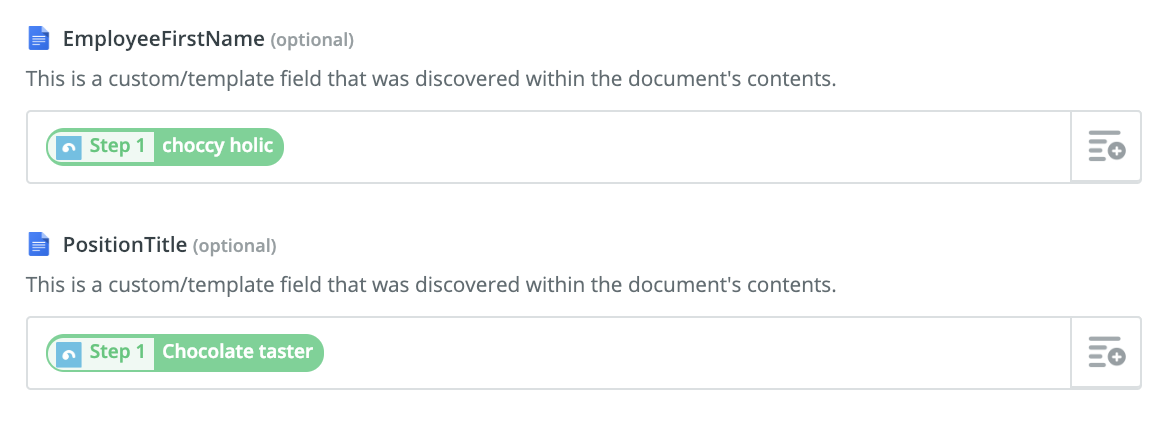
Then you'll complete the mapping for the rest of the fields. For example, our offer letter template has a spot for the employee's name and position title, among other things. So we'd map that information from Breezy HR into the document template.
Click Continue.
Step 12: Test your Zap.
The next step will prompt you to send a test to Google Docs. Click Send Test to Google Docs, and after a few seconds, you should see a success message.
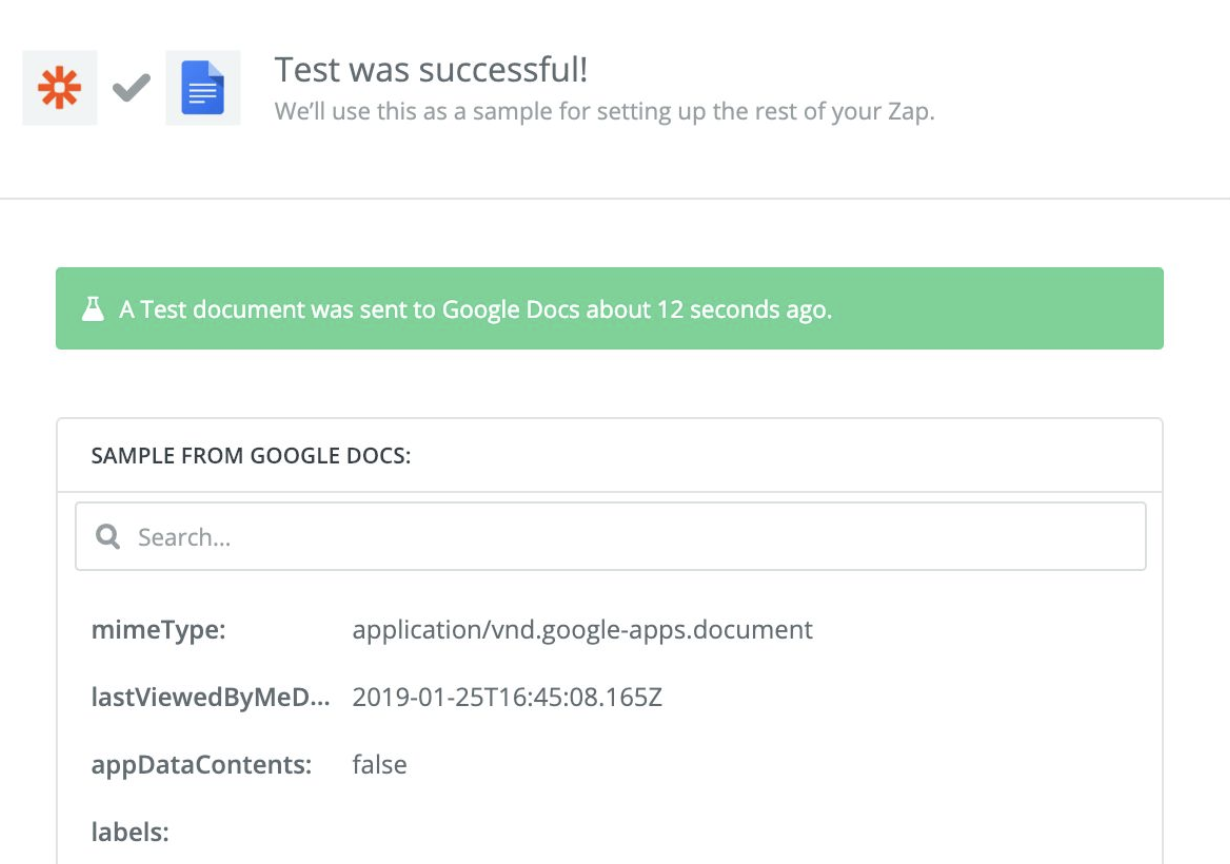
Now you can go to the Google Docs folder you'd selected in Step 11. There, you should find your completed template.
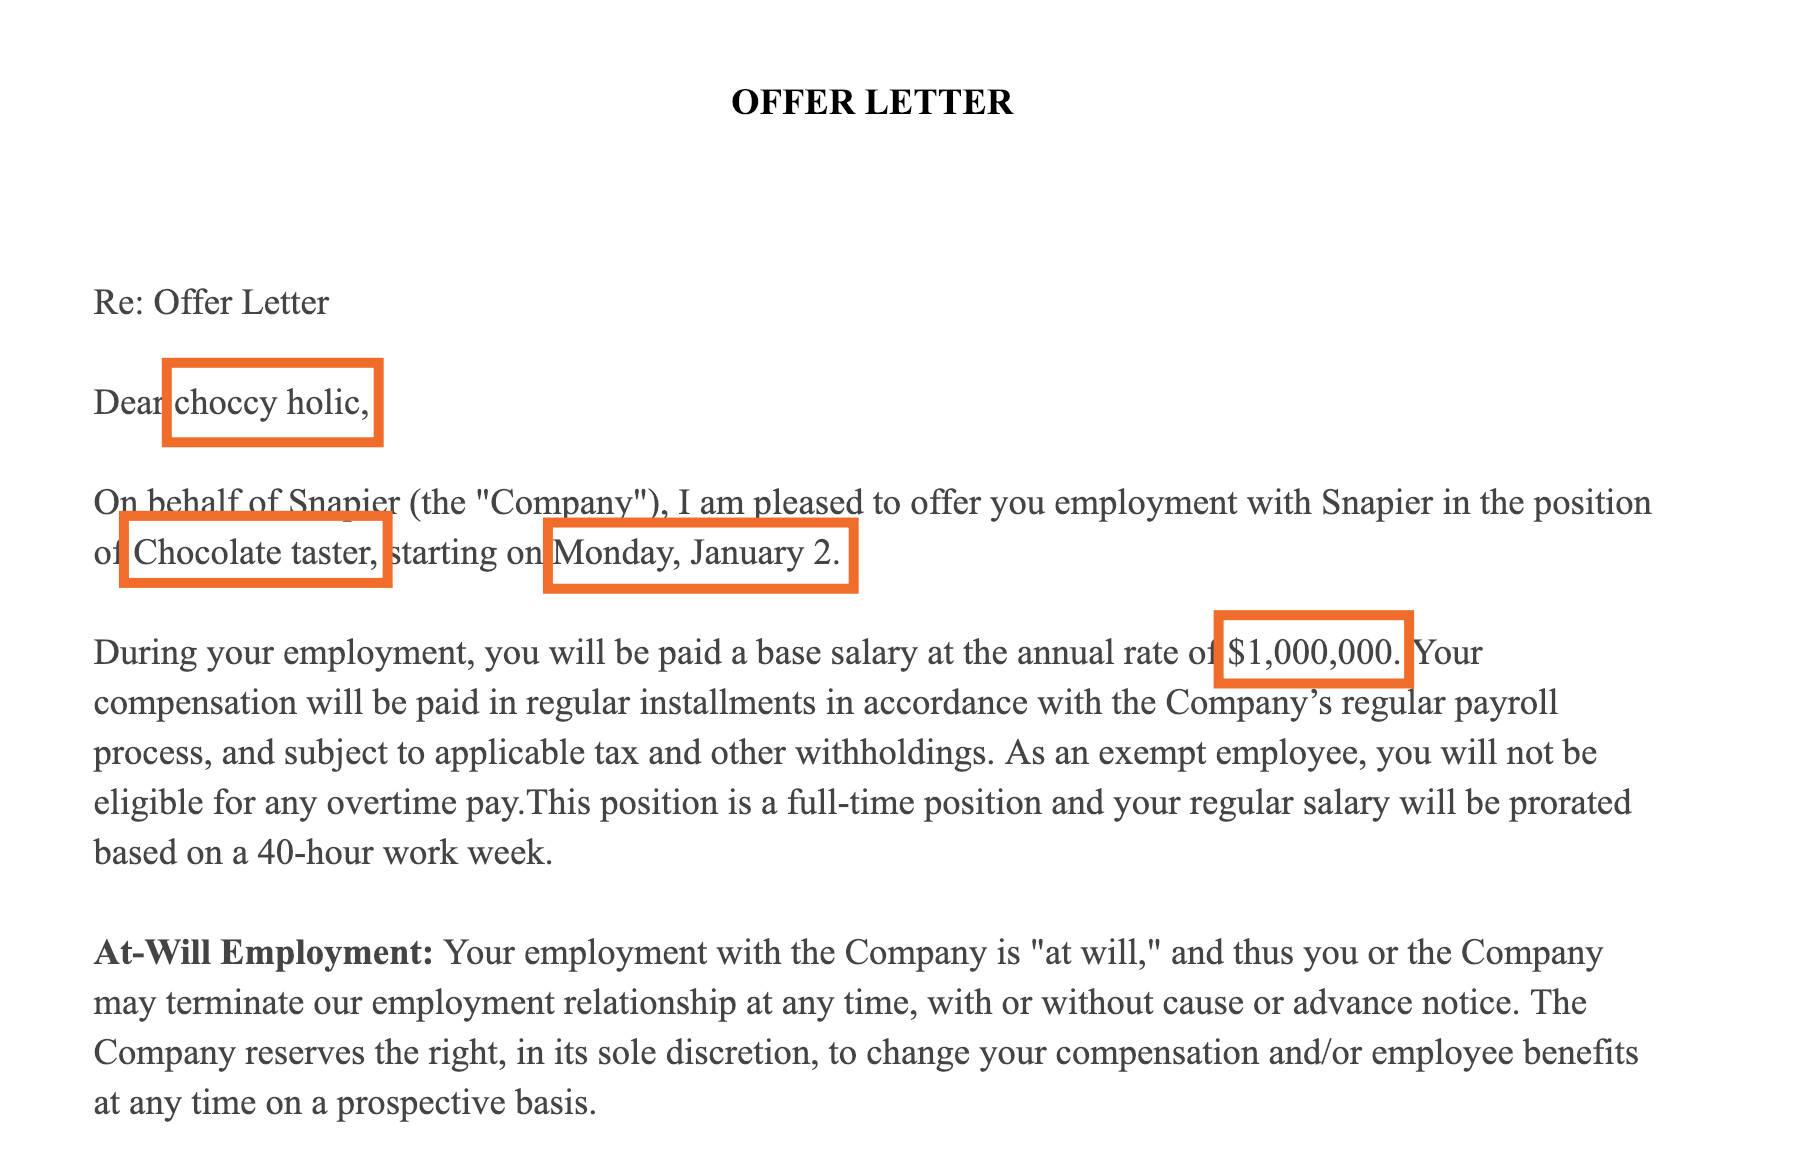
Now, every time you move a candidate to the "Made Offer" stage, this template will be automatically filled in, with zero manual work required from you.
Want to take the process one step further? You can add a step to your Zap that would automatically send that offer letter to the user. So with one simple drag into a new stage in your HR software, you've created the offer letter and sent it to the candidate.
Remember, this is just one example of how you can use Zapier to autopopulate your Google Docs templates. Why not send your LinkedIn updates to your resume template? Or send incident reports from your dashboard software to a Google Docs template to kick off documentation for attending to the issue? Your options are only limited to the tools in your tech stack.
from The Zapier Blog http://bit.ly/2E2ixa4
- Get link
- X
- Other Apps
Comments
Post a Comment