Getting your online store up and running is work enough, and keeping your customers updated on new products in your store can sometimes feel like a second full-time job. If you’ve ever spent hours manually copying customer email addresses into a spreadsheet, or uploading a CSV file to a newsletter app only to find out that it wasn’t formatted correctly, this Zap is for you.
“Zaps” are automated workflows that help save you time and energy by taking care of those repetitive tasks, like signing up new customers for your newsletter. If you use Shopify and Mailchimp, this Zap can take care of all of that for you in 6 steps:
- Set up your Shopify store, and make sure there is at least one Customer.
- Sign into your Mailchimp account, and make sure there is at least one Audience.
- Click the Use this Zap button below to use our template (it will prompt you to create a Zapier account if you haven't already).
- Sign in to Shopify when prompted and customize your trigger.
- Sign in to Mailchimp and customize how you'd like the customer’s info sent to your Audience.
- Test your Zap and turn it on.
If you have a mailing list in an app other than Mailchimp, we’ll have some Zap Templates at the end of this tutorial to help you get started!
Note: Be sure you're signing people up for communication they've opted-in to receive.
Before you begin
To set up this Zap using information unique to your store, you’ll want to log into Shopify and make sure that at least one Customer has been created. This guide from Shopify walks you through locating your Customer settings, and creating a new Customer if one hasn’t been created already.
Mailchimp uses “Audiences” to help keep track of your subscribers. You most likely created on when you first signed up for Mailchimp, but just in case this guide can help you create a new one. Mailchimp recommends that you have one “primary” audience that subscribers can be added to, then use tags and segments to help organize them down the road.
Connect Shopify and set up your trigger step
To get started, we’ll be using the Shopify “New Customer” trigger, which prompts your Zap to run each time a new customer is created in Shopify. That way, each time a new customer makes a purchase or provides their email address in your Shopify store, this workflow will run.
Go ahead and select Try It on the template below to create a new Zap with the Shopify “New Customer” trigger and Mailchimp “Add/Update Subscriber” action already added in.
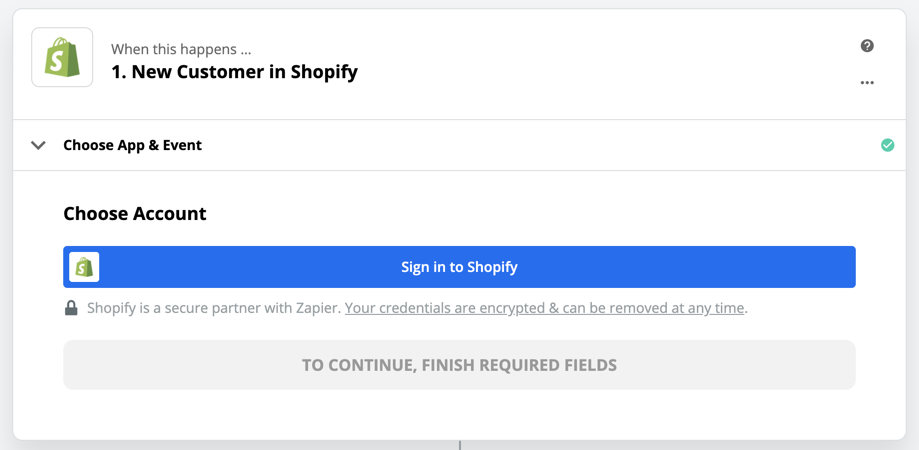
Starting with the Shopify trigger, the first step will be to connect your Shopify account. Select Sign in to Shopify and a pop-up window will appear, prompting you to log into Spotify.
Once your Shopify account is connected, select Continue in the Zap, and it will ask you to test the trigger.
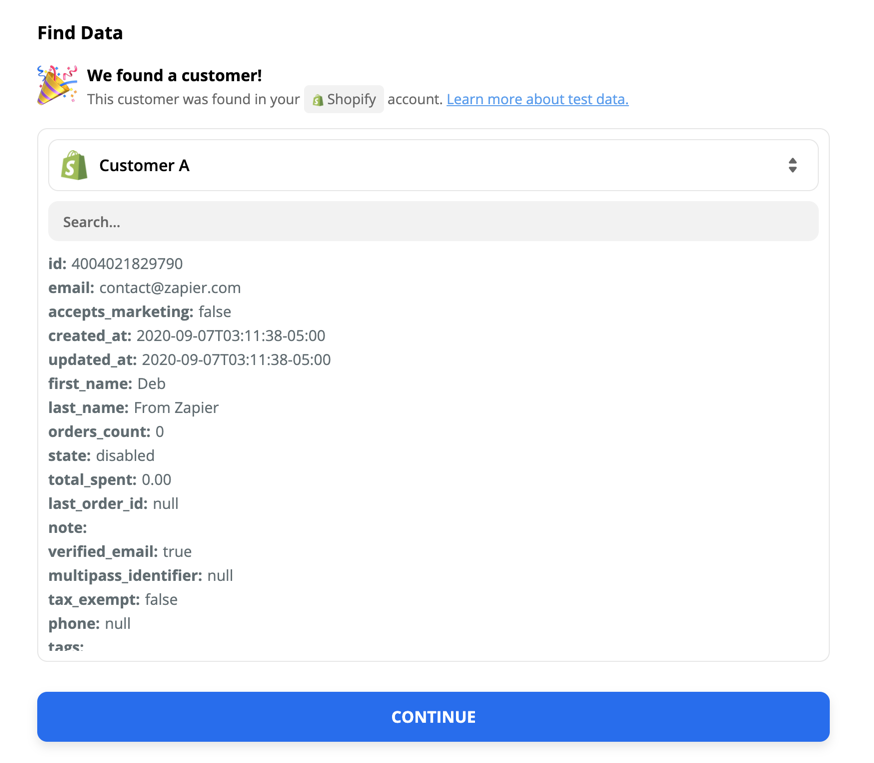
Testing the trigger is important because it tells the Zap to ask Shopify for an example of a recent Customer, which helps you make sure that the Zap is set up correctly. When a Customer’s information appears, select Continue to move on to the next step.
Connect and customize Mailchimp
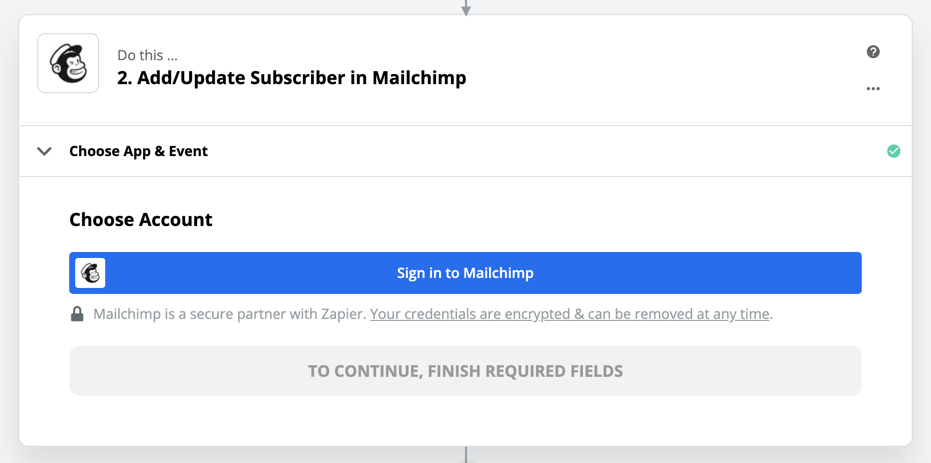
In the next step, you’ll be asked to select the Mailchimp action that the Zap should perform after it is triggered. To add new subscribers, or update existing ones, select Add/Update Subscriber (using the Zap Template above will automatically select that option). Select Continue, and connect your Mailchimp account when prompted.
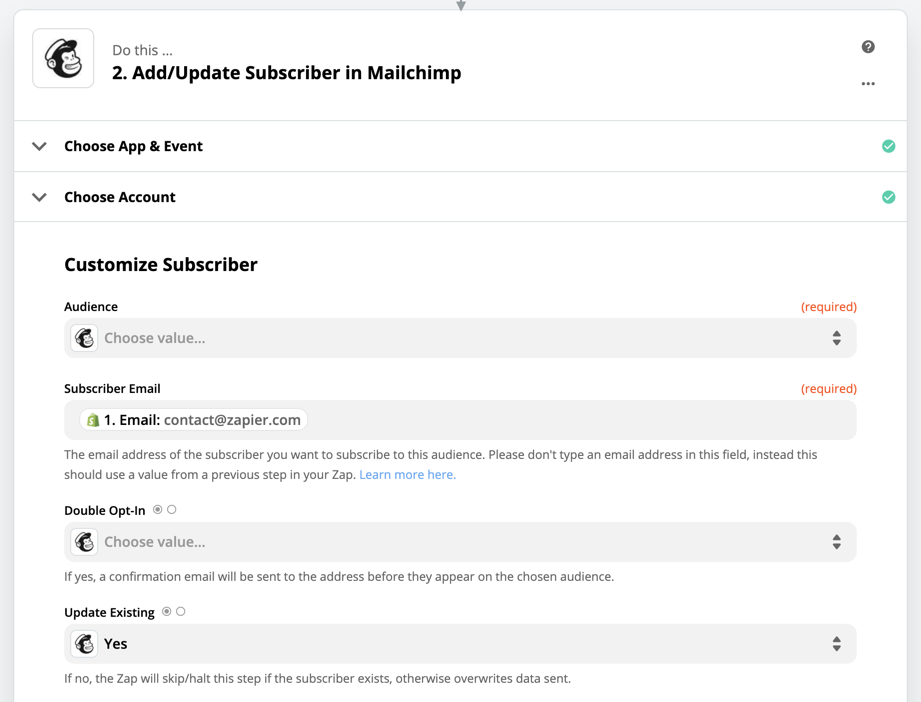
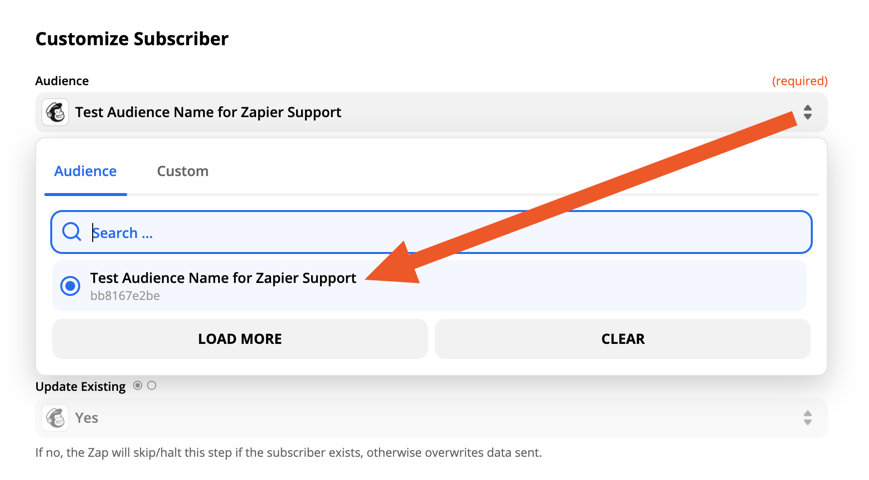
After signing into Mailchimp, select Continue again and you’ll be prompted to “map” data from Shopify to the Mailchimp action. This is how Mailchimp knows which email to use, and what audience to subscribe them to.
The two required fields are Audience and Subscriber Email. When you click on Audience, a dropdown menu will appear showing all of your Mailchimp audiences. In our example, we have a test audience for Zapier’s support team.
In the Subscriber Email field, you can click anywhere in the field, and select the Email value that appears in the dropdown menu.
That will “map” the value to that field, so that each time the Zap is triggered by a new Shopify customer, the Zap will send their email address to Mailchimp in the “Subscriber Email” field.
There are several other optional fields that can be filled in using that same method, such as the subscriber’s First and Last Names, Phone Number, and Birthday. Spend some time reviewing those fields, to see if you’ll want to save that information to Mailchimp as well.
Learn more about setting up Zap actions.
Once all of the required fields have been filled in, you can select Continue at the bottom of the action, and you’ll be prompted to test it.
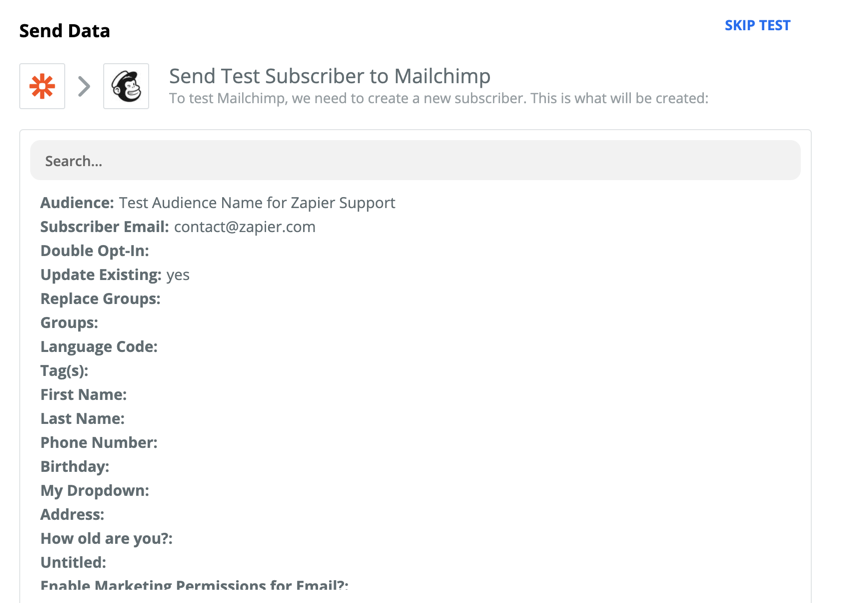
Test your Zap
Testing the Mailchimp action will create a new subscriber in the Audience you selected earlier, and you can see all of the data that it will send to Mailchimp in the “Send Data” section:
If your sample data contains a real customer’s email address, and you’re not ready to sign that customer up for your mailing list, select Skip Test. Otherwise, select Test & Continue to send the information to Mailchimp.
Once the test has been performed or skipped, you can turn the Zap on! While it is on, any new customers in Shopify will trigger the Zap, and be automatically sent to Mailchimp as new subscribers in your Audience.
Related Workflows
If you’d like to save time and automate your mailing list, but don’t use Mailchimp, never fear! Zapier integrates with lots of other newsletter applications, and these Zap Templates can help you get started with other popular options. If you see the app you use, select Try It to create a new Zap and start automating.
from The Zapier Blog https://ift.tt/2Fkbj4L


Comments
Post a Comment