Once you've set up your Shopify store and started taking orders, keeping track of your sales is vital to maintaining a successful business. Rather than manually tracking orders in a spreadsheet, or downloading CSV after CSV, Zapier can help you automatically keep an up-to-date order log.
Using Zapier, you can connect Shopify to thousands of apps and services to help keep track of incoming orders, and save you time along the way. If you haven't already, sign up for Zapier and get started with your free 14-day premium trial.
In this example, we'll use Google Sheets to store and track our order information. If you use other similar apps, we'll include some additional templates at the end of this tutorial to help you get started.
To automatically keep track of your Shopify orders, we create a workflow—we call them Zaps— that connects Shopify to Google Sheets. Zaps always have one "trigger," which is an event that happens in one app, and at least one "action," which is something we want to do in another app.
These are the steps involved:
Set up your Shopify store, and make sure there has been at least one order placed.
Create your spreadsheet in Google Sheets and label your columns.
Click the Use this Zap button below to use our template (it will prompt you to create a Zapier account if you don't have one already).
Sign in to Shopify when prompted and customize your trigger.
Sign in to Google Sheets and customize how you'd like your order info sent to your spreadsheet.
Test your Zap and turn it on.
We'll walk you through each step in this tutorial, using a spreadsheet of new orders as an example.
Before you begin
When you first sign up for Shopify, you’ll be walked through all of the necessary steps to name and publish your online store. If your store is still brand new and no orders have been placed, you’ll need to place a test order that includes at least one of your store’s products.
To create the Google Sheets spreadsheet that will receive the information, you can head to sheets.new. Be sure to use the first row to label your each column with the information you want to track from your Shopify orders. This can be anything that you want to keep track of, such as the customer's name, or the SKU of the items that are purchased. Here's a screenshot of a spreadsheet I created as an example:
If you need to create a new Google Sheet, you can navigate to sheets.new and one will automatically open for you, if you're logged in to your Google account.
Connect Shopify and set up your trigger step
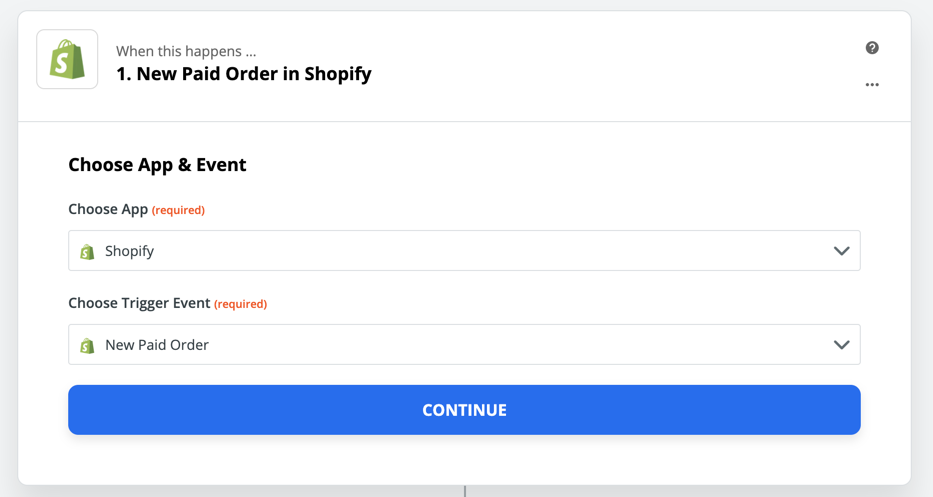
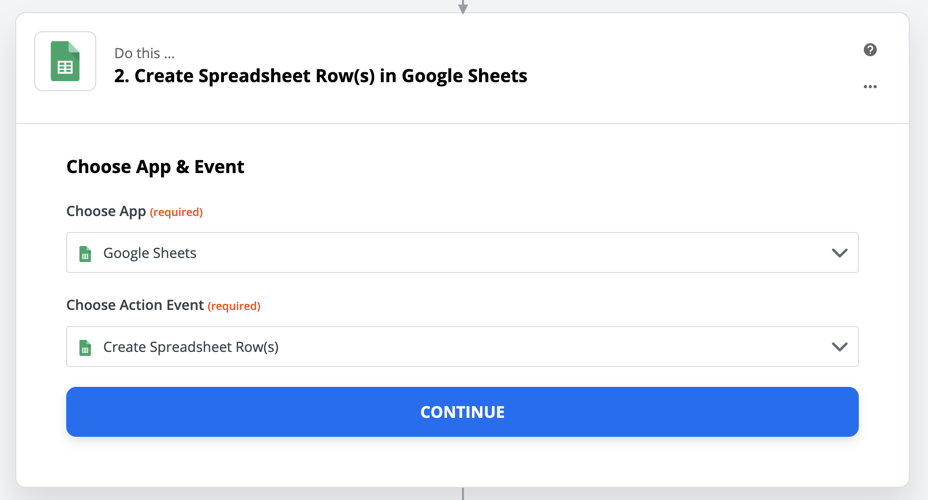
This template automatically creates a new Zap with Shopify's "New Paid Order" trigger, and Google Sheets' "Create New Spreadsheet Row(s)" action to help us get up and running:
We'll work our way down, starting with the Shopify trigger. Select Continue to confirm that you want to use the "New Paid Order" trigger event, and you'll be prompted to log into your Shopify account.
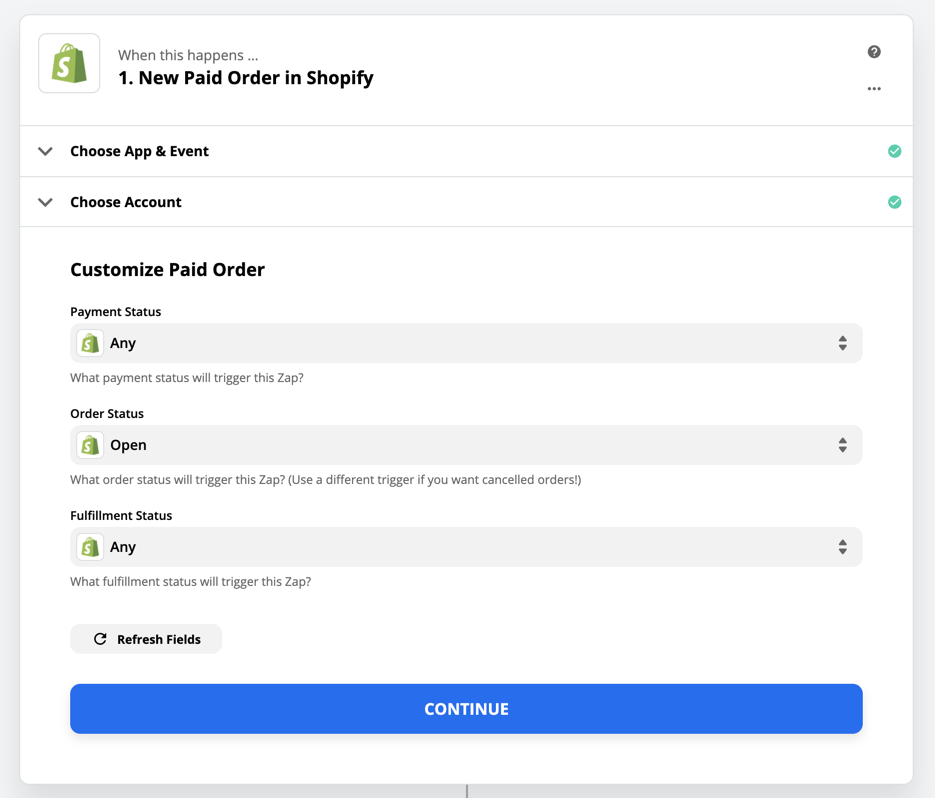
Once your Shopify account has been connected, you'll be given three fields to adjust:
- Payment Status
- Order Status
- Fulfillment Status
Each of these help us further clarify which orders will be sent to Google Sheets. You can come back to these settings later if you like. Leaving them as-is will mean that any new order will trigger the Zap, regardless of whether it has been paid or fulfilled.
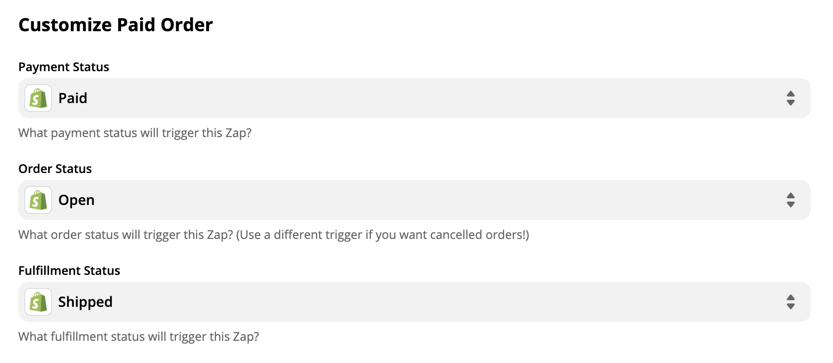
As an example, if you would prefer that only orders that have been paid and shipped trigger the Zap, you can update the options to match by choosing those options from the Payment Status and Fulfillment Status fields.
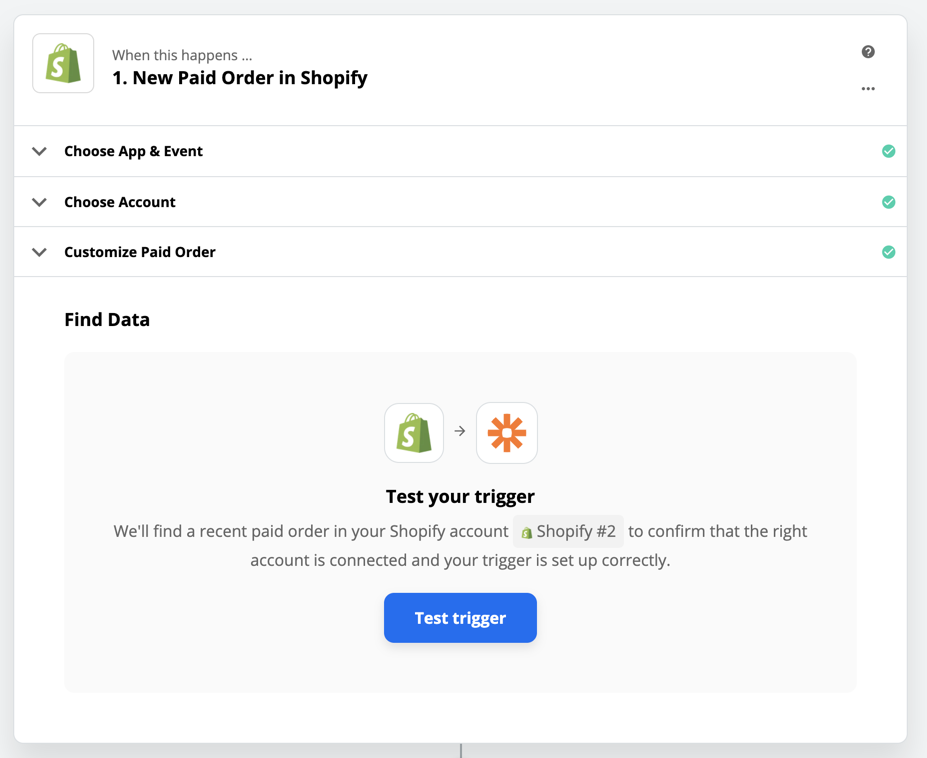
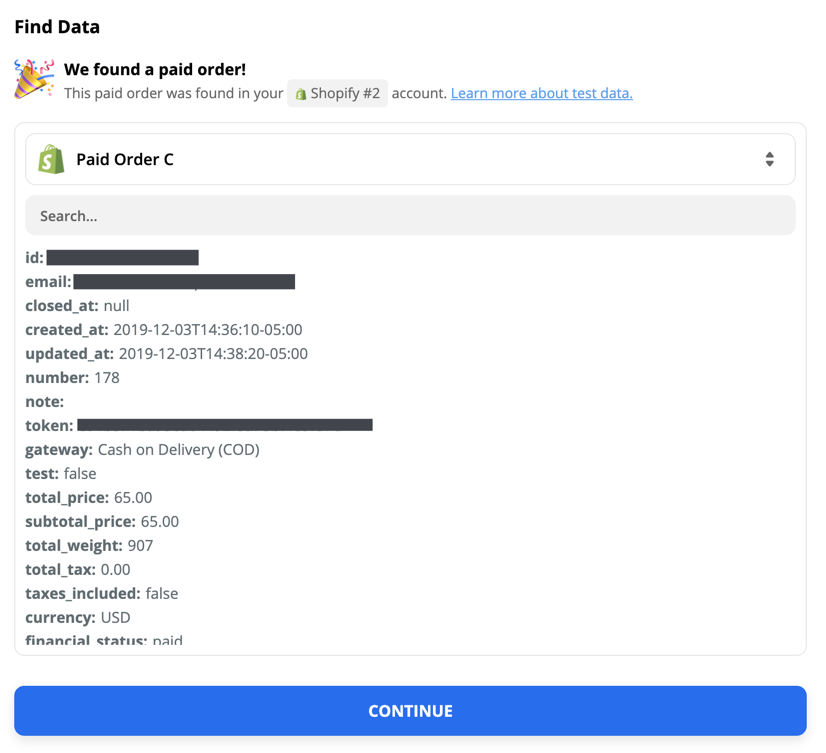
Select Continue, and you'll be prompted to test the trigger. This tells the Zap to ask Shopify for a recent order from your store, which we can use as an example for setting up the rest of the Zap.
Once some sample data appears, we're ready to move on to the next step!
Connect and customize Google Sheets
Select Continue to move on to the Google Sheets action.
Like before, you'll be prompted to select Continue again, confirming that we want to use the "Create Spreadsheet Row(s)" action. This action creates multiple spreadsheet rows, so it can create one row for each product in the order. Select Continue, and you'll be prompted to connect your Google Sheets account.
After connecting your account, you'll be asked to select a spreadsheet to create new rows on. Select the Sheet you configured as you began working through this tutorial.
Learn more about setting up your Google Sheets spreadsheet to work with Zapier.
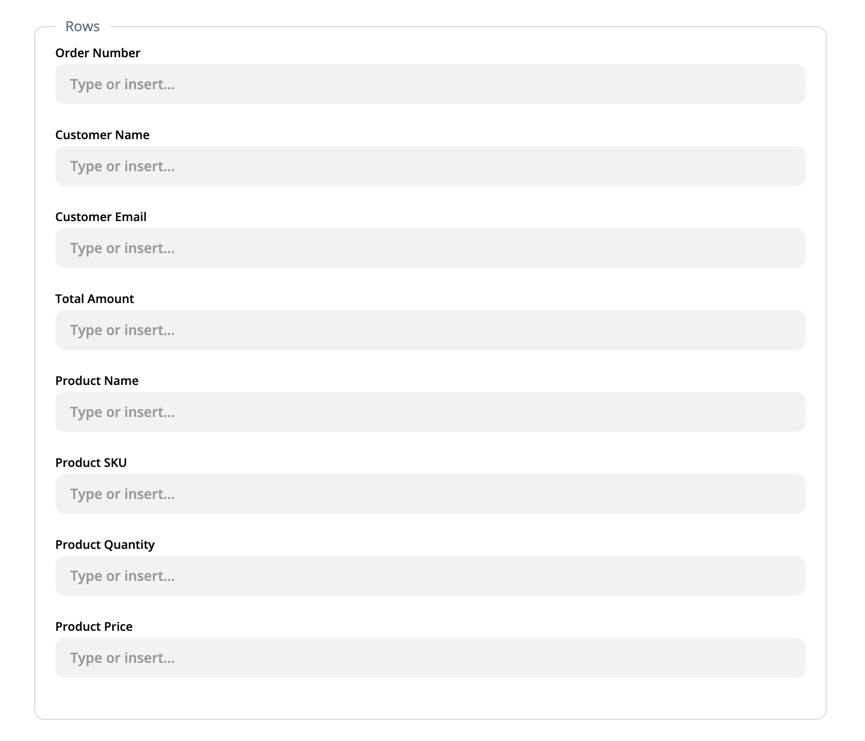
In the Zap, select your spreadsheet, and the columns you've titled will appear as fields to fill in.
Each time a new order comes in that matches our conditions, Zapier will send the information we designate in this step over to the corresponding column in our Google Sheets spreadsheet.
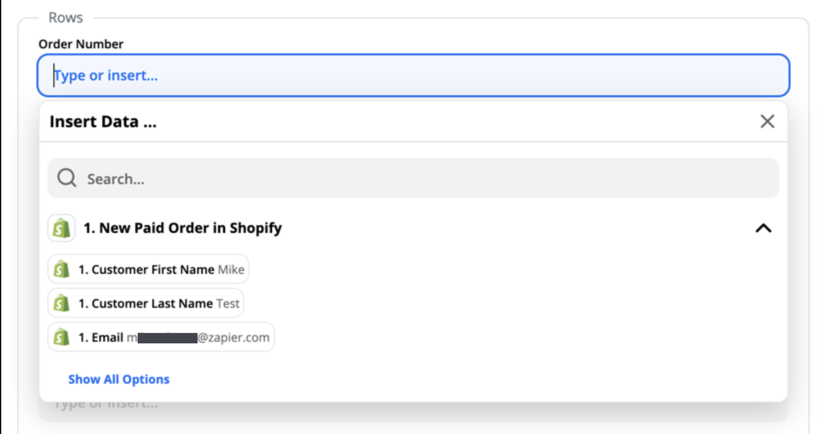
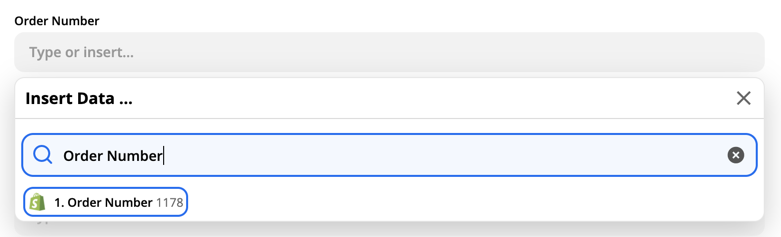
To send information about our order to Google Sheets, select the first field, and a dropdown menu will appear, giving us a list of values provided by the trigger.
You can select Show All Options to see the full list of values that Shopify provides, or use the Search field to search for one value in particular. In this case, searching for "Order Number" gives us the exact value we need.
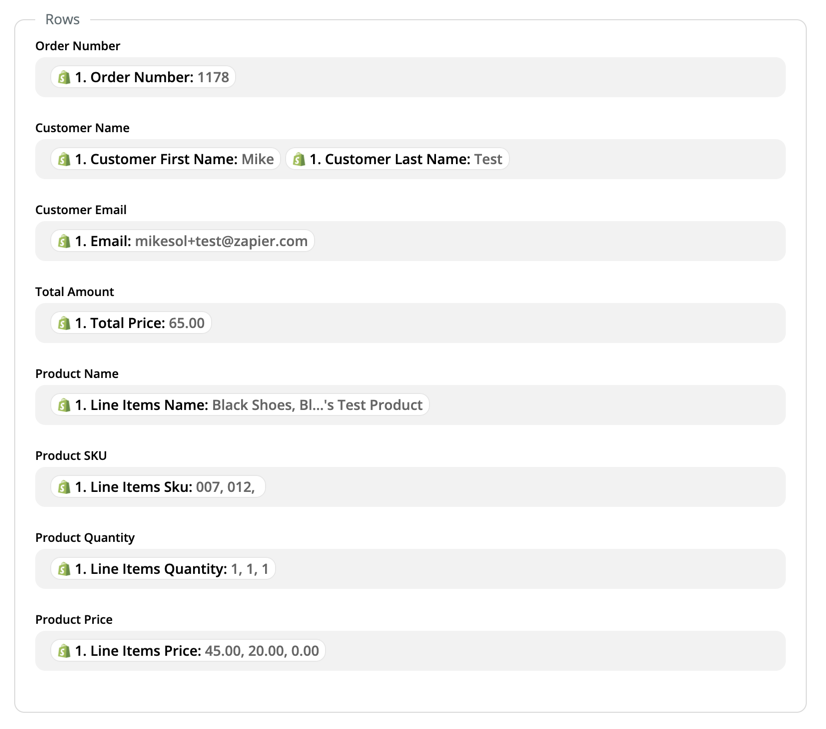
Select the value, and it will be automatically mapped to that field. Now, each time the Zap is triggered by a new paid order, that order's "Order Number" will be sent to the "Order Number" column in my Sheet. We can fill in the rest of the fields using those same steps, which gives us an end result that looks like this:
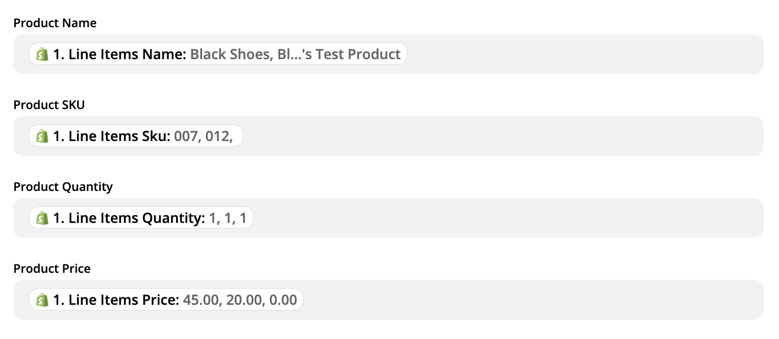
Notice the fields labeled "Line Items"?
This means that Shopify is sending us multiple values in one. Only certain actions support line items, and luckily Create Spreadsheet Row(s) is one of them. This means that it will create a new row for each line item (or product) in the order.
Learn more about using line items in Zaps.
Test your Zap
Select Continue once all of the fields have been filled in, and you'll be asked to test the action. This lets us make sure that everything is set up correctly, and get an idea for how this Zap will run after it's been activated. Select Test & Review then head to your spreadsheet to see the new rows it creates.
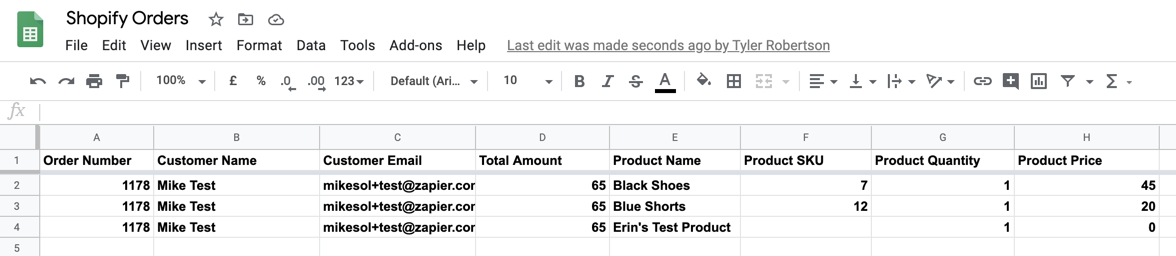
Success!
Notice how some cells have repeating information? These are cases where the information is the same across all lines, such as the order number:
Cases where the cell is blank means that that specific line did not have a certain value. For example, in my test order, "Erin's Test Product" doesn't have a SKU, so that cell was left alone:
Note: Testing the action step will create new rows in your spreadsheet.
Now that the Zap is successfully creating new rows in your spreadsheet, you're ready to turn the Zap on! Select Done Editing and you'll be presented with a big, friendly button that lets you do just that.
Now any time a new order is made in Shopify, its information will be automatically saved to Google Sheets!
Saving information to other apps
Want to easily keep track of new paid Shopify orders, but don't use Google Sheets? We’ve got you covered! These Zap templates can help you build Zaps very similar to the above, using other popular apps.
from The Zapier Blog https://ift.tt/33PEHcP


Comments
Post a Comment