Maintaining a relationship with your customers often means spending a lot of time and energy after making that initial sale, and making good use of a Customer Relationship Management (CRM) application can help build a loyal customer base for your business more easily.
Using Zapier, you can let automated workflows called “Zaps” take the new customers you’ve made in Shopify, and automatically add them to your CRM, so that you can save time and focus on the work that really matters.
For this example, we’re going to use Salesforce, but the concepts we’ll show will work with any of the CRM applications that integrate with Zapier. You can see the full list here.
Here are the steps involved:
- Set up your Shopify store, and make sure there is at least one Customer.
- Click the Use this Zap button below to use our template (it will prompt you to create a Zapier account if you haven't already).
- Sign in to Shopify when prompted and customize your trigger.
- Sign in to Salesforce and customize how you'd like the customer’s info sent to your CRM.
- Test your Zap and turn it on.
If you don’t use Salesforce, we’ll also provide several alternate Zap Templates at the end of the tutorial, to help you get up and running quickly with the CRM of your choice.
Before you begin
To set up this Zap using information unique to your store, you’ll want to log into Shopify and make sure that at least one Customer has been created. This guide from Shopify walks you through locating your Customer settings, and creating a new Customer if one hasn’t been created already.
You’ll also want to log into Salesforce or your CRM of choice, and make a note of all of the information you currently store for contacts. For example, are first name and last name separate, or are they saved as a single “name” field? Do typically save phone numbers, or just emails? This will help the last few steps of setting up the Zap go quicker.
Connect Shopify and set up your trigger step
To get started, we’ll be using the Shopify “New Customer” trigger, which prompts your Zap to run each time a new customer is created in Shopify. That way, each time a new customer makes a purchase or provides their email address in your Shopify store, this workflow will run.
Go ahead and select Try It on the template below to create a new Zap with the Shopify “New Customer” trigger and Salesforce “Create Record” steps already added in.
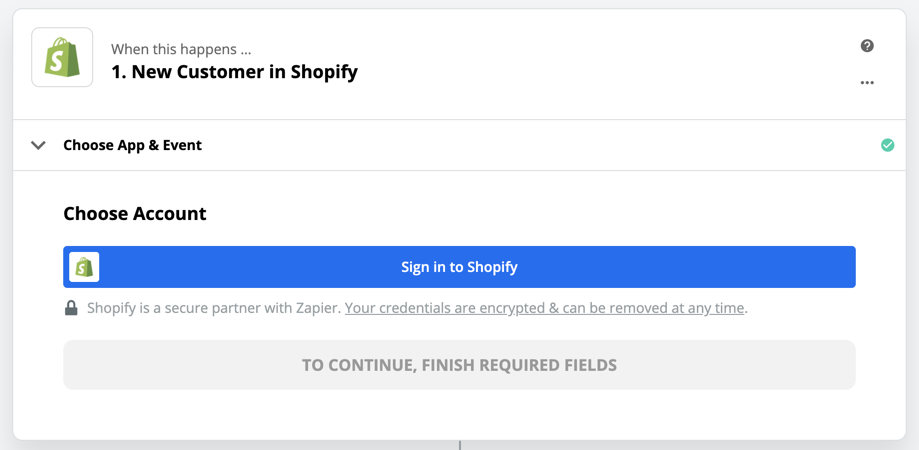
We'll work our way down, starting with the Shopify trigger. Select Continue to confirm that you want to use the "New Customer" trigger event, and you'll be prompted to log into your Shopify account.
Once your Shopify account is connected, select Continue, and you’ll be prompted to test the trigger.
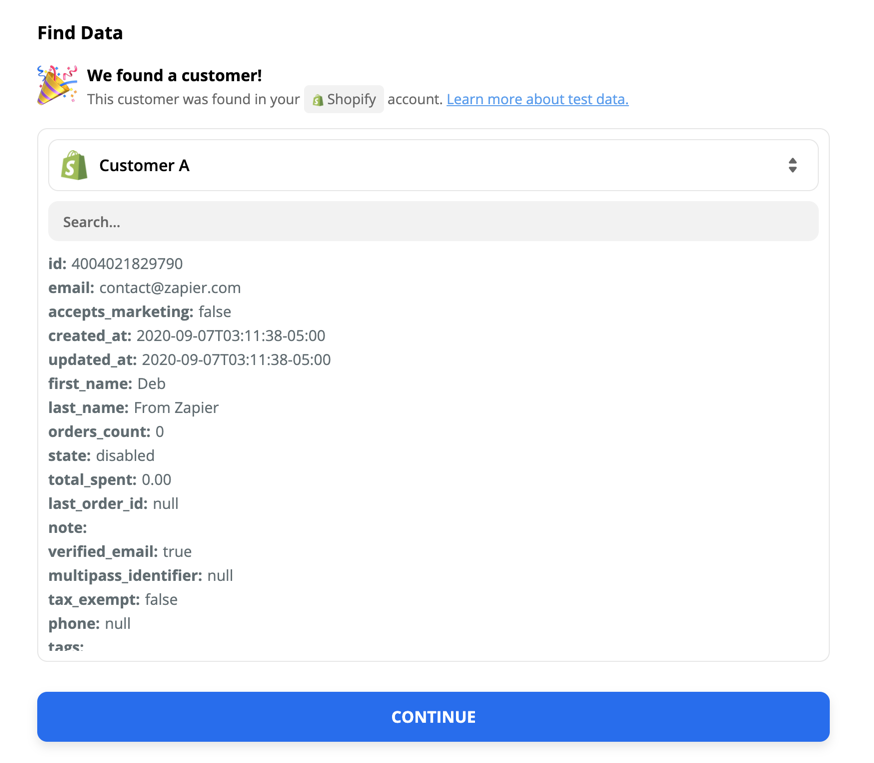
When you test the trigger, Zapier will ask Shopify for the most recent customer in the store, so you can use their information as an example for setting up the rest of the Zap. If you don’t have any customers yet, select Skip Test and Shopify will provide a fake customer to use as sample data instead.
Once you see some sample data appear, select Continue and head to the next step, where we’ll set up the Salesforce “Create Record” action.
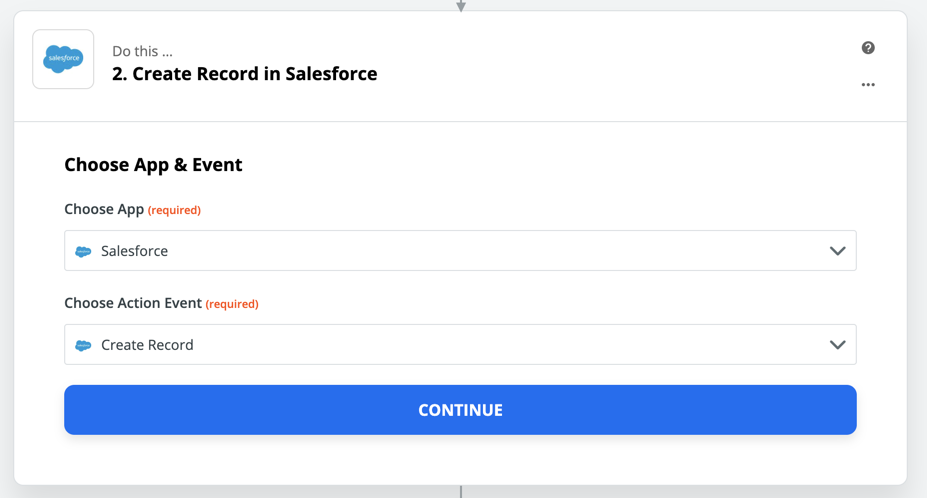
Connect and customize Salesforce
Just like with Shopify, the first step here is to select Continue to confirm that you’d like to use the “Create Record” action.
Then, select Sign in to Salesforce and connect your Salesforce account.
Once Salesforce has been connected, select Continue and you’ll be taken to the next step, where we can define how the Contact is created.
First, if it is not already selected, make sure to select Contact in the Salesforce Object field.
Salesforce’s “Create Record” object allows us to create many different object types, depending on what is available in your Salesforce account. For example, if you would prefer to create Leads instead, you can select “Lead” from that list.
The fields that appear after “Salesforce Object Type” will vary, depending on your Salesforce account’s settings. If a field you were expecting to appear isn’t available, log into Salesforce and make sure that it is set up correctly. This guide can help troubleshoot any fields that still don’t appear:
https://ift.tt/3dlXXBu
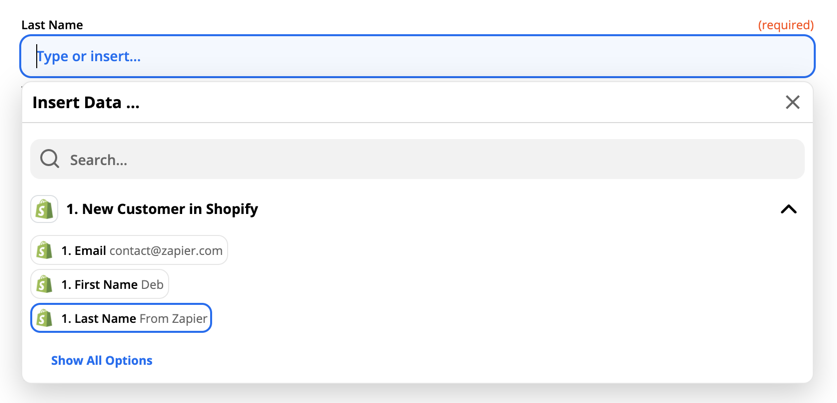
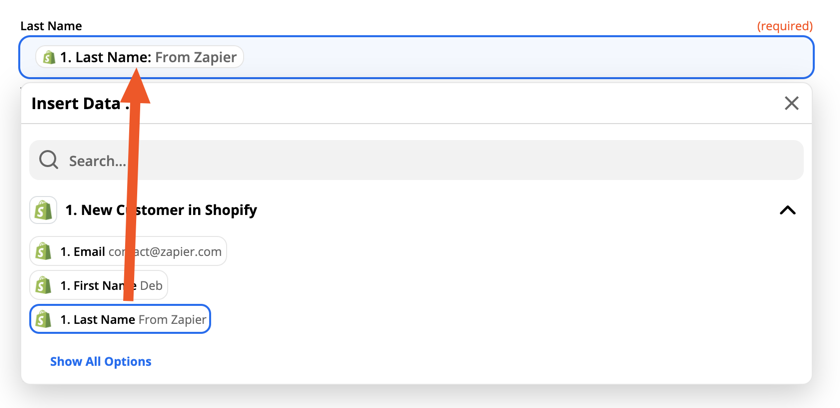
To make sure that data from Shopify is sent to Salesforce, we’ll want to “map” each field. To do that, click anywhere in the field, and a dropdown menu will appear.
If you see a value that matches what you need for the field, such as “Last Name” in the example above, click on it to map the value to that field. Once selected, you’ll see the value appear as a “pill” in the field, meaning that each time the Zap is triggered by a new contact in Shopify, the value for that new customer will be sent to Salesforce in that field. For example, each time our Zap runs, it will send the “Last Name” value in the “Last Name” field.
If the value you need doesn’t appear right away, you can select Show All Options to see all of the values that the Zap received from Shopify, or use the Search bar to search for one value in particular.
Once all of the fields have been filled in to your liking, select Continue and you’ll be asked to test the Salesforce action.
Test your Zap
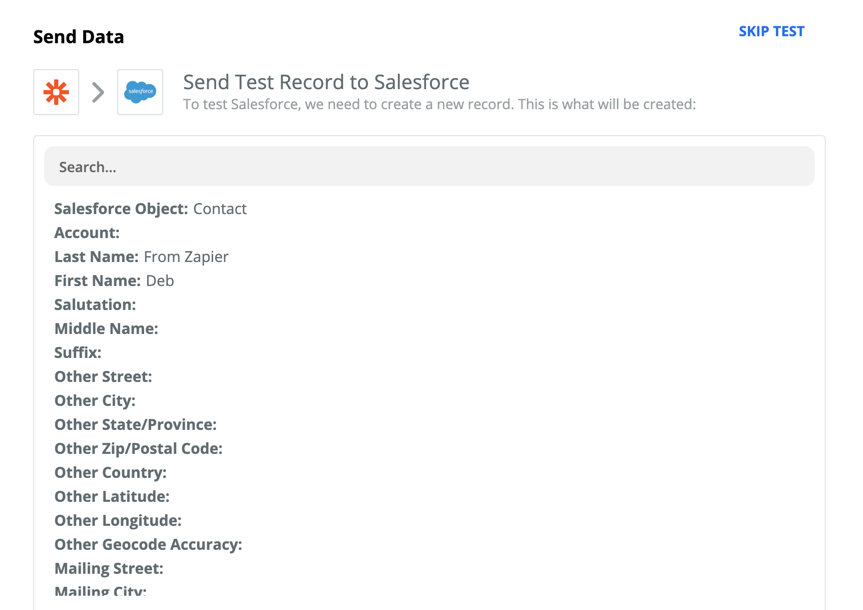
To make sure that everything is working correctly, you’ll be prompted to test the Salesforce action. This will create a new Contact record in Salesforce, using the sample data that you received from the Zap’s trigger. You can see everything the Zap will use for the new Salesforce Contact in the action’s “Send Data” section.
If you’d prefer to not create a new contact just yet, select Skip Test instead. Otherwise, select Test & Review and a new Contact will be created in Salesforce. Log into Salesforce to review that Contact, and make sure everything looks right to you. If anything looks out of place, you can head back a step to “Customize Record”, and adjust the fields there.
Once the action has been tested (or skipped), you can turn the Zap on!
While the Zap is on, each new customer received in Shopify will trigger the Zap, and be automatically sent to Salesforce as a new contact. To track how often that happens, you can review the Zap’s Task History, where each action will be listed for review later on:
https://ift.tt/1ynuhJa
Saving data to other CRMs
If you’d like to automatically add Shopify customers to your CRM, but you use an app other than Salesforce, the steps we’ve outlined above should still help you set up your Zap. Use any of the Zap Templates below to get started with the CRM of your choice.
from The Zapier Blog https://ift.tt/3798iA3


Comments
Post a Comment