How to get different results with one Zap
- Get link
- X
- Other Apps
We can all agree: Zaps give you superpowers.
But for the most part, Zaps with just one action are fairly one-note: when thing X happens, Zap makes Y happen. What if we want more?
By upgrading to any of Zapier's paid plans, you gain access to "multi-step" Zaps, which allow you to add multiple actions to the same workflow. Each time you add an action, you can double, triple, quadruple… quin-… tuple? your output! Now, instead of the Zap doing Y each time X happens, we can have it do Z, too (or A, or B, or… you get the point)!
Sometimes you might need things to happen in different ways, rather than only in a series. We're going to cover three different ways to increase the possibilities for each Zap, allowing you to set up more complex workflows and save even more time:
- Stick to the important things with Filters
- Add variety to an action with a Lookup Table
- Give your Zap more options with Paths
Stick to the important things with Filters
Filter by Zapier lets us set up rules for our Zaps, so they only continue if they absolutely have to. When the filter's conditions aren't met, the Zap stops, and no more tasks are used for that attempt. Using filters is a great way to cut down on the number of tasks your Zaps use.
Check out this help doc to learn more about tasks and how filters affect them.
Let's say I run a small online shop, and want to know whenever orders for certain products come through. I could set up a Zap that emails me for each new order, but then I'd end up manually reading through each email, archiving the ones that aren't what I need.
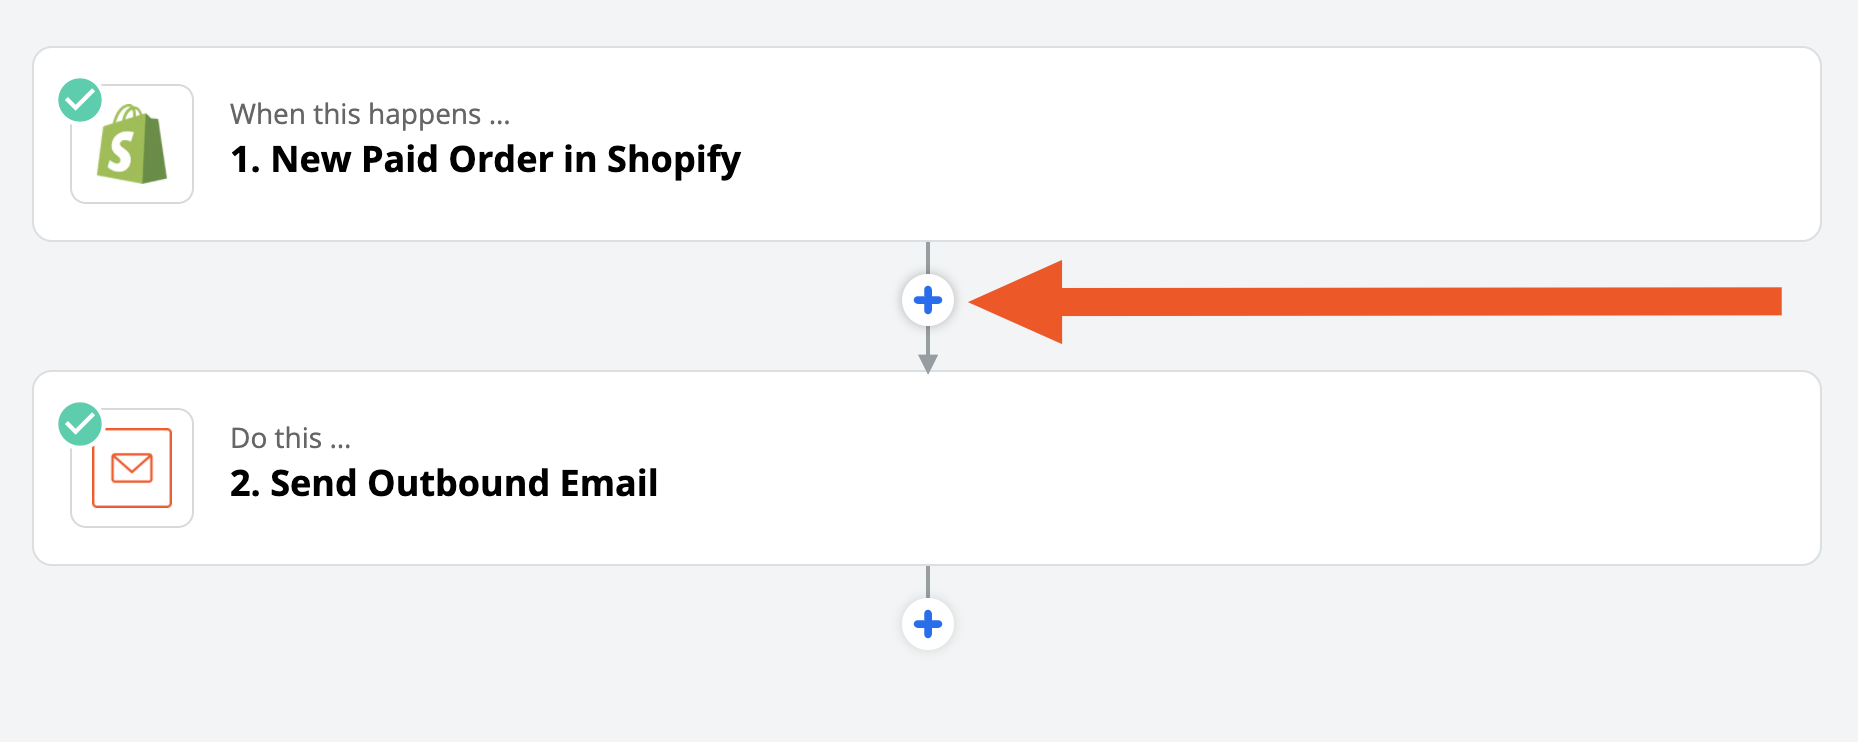
Instead we can add a Filter by Zapier step. To do that, we can click the plus icon between the trigger and action to add a new step in the middle of the Zap:
As a helper action, Filter will always be one of the top options:
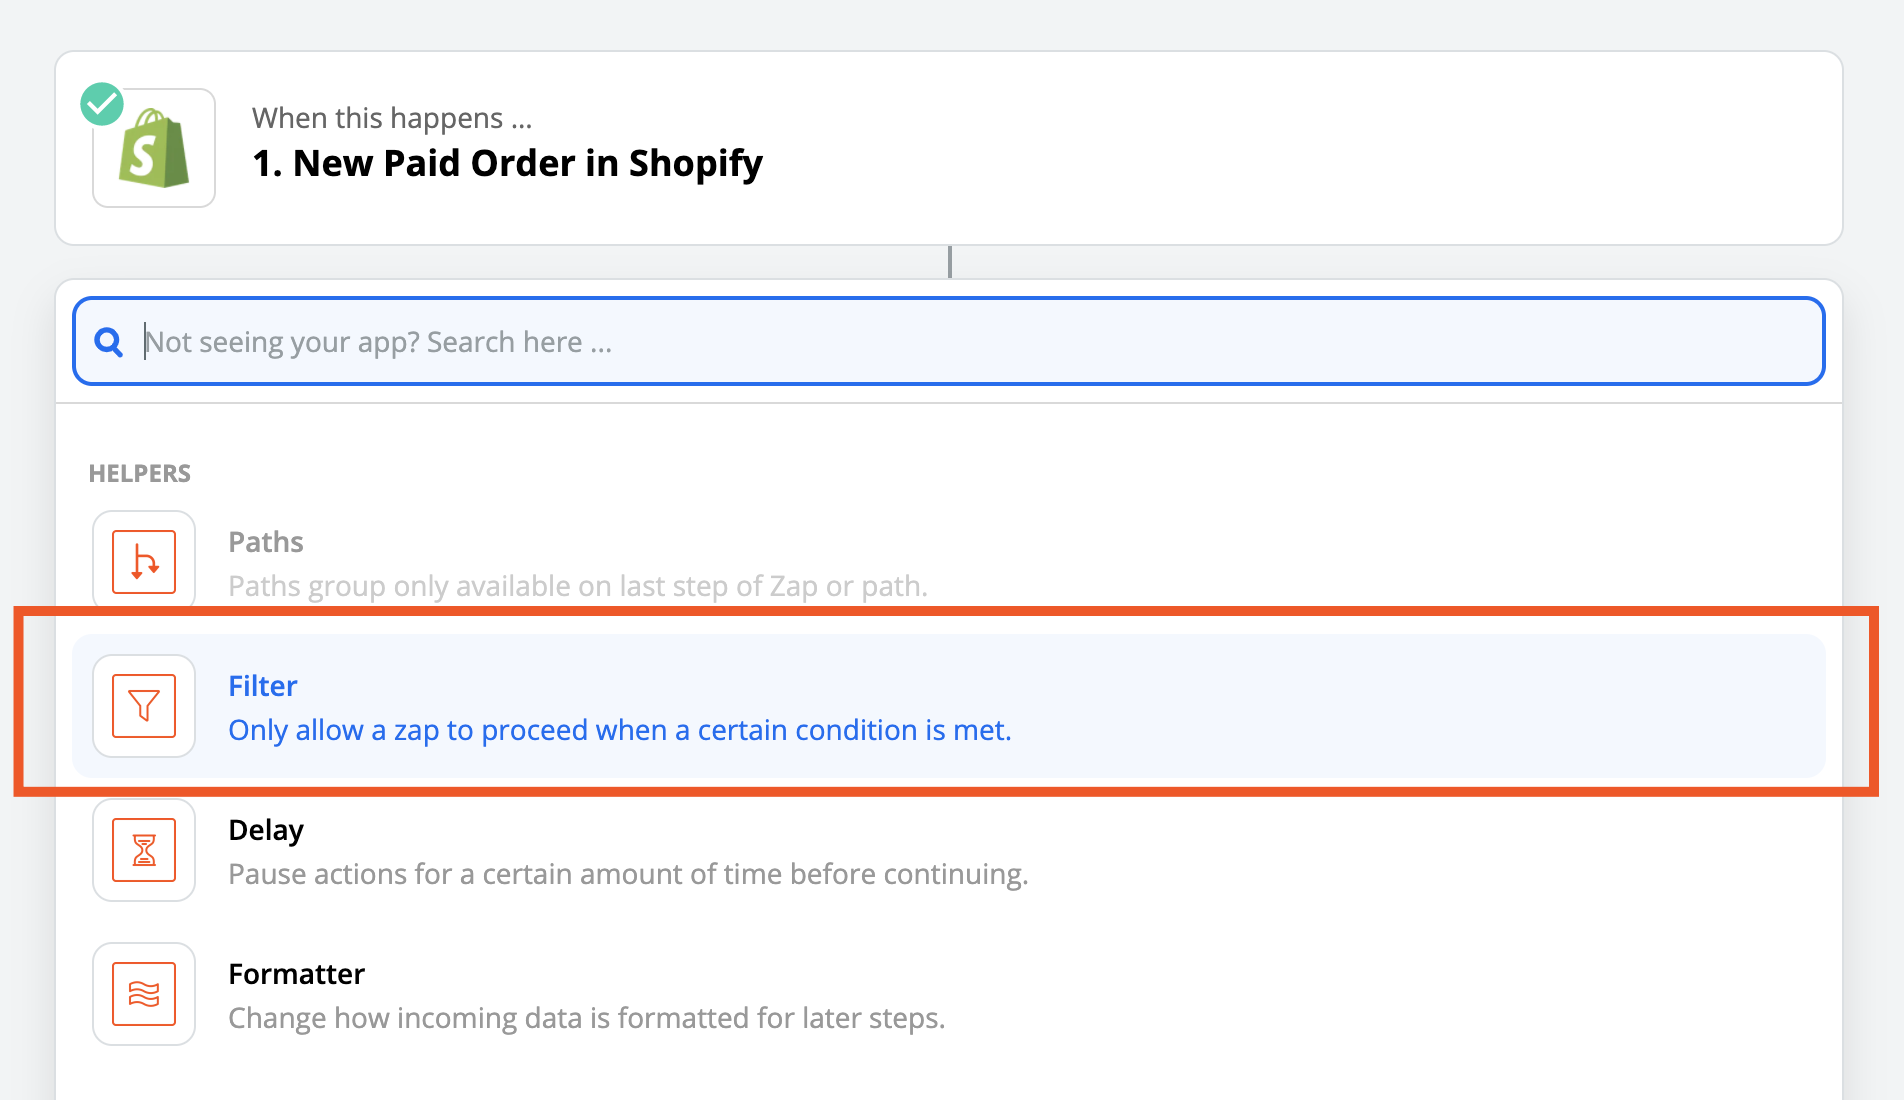
Select it, and you'll be presented with some blank fields:
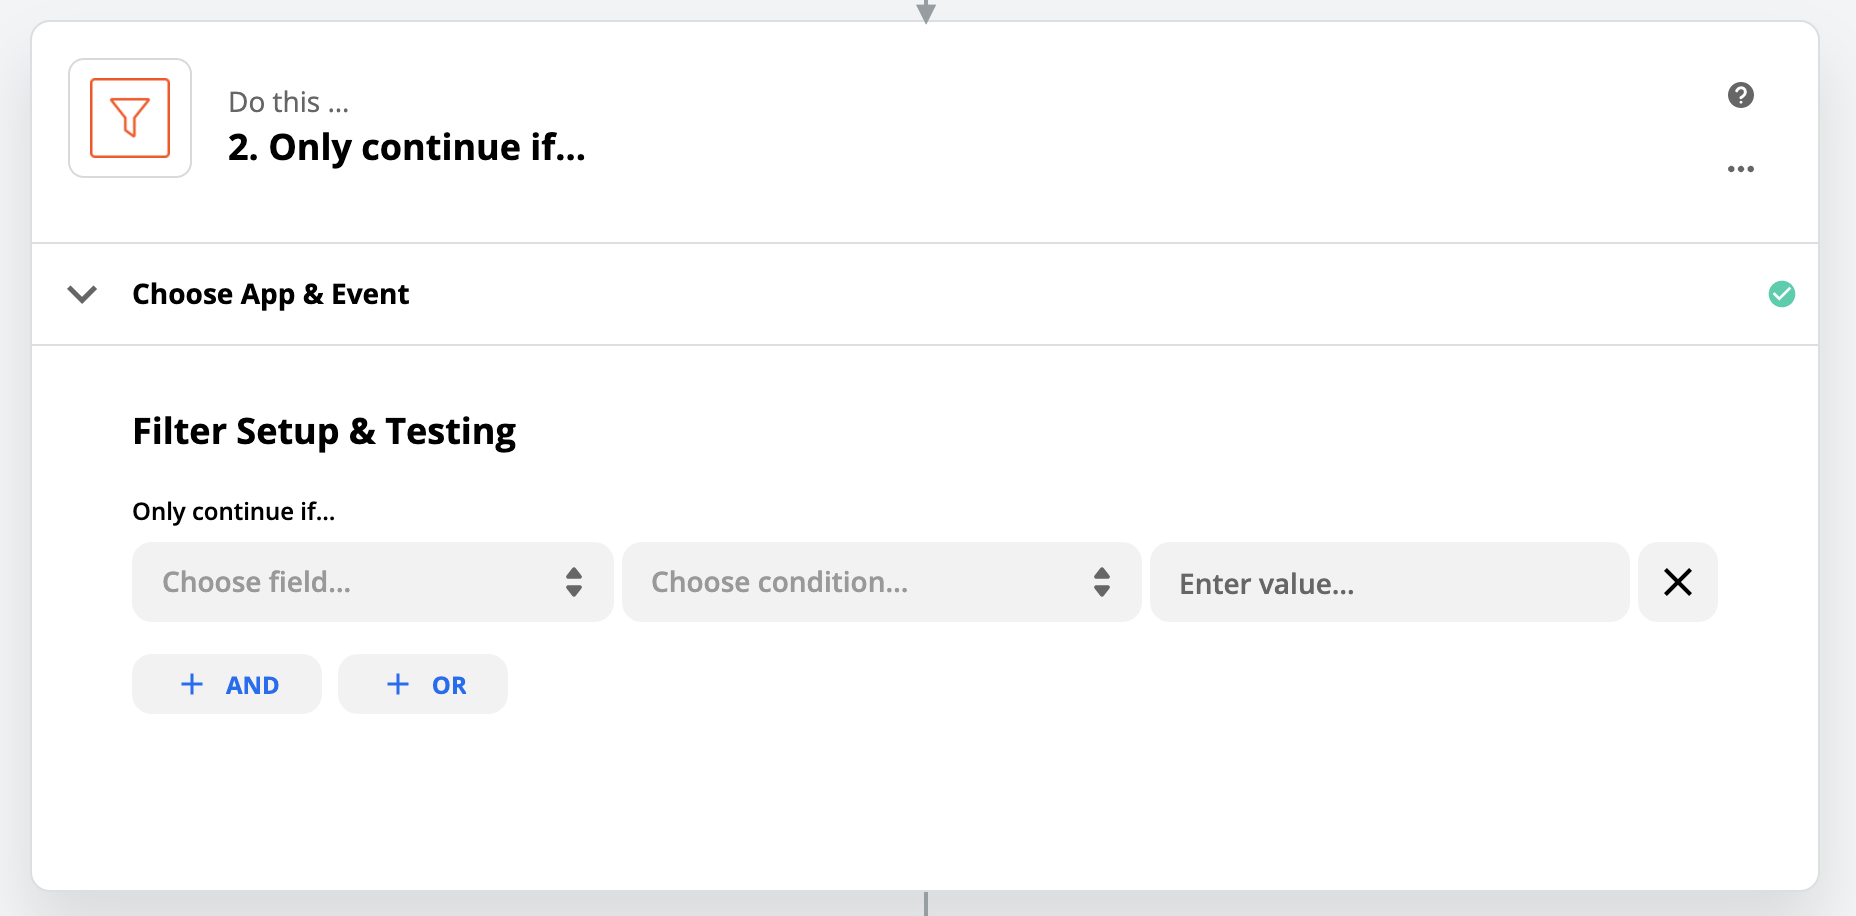
Moving from left to right, these fields are:
- Choose field: Something from a previous step in the Zap
- Choose condition: A kind of comparison we can make
- Enter value: Something we want to compare to
Clicking on the dropdown menu on the left will let us pick any value from the previous steps in our Zap. In this case, I want to check the names of the line items from the new purchase, so I pick Line Items Name for that field:
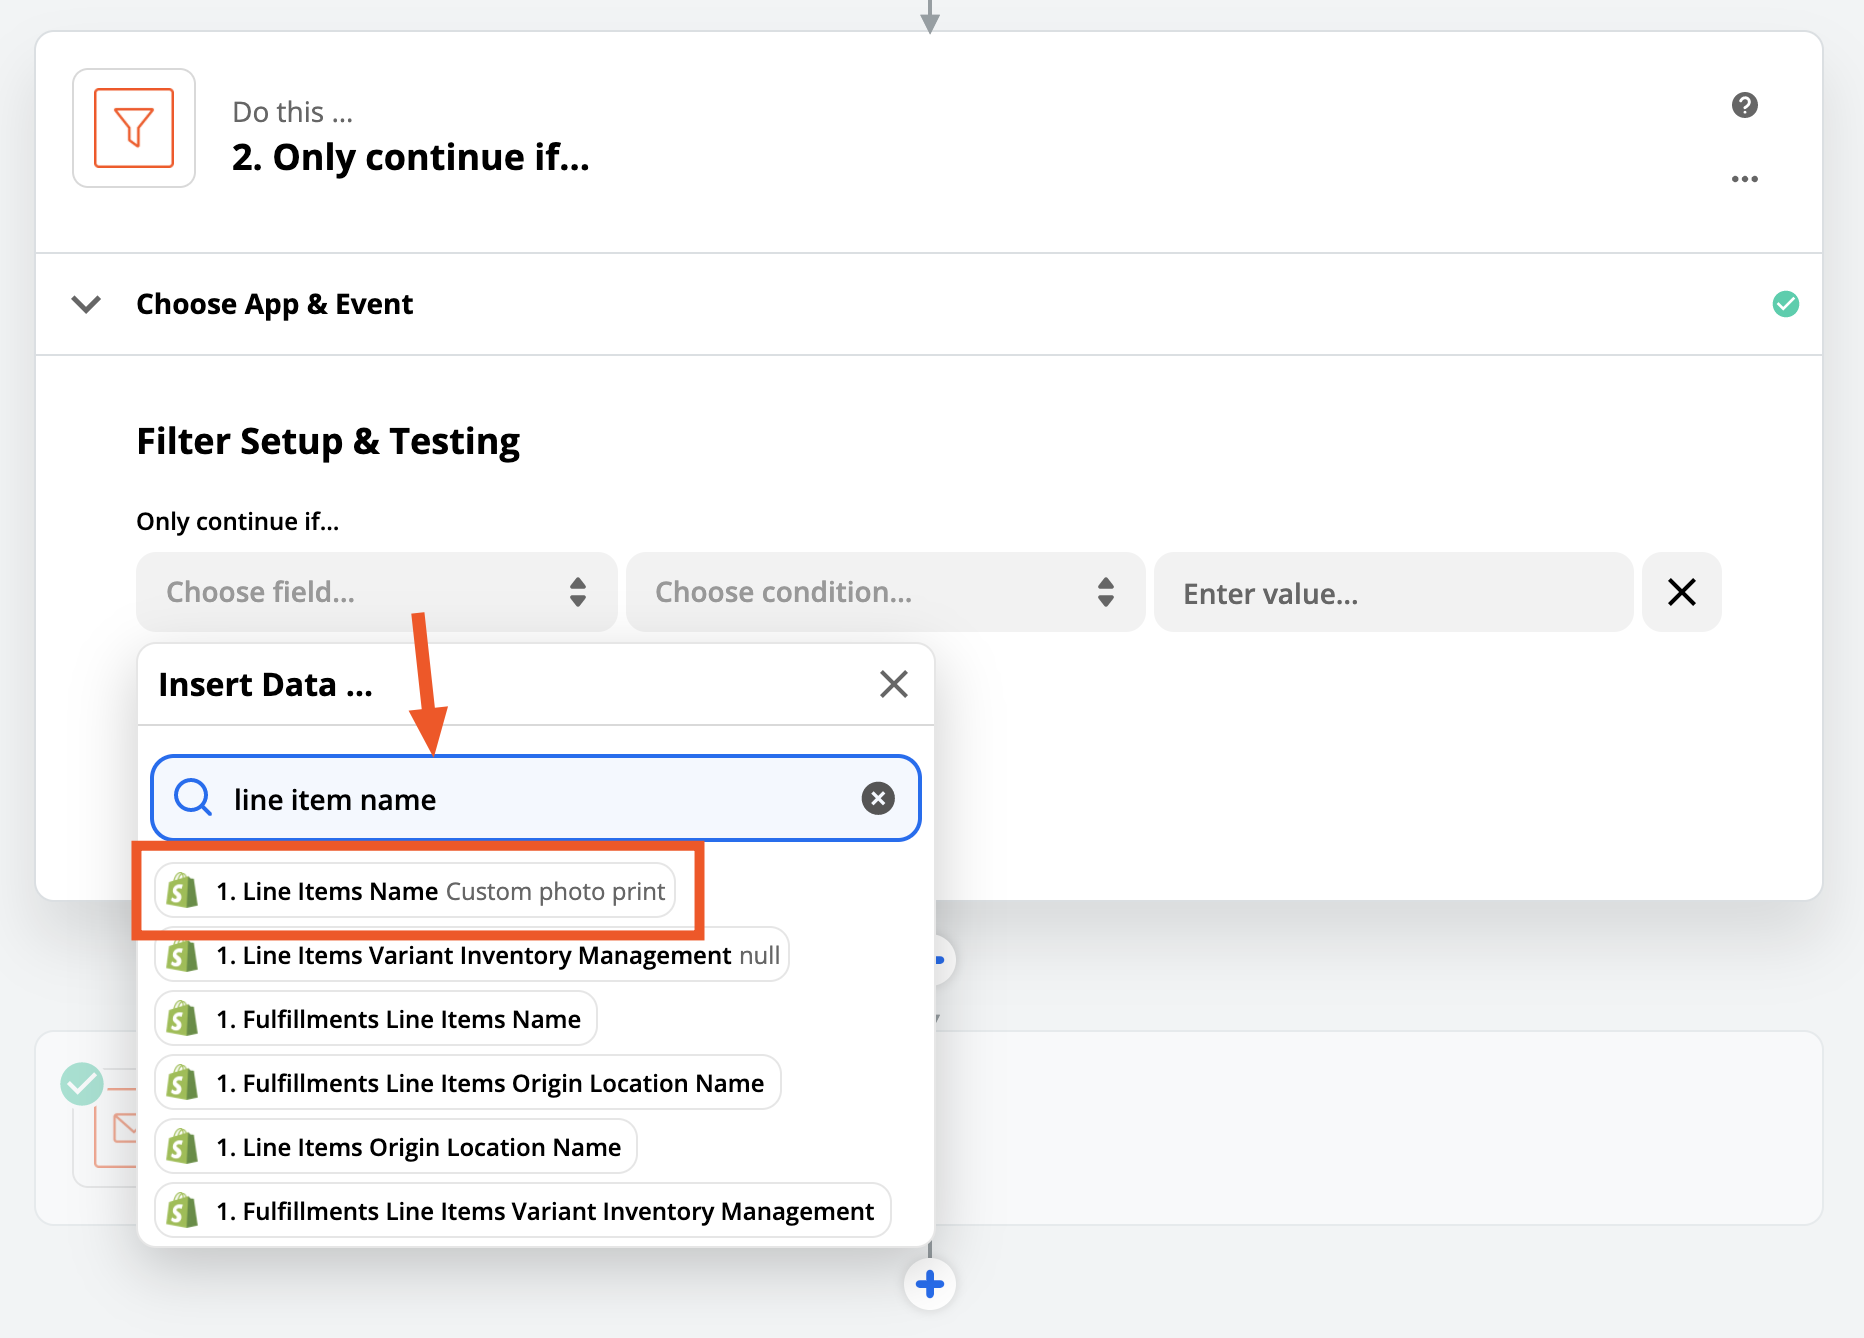
You can search in the left-hand field in Filters. This saves a lot of time and scrolling and can help you quickly find what you need.
For the center field, I know I want to have the Filter only let the Zap continue when a specific product is purchased, so here, I'll pick (Text) Contains:
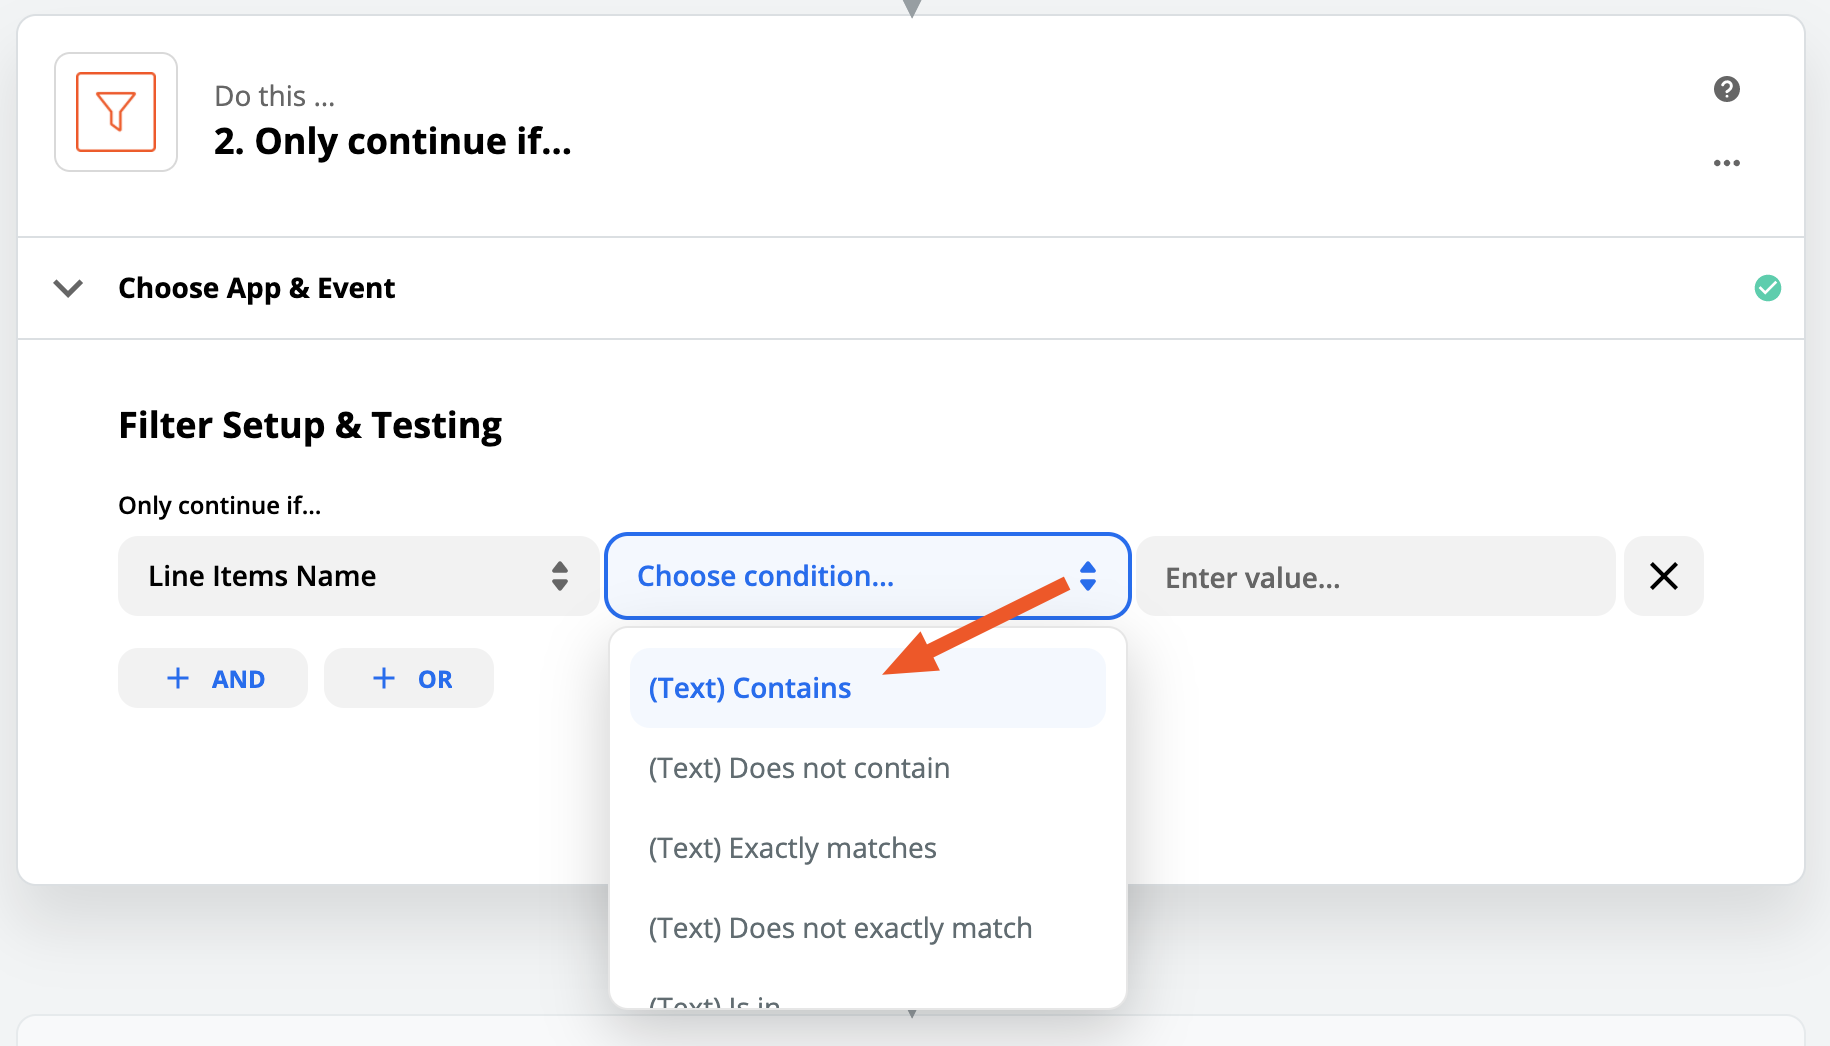
Note: Learn more about the different conditions you can select for your Filter.
The final, right-most field needs to be filled in manually, as this is what the Filter will compare to the value on the left. I only want to let "Guidebook" purchases continue, so I'll manually type that into the field:
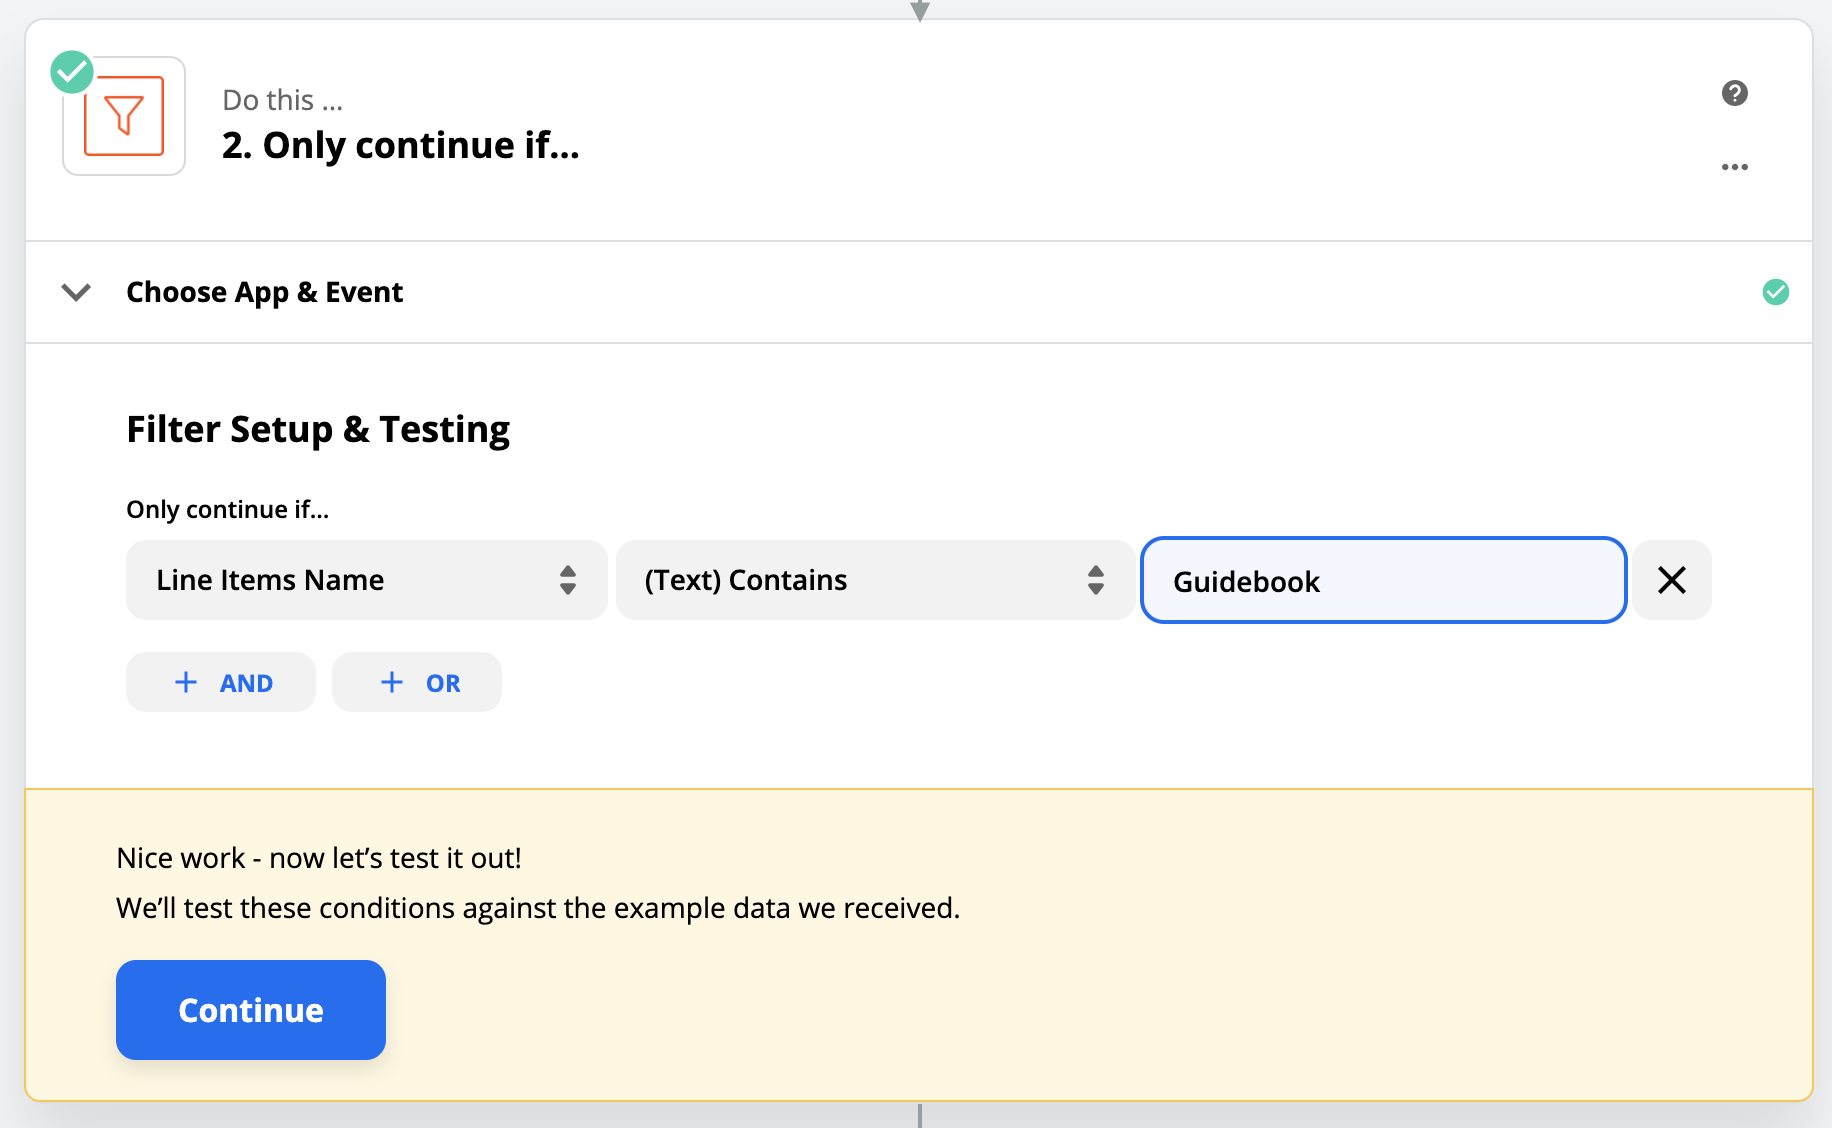
Now we have a Filter that's ready to test. Select Continue and the Zap will tell you whether the Zap's sample data would have passed this Filter. In this case, it didn't.
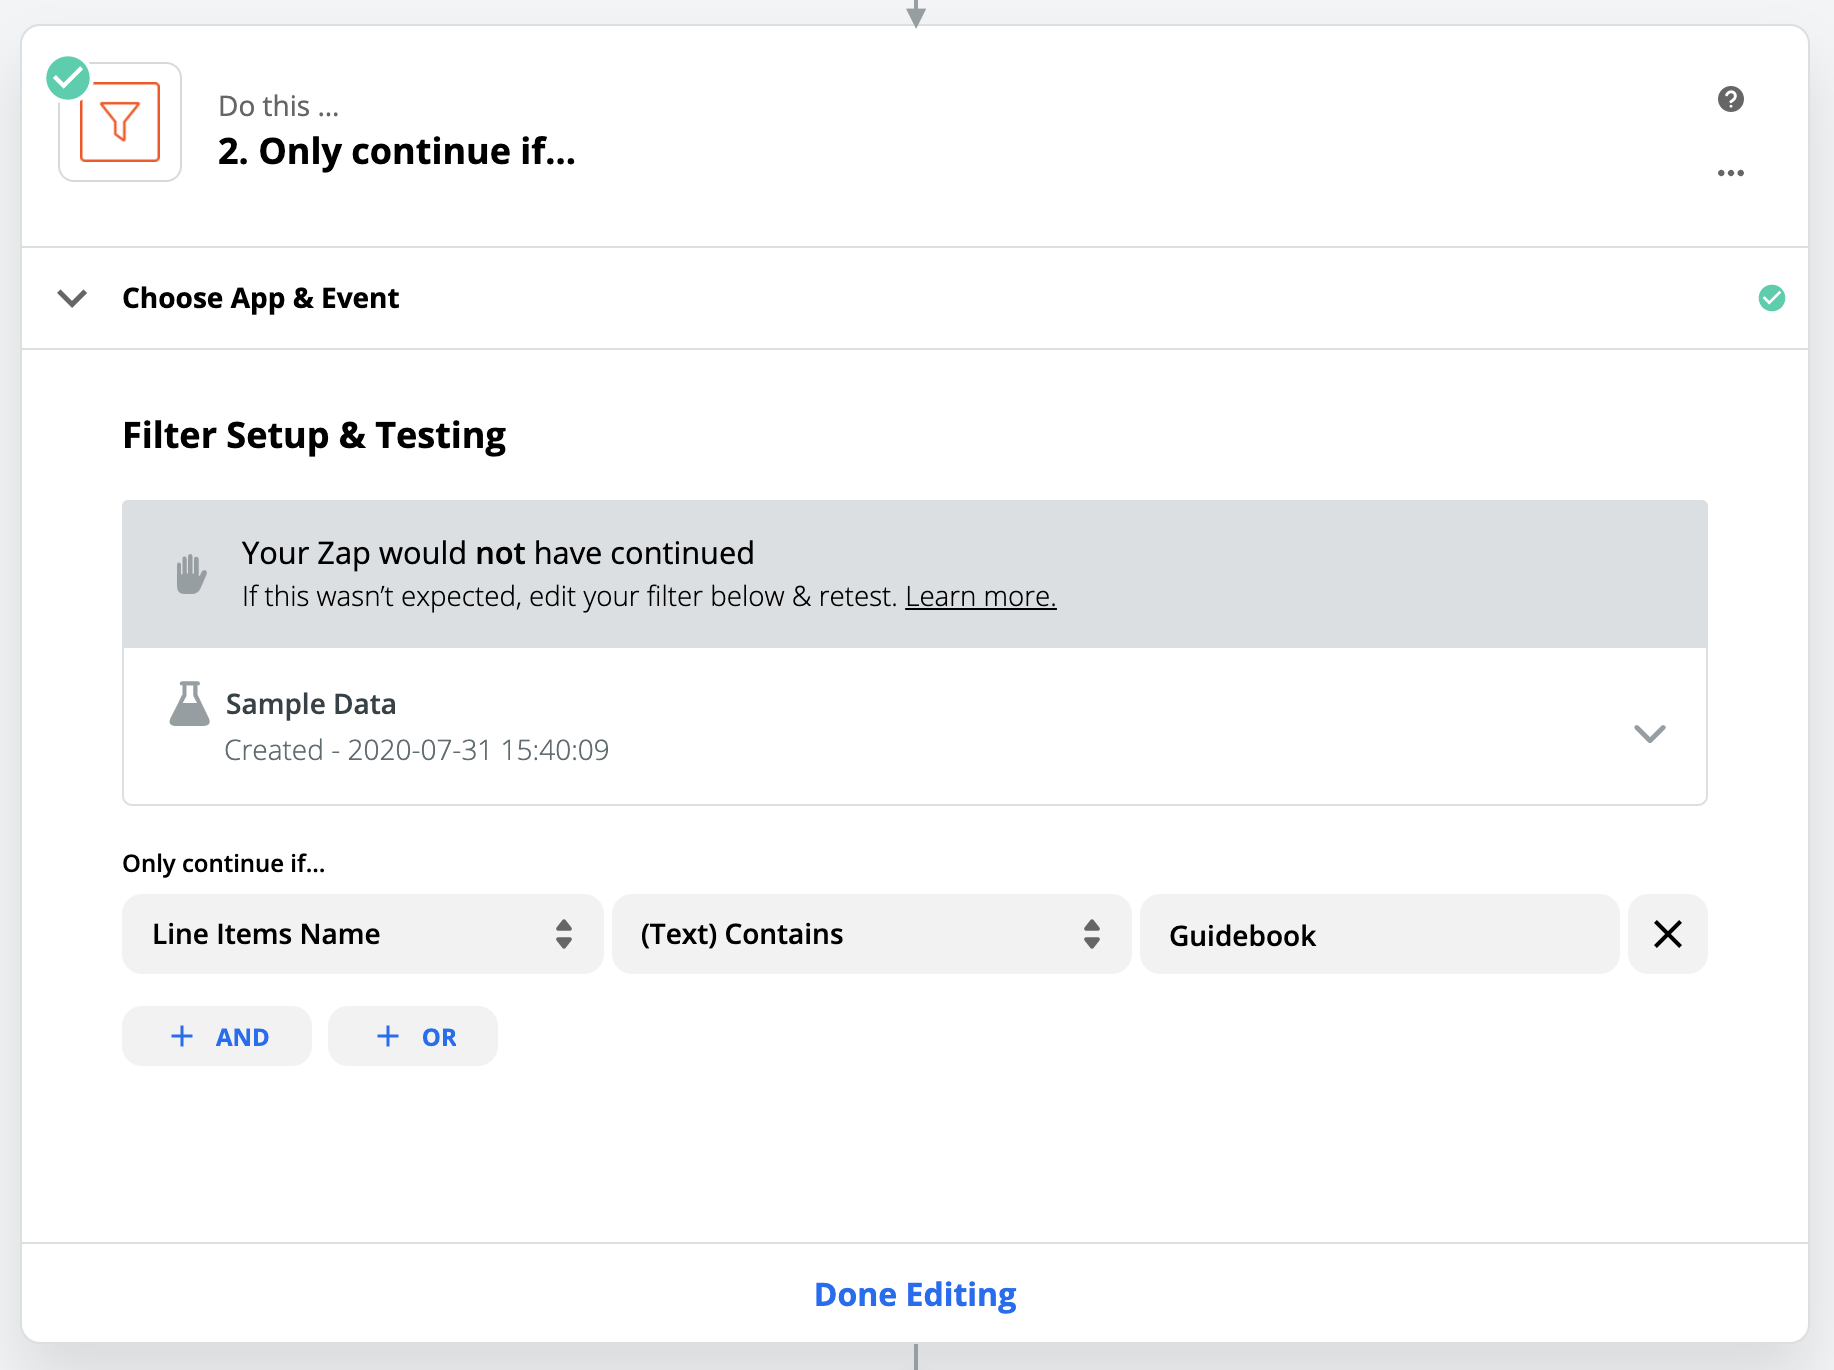
To see exactly why the Filter would not have passed, we can click the little caret symbol on the right:
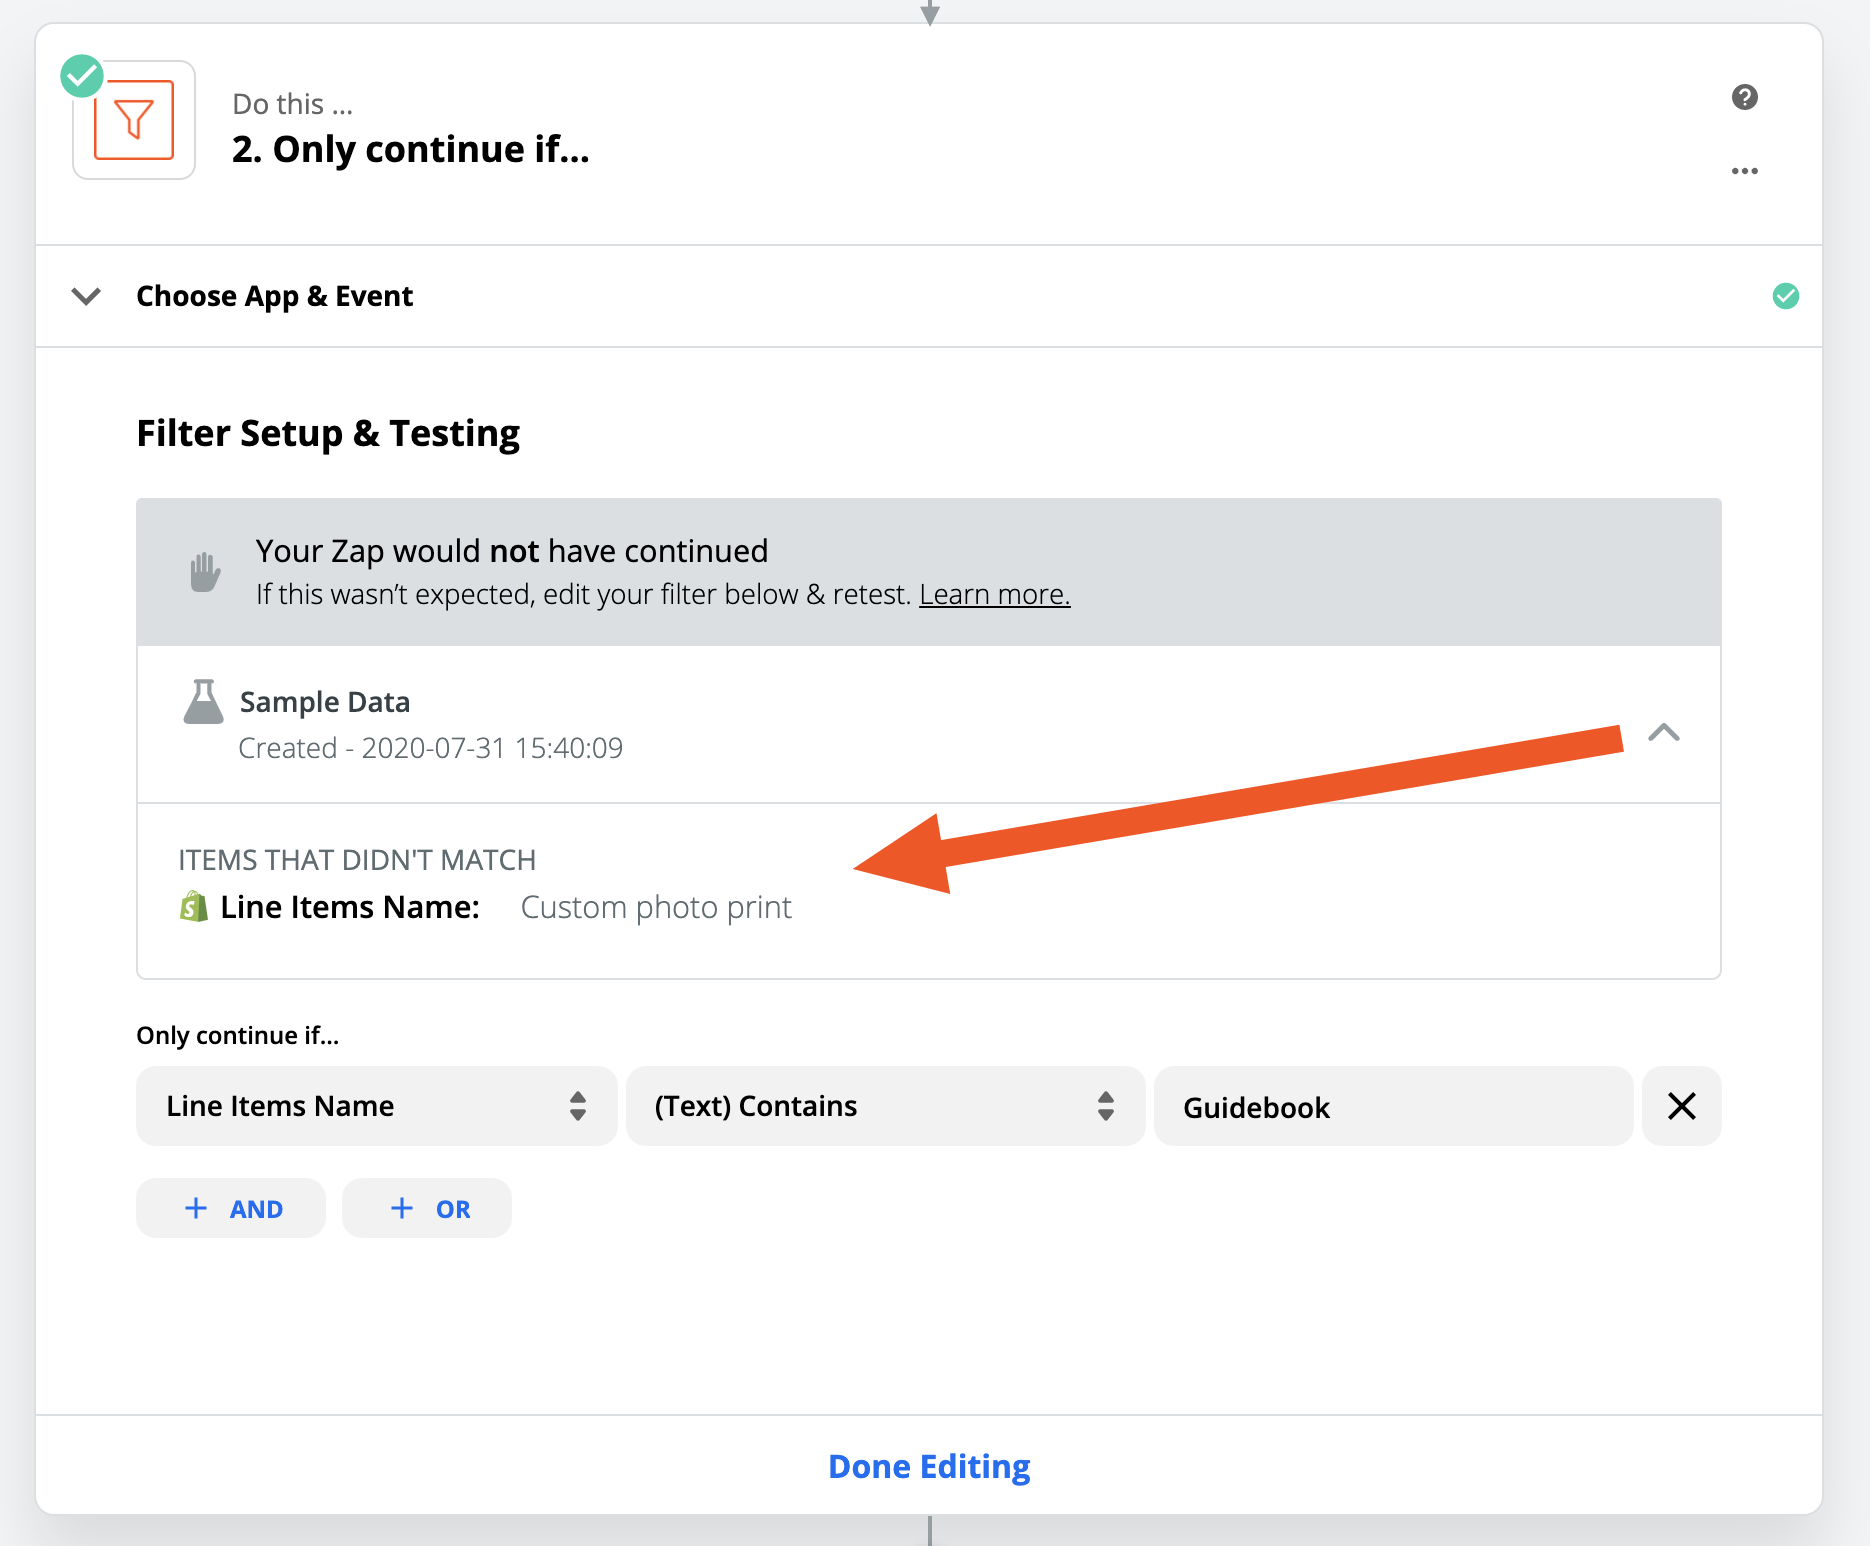
There, we see that this was expected, and totally fine. The order we're using as sample data only contains a purchase of a custom photo print, and should not have passed the Filter. This means that the Filter is working correctly.
When we turn the Zap on, we will only receive emails when a customer's order contains the "Guidebook" product. All other orders will still appear in the Task History, but will show up as "Filtered." Plus, because this is the first step after the Zap's trigger, the "Filtered" attempts won't use any tasks from our monthly bank of tasks.
Tip: Use the + AND and + OR buttons in the Filter to add more conditions to your Filter AND means that all of the conditions need to be met, while OR means that any of the conditions need to be met.
Adding variety to an action with a Lookup Table
I use a Zap to email me each time a new lead comes in from Facebook Lead Ads. It's this one right here, actually:
But here's the problem I run into: I'm not the only person who needs to know about these new leads. Depending on their location, it may need to go to one of my colleagues instead. We could add everyone to the "To" line, but that would mean everyone gets emailed for every lead, which gets messy fast.
To make sure the lead gets to the right person, we can insert a Lookup Table to tell the Zap which email to use. The "Lookup Table" is a function of the Formatter action, and it can be set up to take a value from Facebook Lead Ads (in this case, the "location" value), and return the corresponding email address that I want to send a message to.
Lookup Table is a function of the Formatter action, so to add one we'll want to click the plus icon in our Zap, and select Formatter from the list of Helper actions:

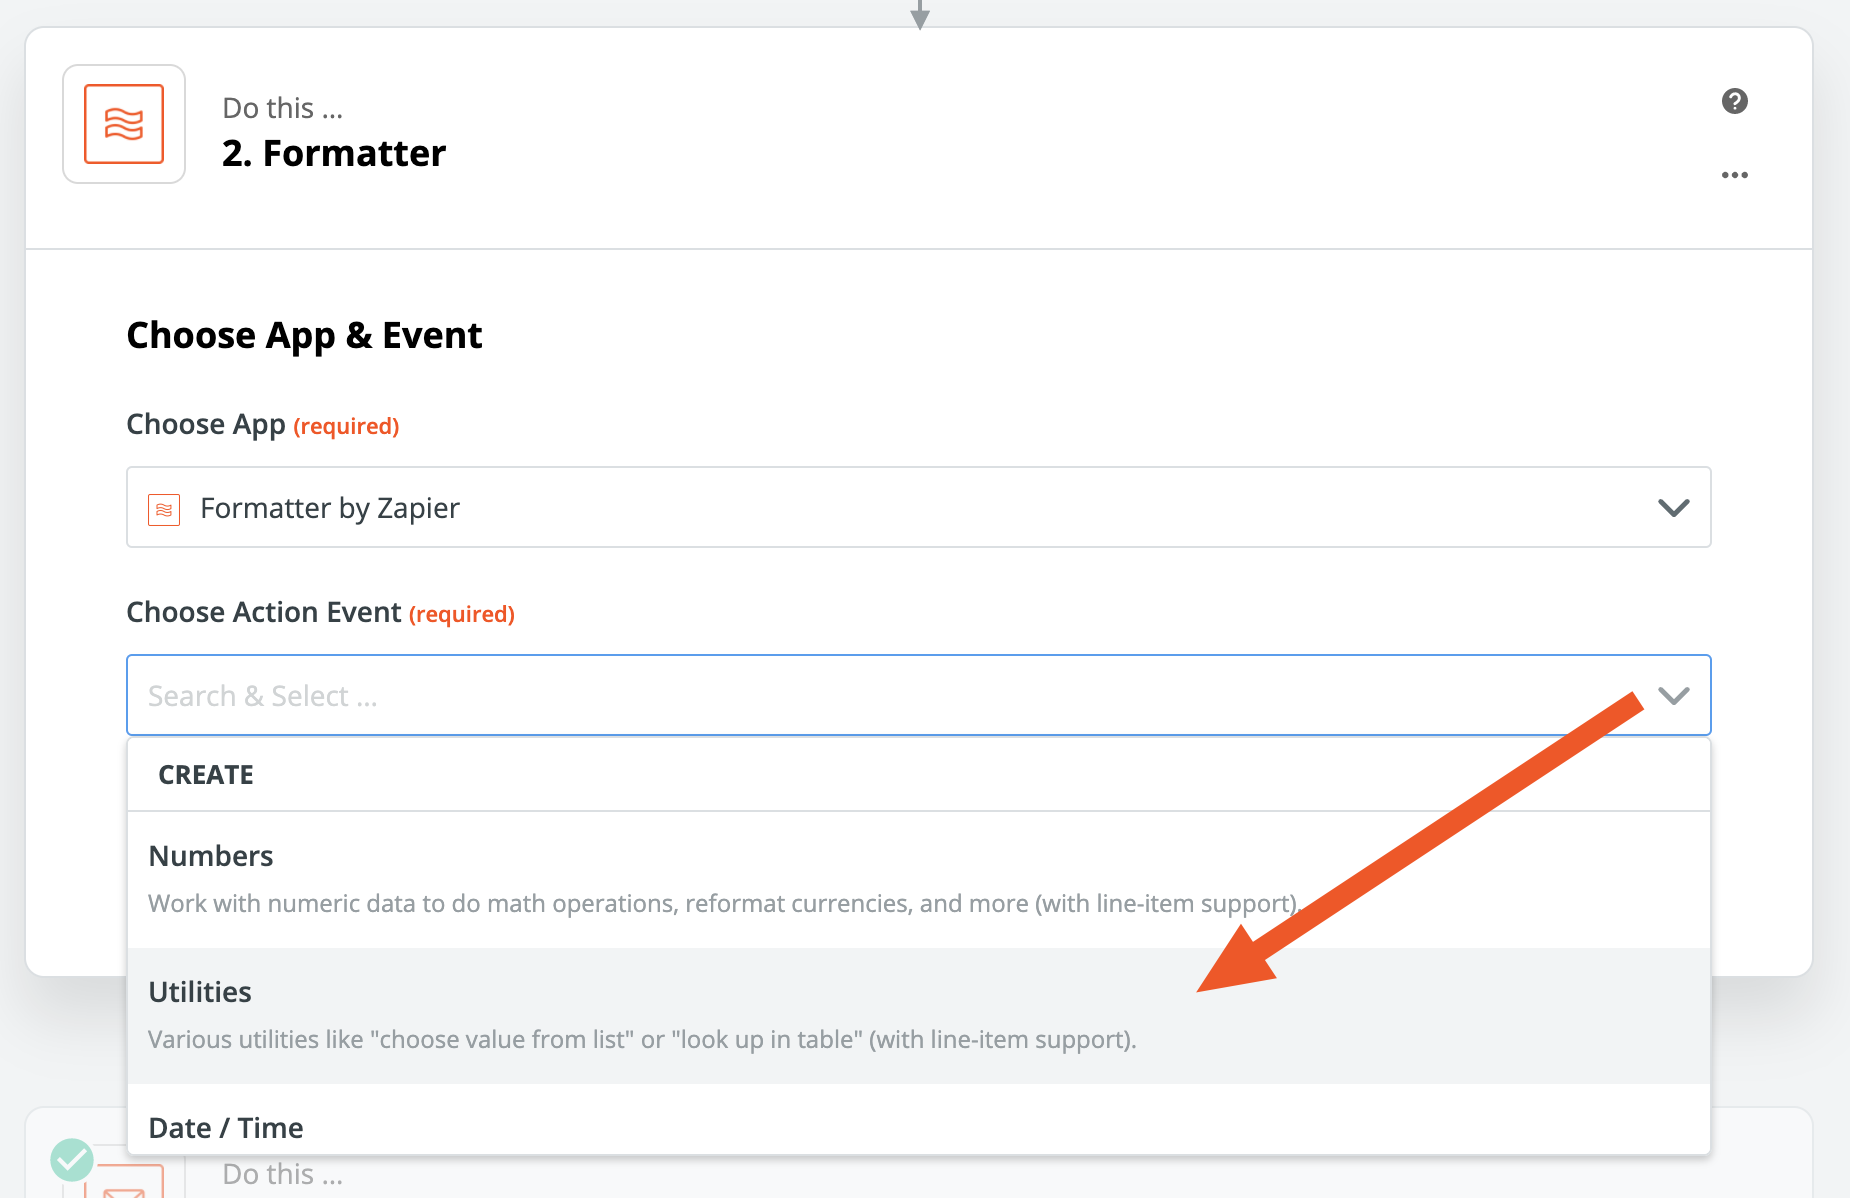
Formatter has a lot of uses, but for now we're going to select Utilities:
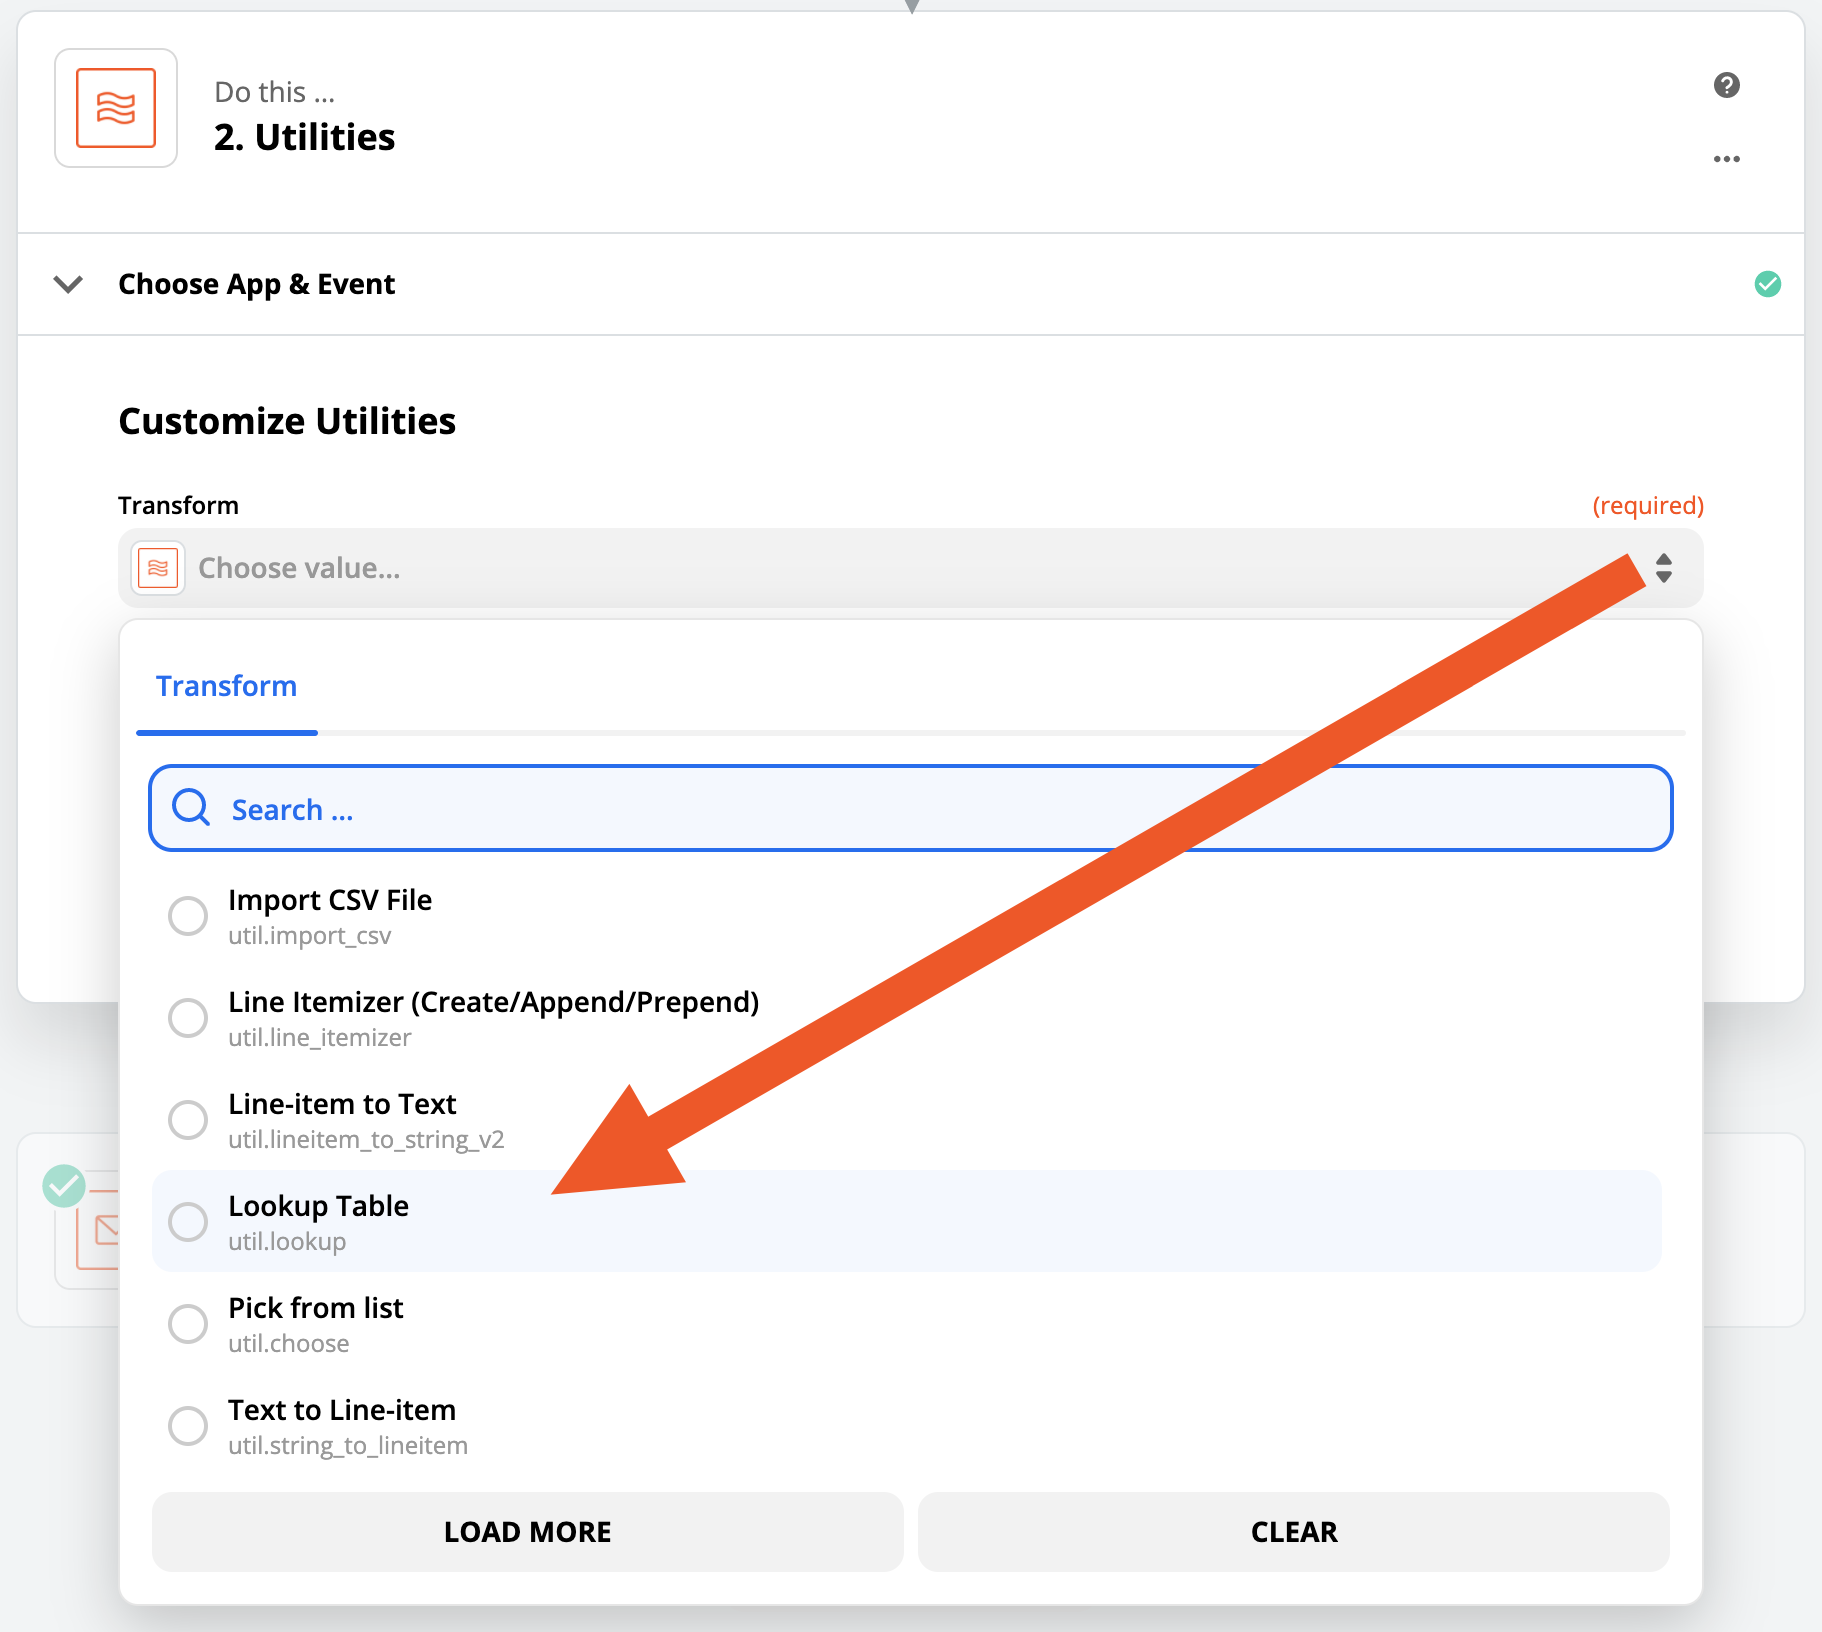
Lookup Table is one of the utilities that the Formatter action offers, and after clicking Utilities and Continue, we can select it from the Transform menu:
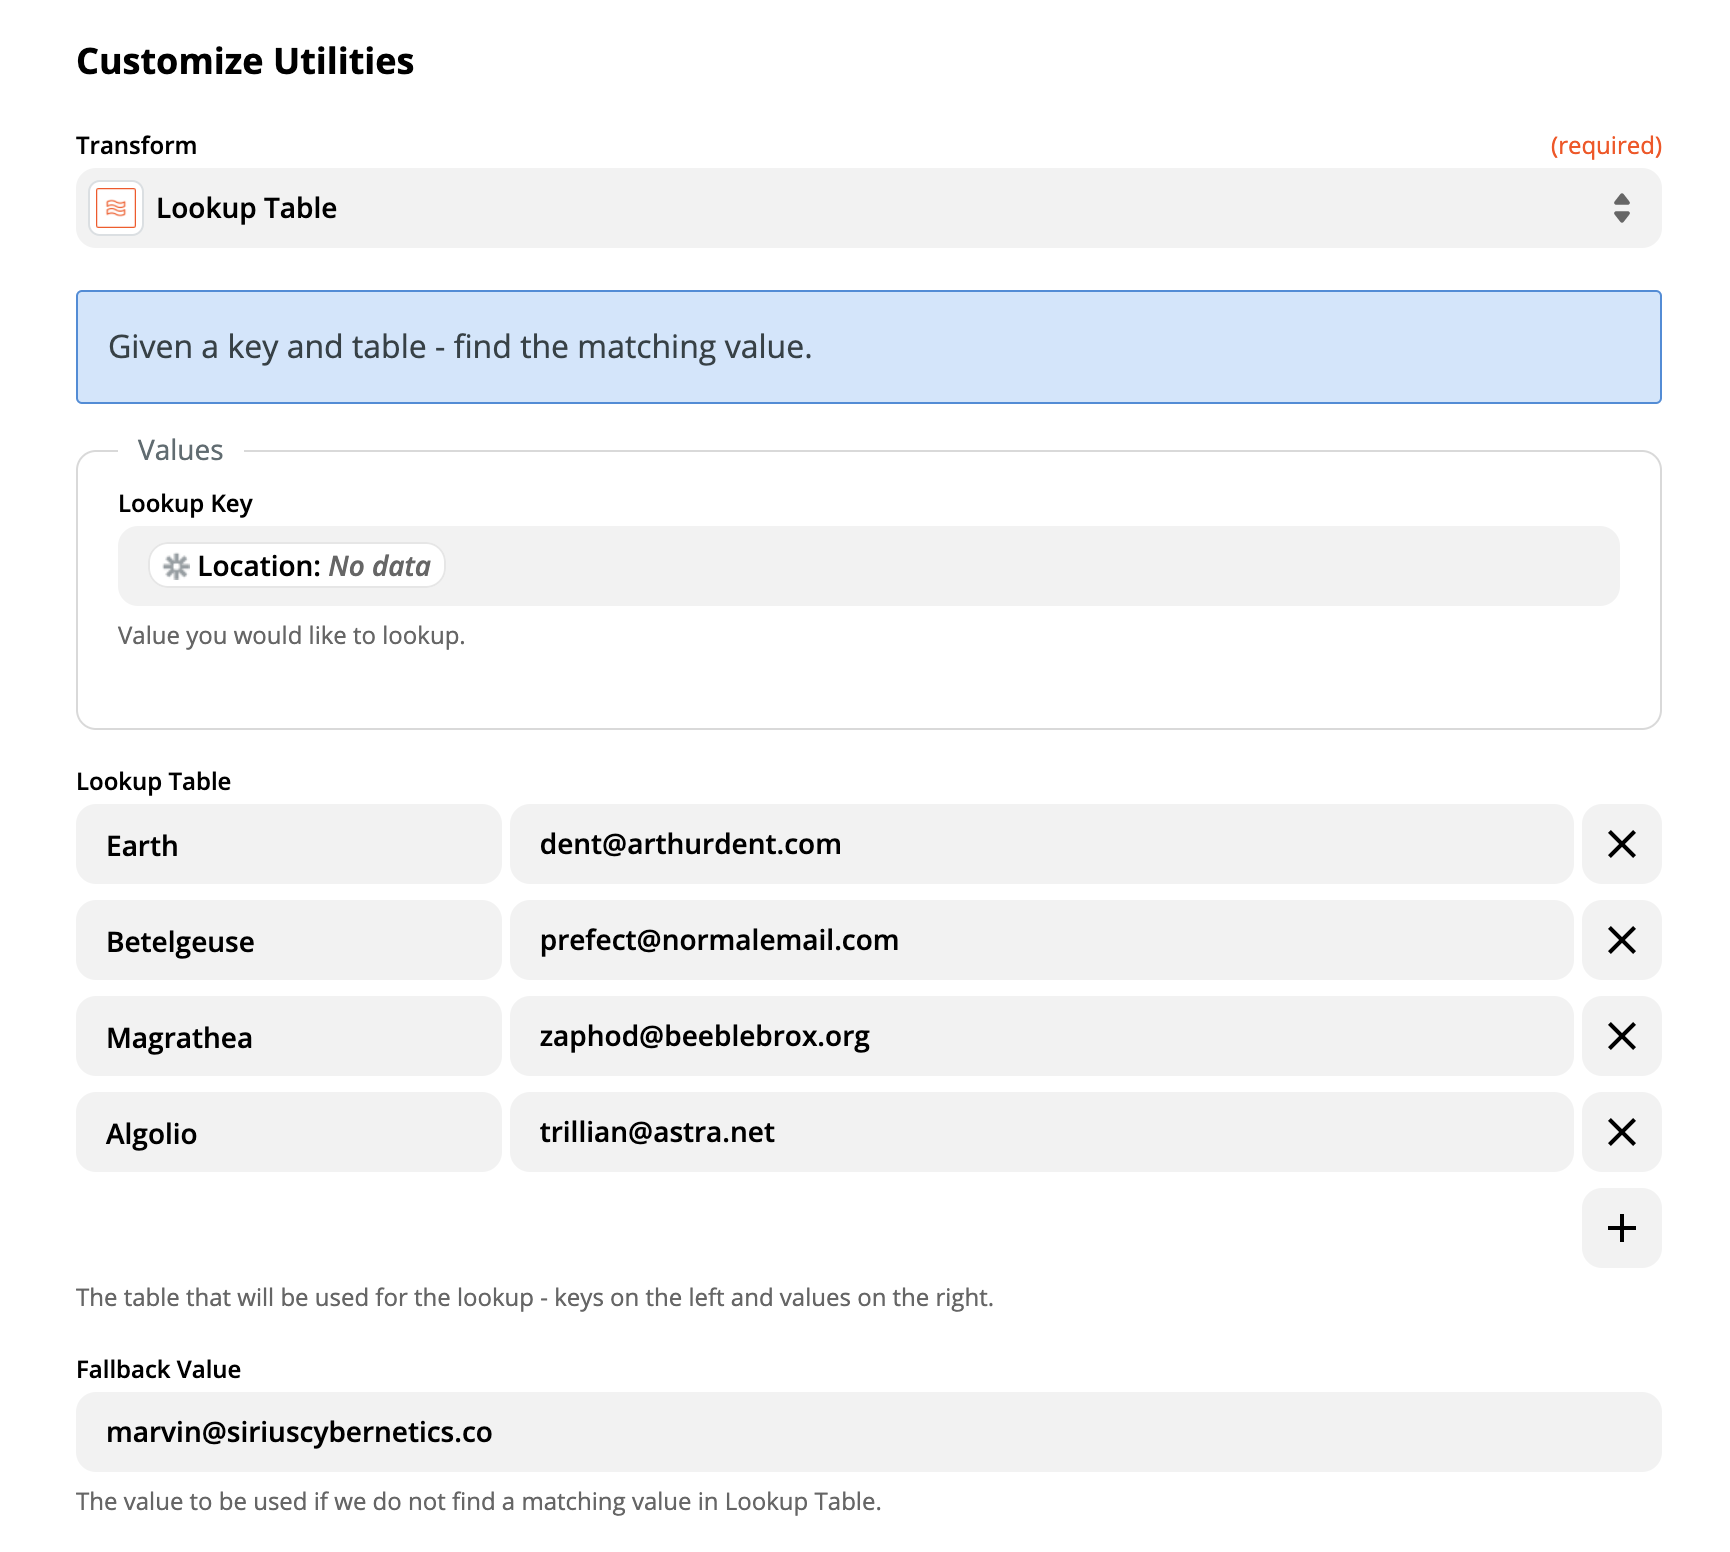
The Lookup Table lets us set a list of corresponding pairs, where the field on the right is something that we might see from a previous step, and the field on the left is the corresponding value that we need later on in the Zap. In this example, we want to match the locations that my coworkers work, with their email addresses. Here's what that looks like.
Note: Learn more about how to set up Lookup Table actions.
In the example above, any time a lead comes in from Facebook Lead Ads with the location set to "Earth," the Lookup Table returns my coworker Arthur's email.
To help catch any cases where the incoming value doesn't match any of the options you've listed, we can also set a "Fallback Value" at the bottom of the action. That way, if there's a typo or someone forgets to fill in a field, the Lookup Table will still return a value to be used in the next action. In the example above, we use my trusty coworker Marvin as a backup.
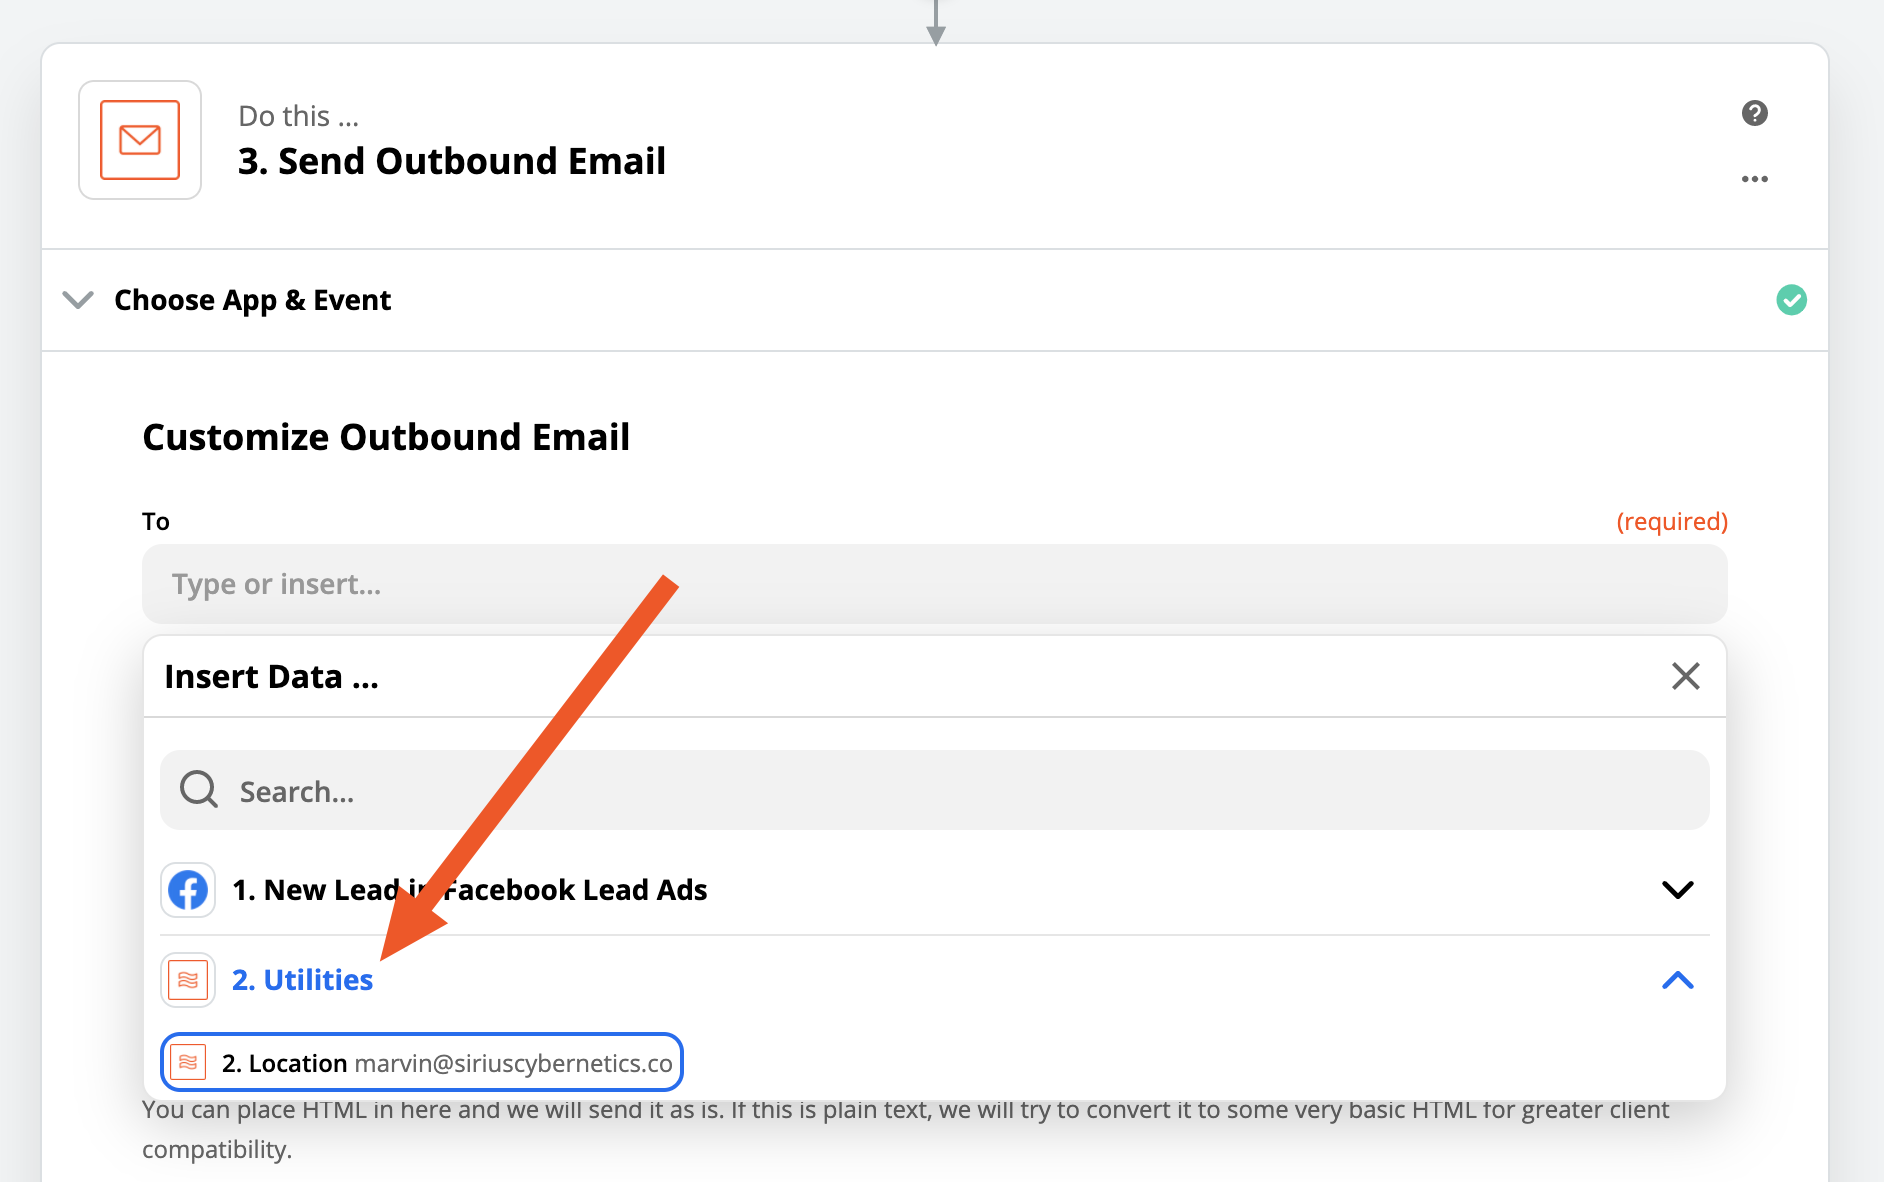
To use the results of the Lookup Table, all we'll have to do is map its output to the "Send Email" action:
Note: Learn more about how to map field values.
The end result is a Zap that takes in a new lead, checks where they live, and emails only the relevant person, all in one go.
Give your Zap options with Paths
In my side-hustle selling handbooks for outer-space wayfarers, I want to make sure I'm doing everything I can to engage with my new and invested customers. To help do that, I email all of my first-time customers with a welcome message and coupon code, and automatically send a hand-written card to each customer that makes a purchase of at least $100.
To do that, I use Paths, a feature available on the Professional plan or higher. Paths help the Zap perform entirely different actions depending on the data we receive.
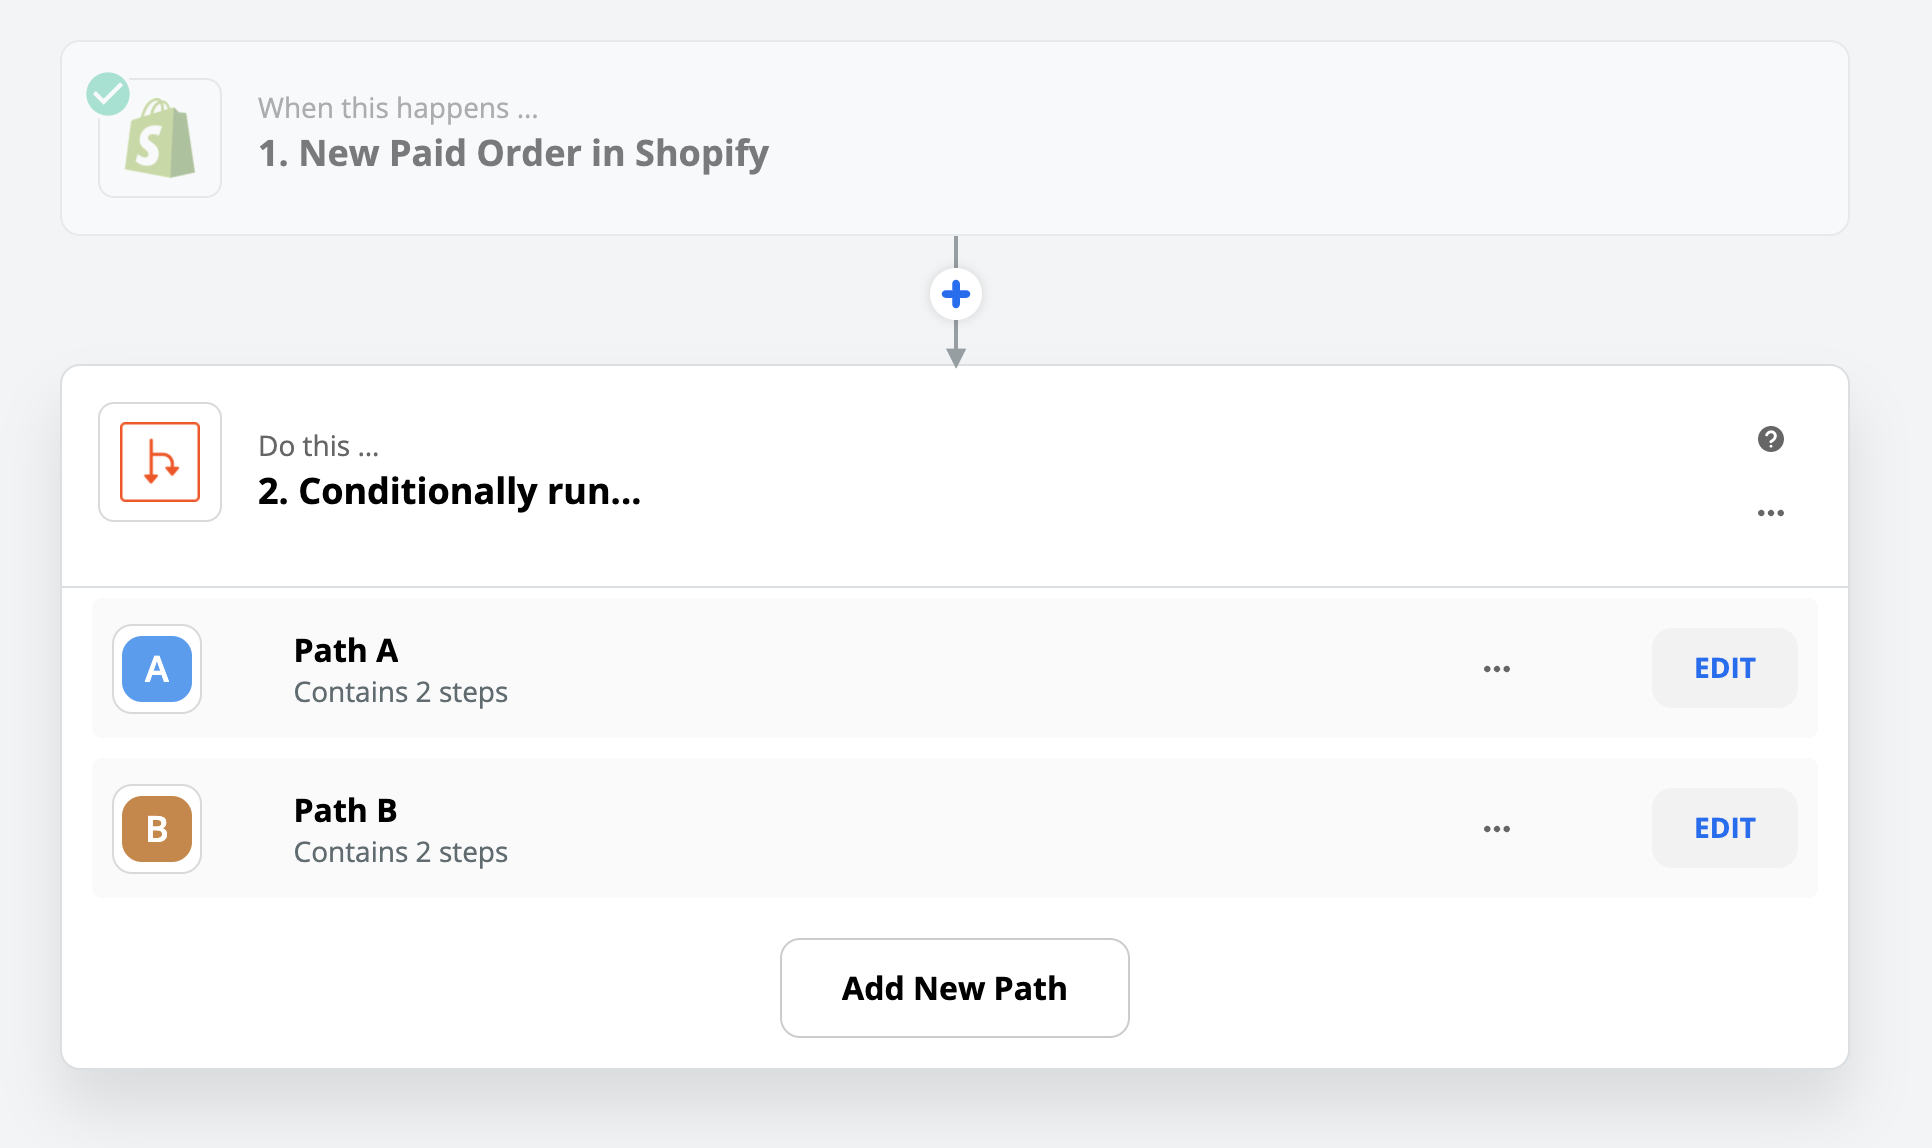
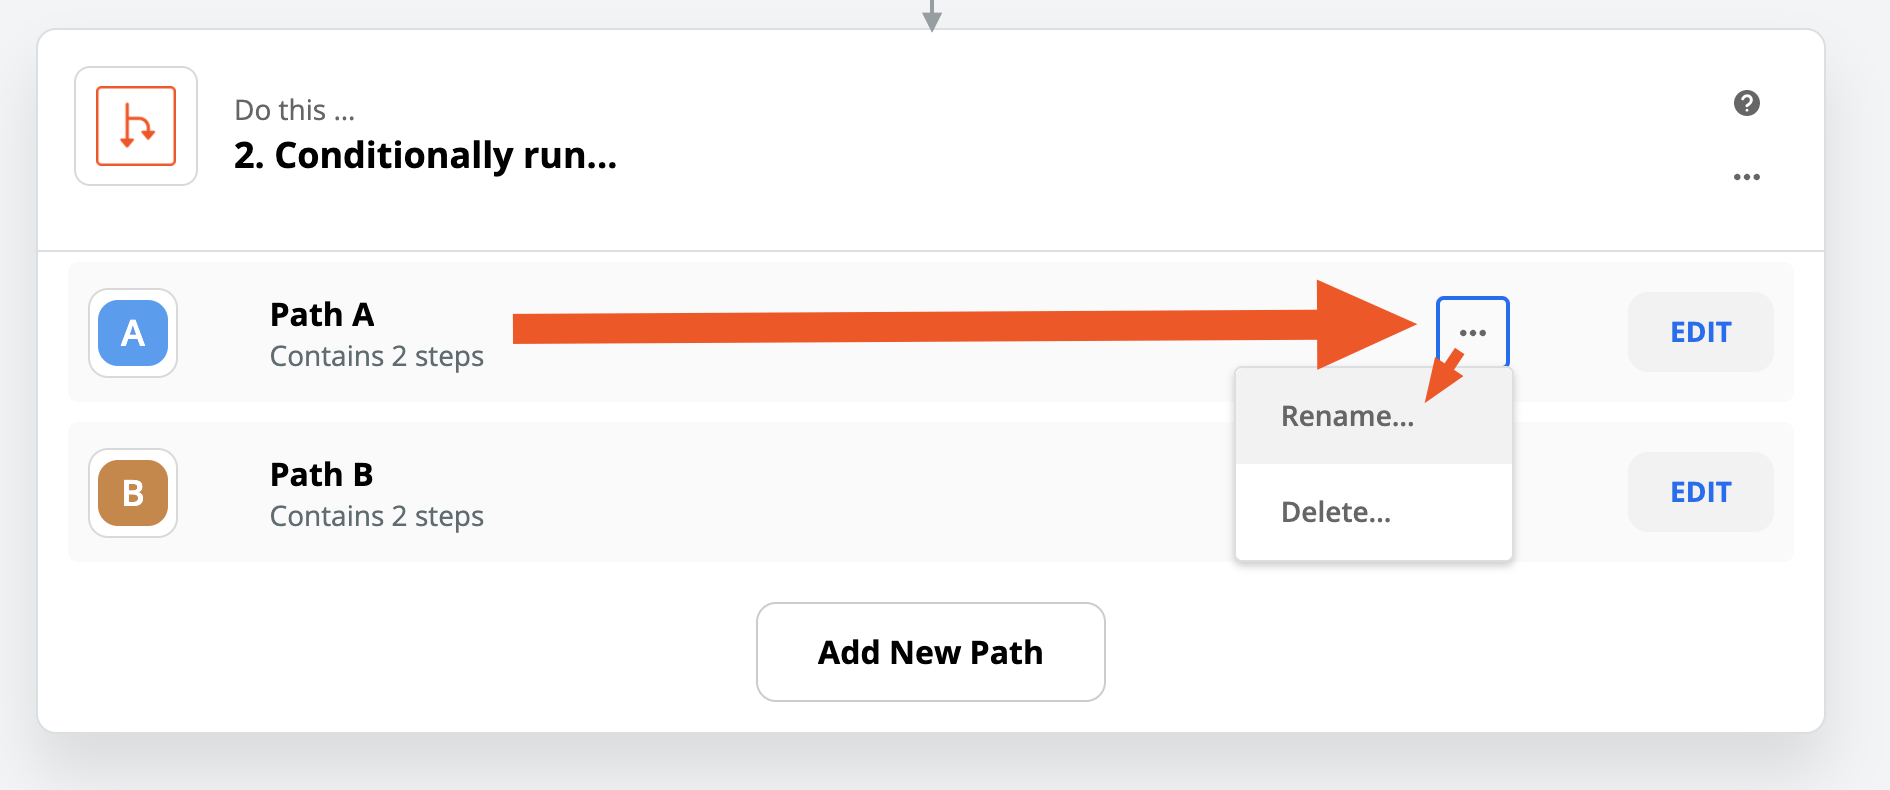
When we add the "Paths" option, the Zap gives us "Path A" and "Path B" by default. If we want to get really fancy we can even add "Path C", but for now I'm going to stick to these two, and rename them so I can remember what they're supposed to do:
In each Path, we set "rules"—conditions that have to be met in order for the Zap to run. These are similar to the Filter action. When the rules are met, the Path runs all of the actions inside of it, like a mini-Zap inside your Zap.
In my "Email first-time customers" Path, I have it check the outcome of a "Find or Create" action earlier in the Zap, which returns "false" if the customer is brand new. To be safe, I also have it check to make sure that the customer provided an email address we can use. Each of those criteria makes up a row in the Rules section:
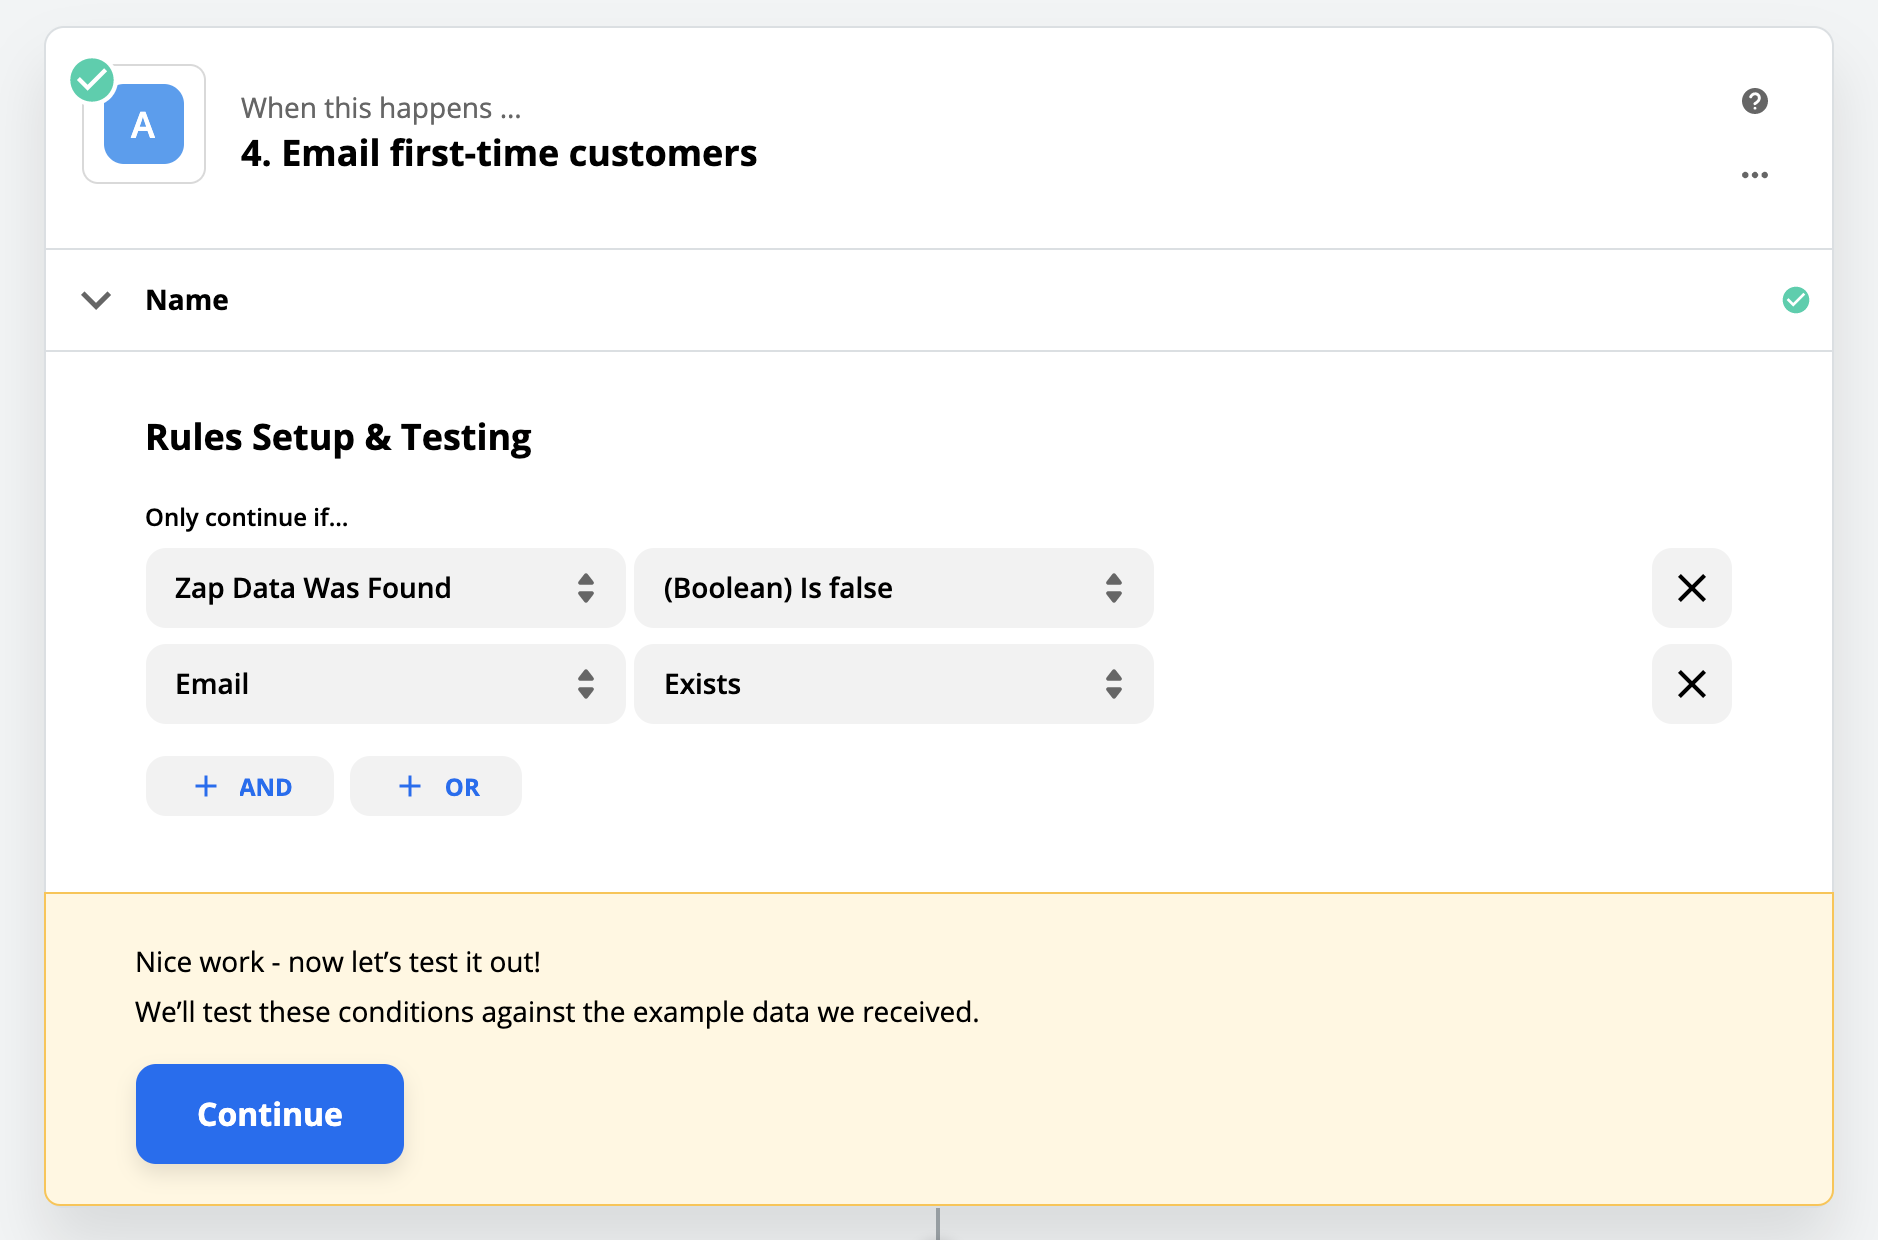
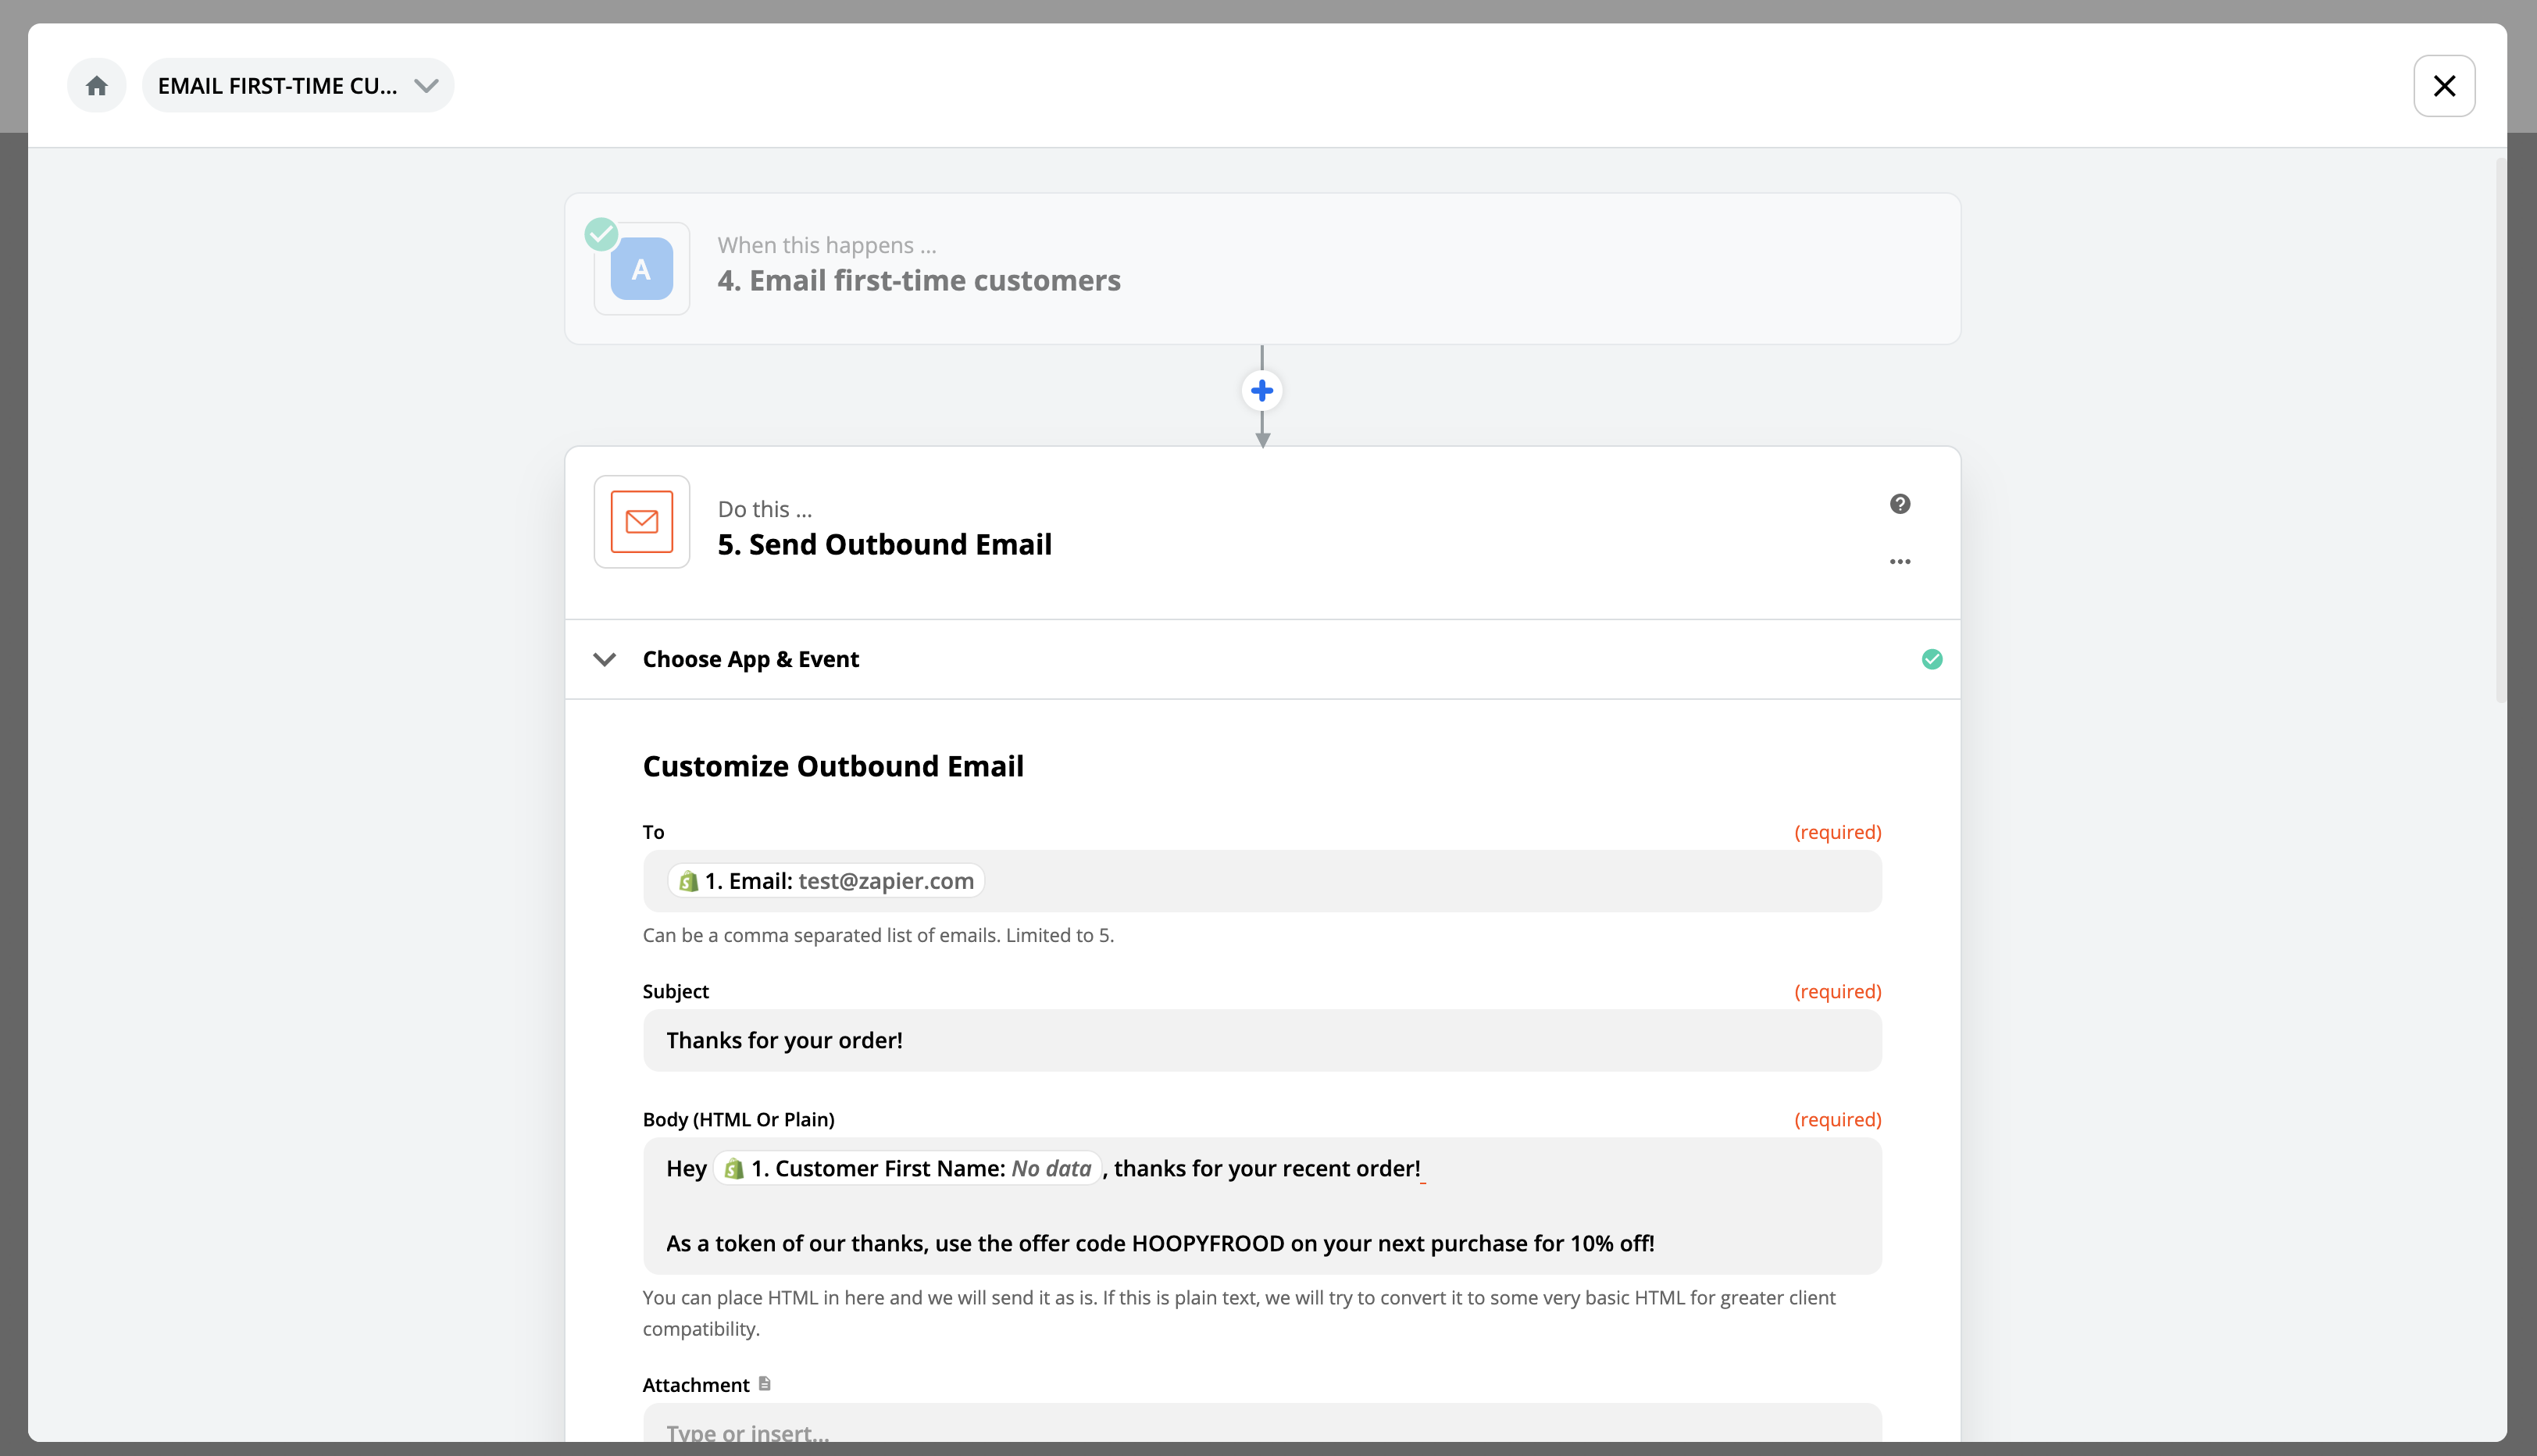
Now each time the Zap runs and the conditions are met, this Path will make sure my email will be sent to the customer.
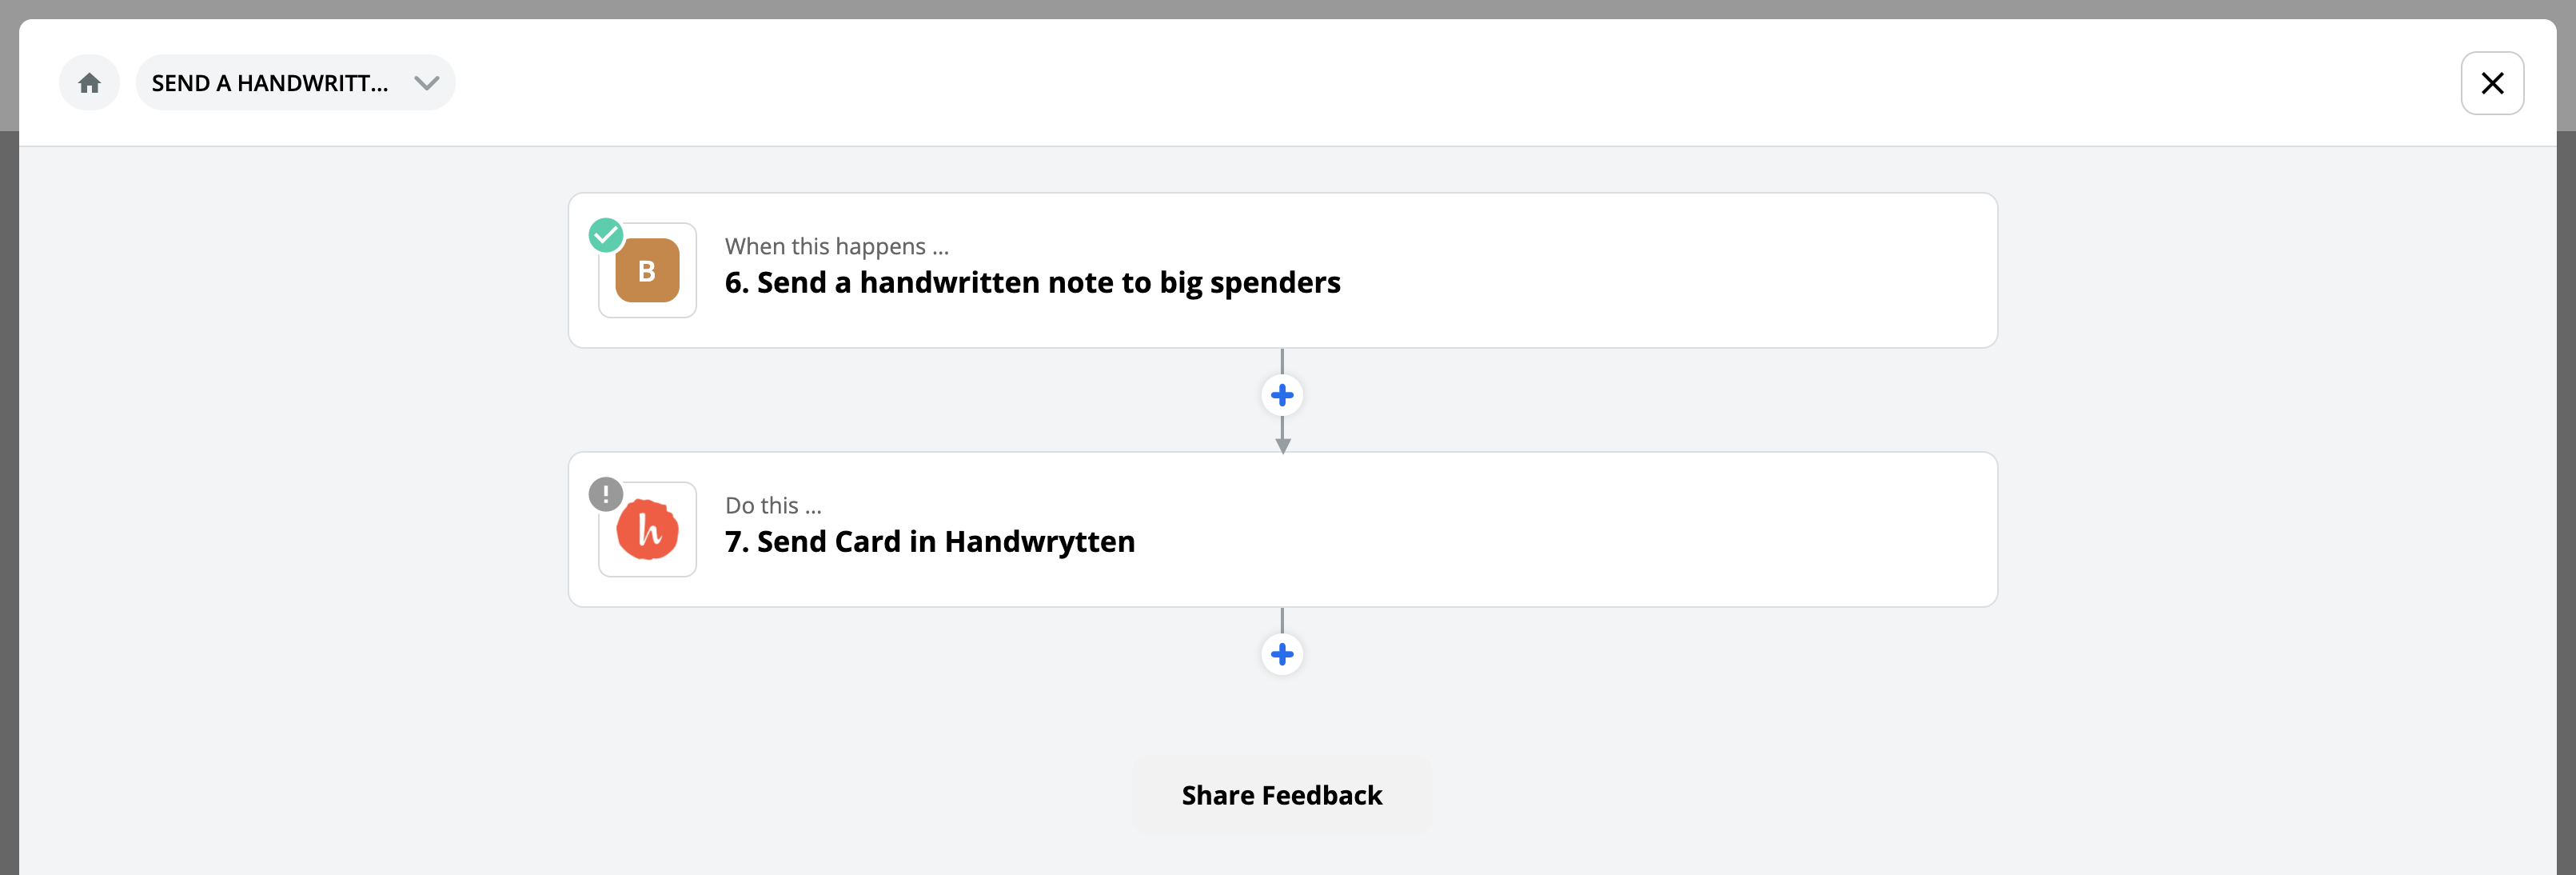
Path B can be set up in basically the same way. The rules make it so any time the purchase amount is $100 or more, the Handwrytten "Send Card" action sends the customer a thoughtful card:
Want to see all of the actions in your Paths at once? Use the Outline button in the Zap editor to open a panel that does just that:
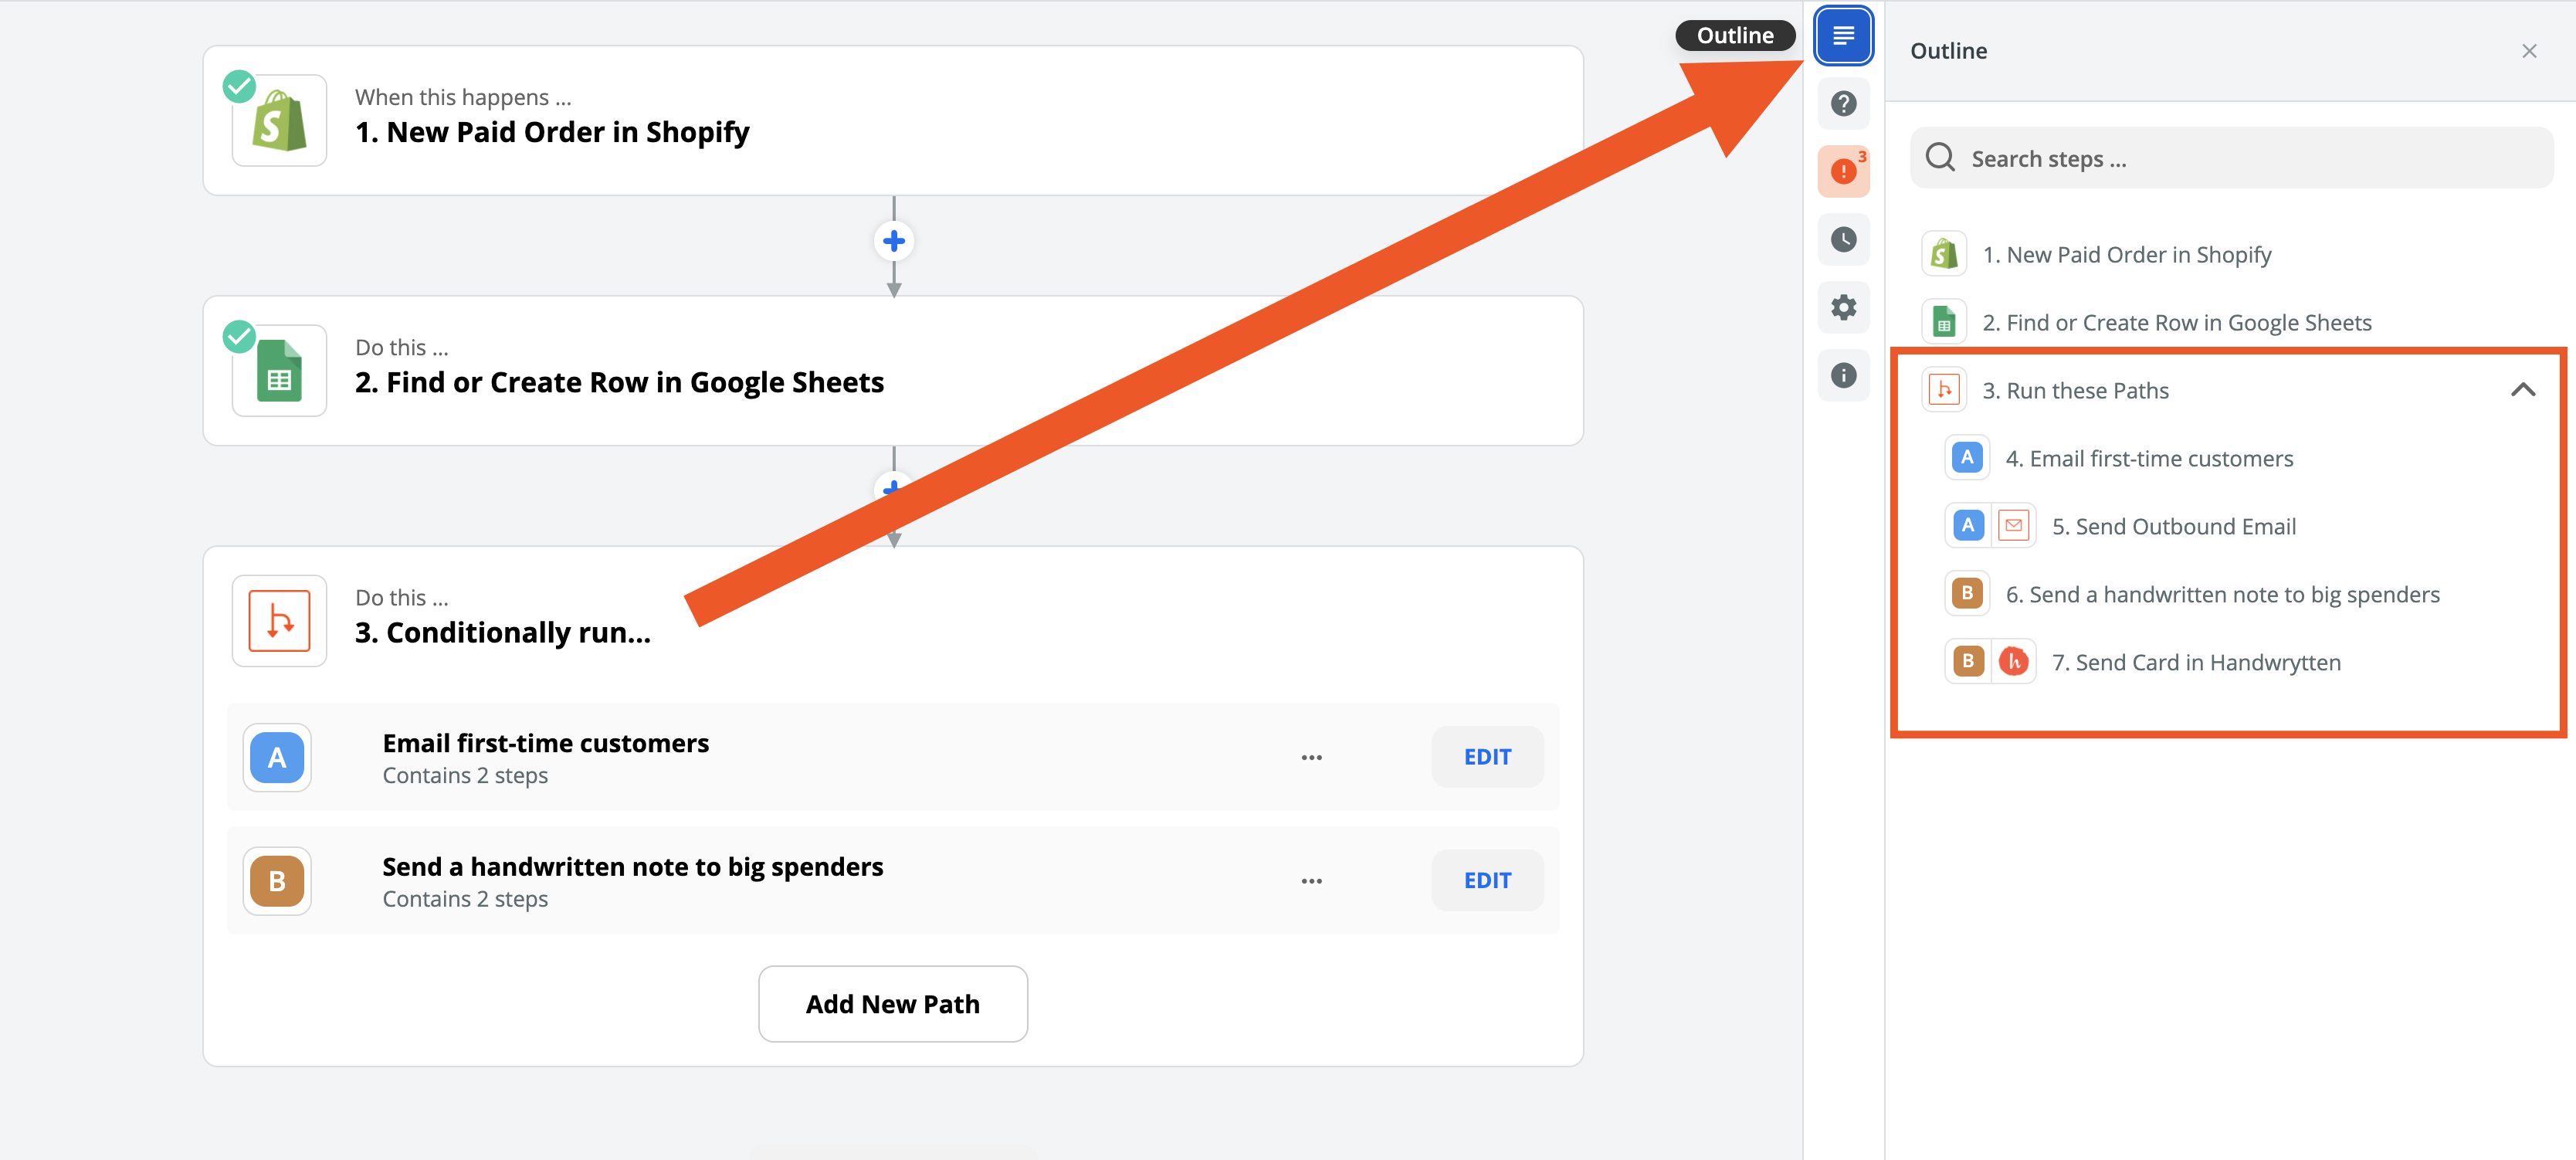
Now that we have our Paths set up, the Zap will check two things each time the Zap is triggered by a new purchase:
- Is this a first-time customer? If so, send them an email.
- Is this customer spending a lot of money? If so, send them a card.
And if a first-time customer also happens to spend a lot of money? Both Paths will run simultaneously!
Note: Learn more about setting up Paths.
Customize your Zap outcomes
We've covered three separate ways to add variety to your Zaps, but you can mix and match them for even more options.
Ready to give it a try? Head to the Zap editor to start creating a Zap from scratch, or if you'd like a little help, check out the featured workflows on our Explore page. Choose a job you need done, like sending new leads a personal message or tracking leads in a spreadsheet, and Zapier will guide you through set-up. After you choose your apps and configure triggers and actions, you can jump into customizing them with your own Filters, Lookup Tables, and Paths.
Check out these workflows that take advantage of Zaps with multiple outcomes:
- Make your perfect Spotify playlist with this automated workflow
- How to Use Zapier's Paths to Automate Decisions
- How to create a 'You're Awesome' bot
from The Zapier Blog https://ift.tt/34xF4JF
- Get link
- X
- Other Apps
Comments
Post a Comment