These days, keeping in contact with your customers digitally is a must. Not only can you send them receipts and other important account info, you can establish a genuine connection by asking for feedback and giving exclusive access to promotions and sales.
By using Stripe, you can get access to your customer's email address. Don't just let that customer data stay in Stripe. Instead, pass that info into Mailchimp so you can easily stay in touch.
In case you're unfamiliar, Stripe offers financial SaaS for businesses that need payment processing through APIs. You might use Stripe if you sell things online. Mailchimp is best known for their email marketing automation services, but in their nearly 20 years of existence, they've also expanded to become a full-fledged marketing platform.
Together, Stripe and Mailchimp can be used to create an automated email marketing list from your Stripe customers. With this integration, every time you get a new customer in Stripe, their email will be added your Mailchimp list.
To set up your new automated email integration, all you need is a Stripe account and a Mailchimp account. Let's get started.
Set your audience in Mailchimp
Before you get started, make sure you've set Mailchimp up to receive the information you'll be sending in from Stripe. For this automated workflow, that will mean logging in to your Mailchimp account and making sure you have an Audience set up.
Connect your Stripe account to trigger your Zap
The first thing you need to do is set up a new Zap to connect your Stripe trigger to the Mailchimp action. We have a template for this integration to help you get started quickly.
Click the Use this Zap button below to get started, or click here to start a new Zap from scratch. You'll need to create a Zapier account, if you don't already have one.
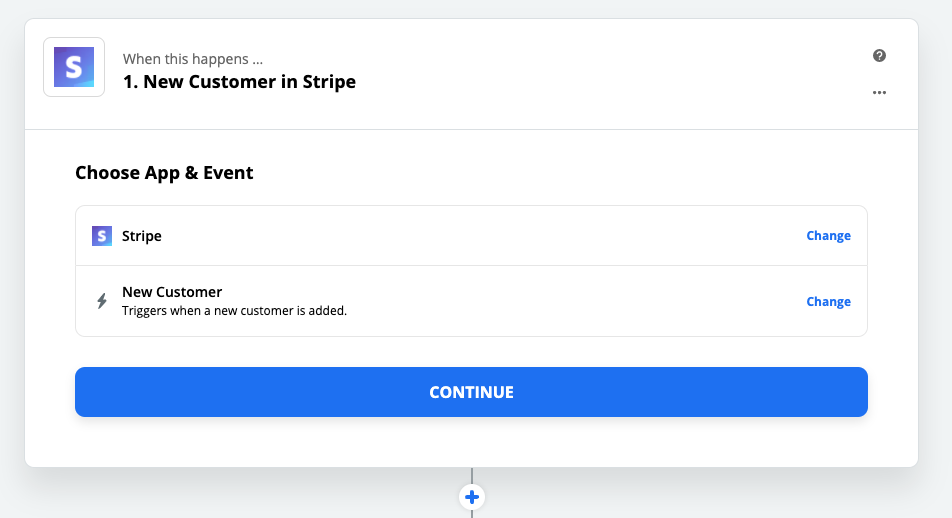
To get started, choose Stripe as your app and New Customer as your trigger event. If you start from a template, these should be pre-selected for you.
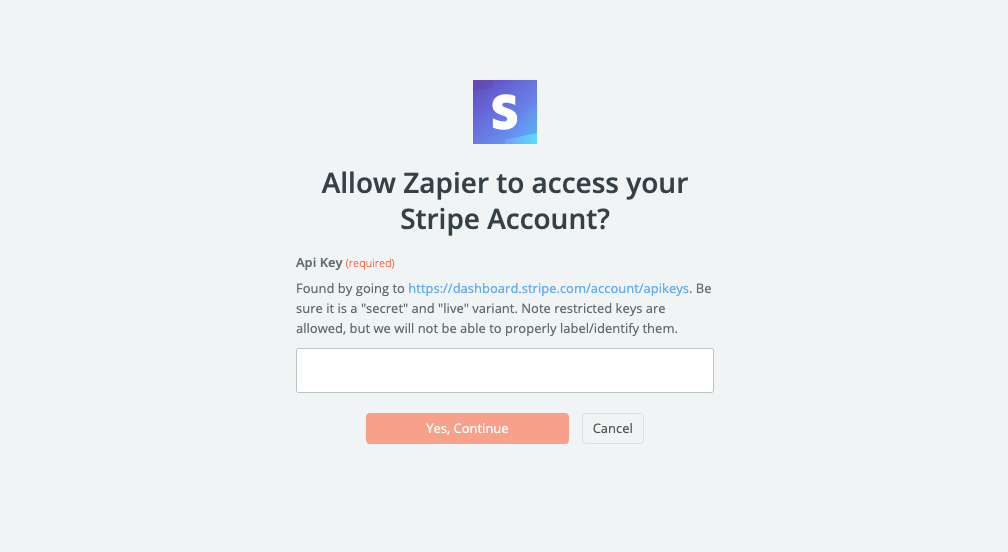
Click Continue. You will be asked to sign in to your Stripe account, if you haven't already. If this is your first time connecting your Stripe account, you will need to add your API key from Stripe, which can be found here.
Note that the API key should be a "secret" and "live" key. You need an activated account to get a key like that. If you're just trying to test out your Zap for now, you can use a test key, which can be found here.
Click Yes, Continue, and then test the Stripe trigger with some sample data.
Connect Mailchimp to your Stripe trigger
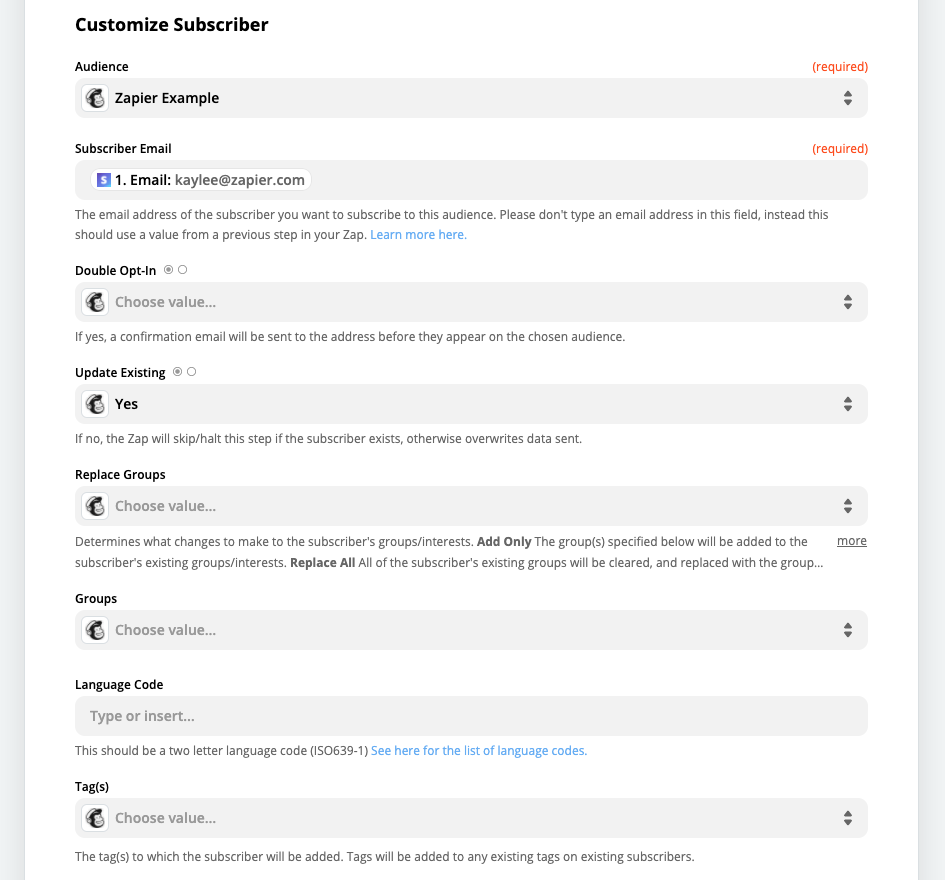
In Zapier, select Mailchimp as your app and Add/Update Subscriber as your action.
This will prompt you to sign in to your Mailchimp account. After you've signed in, you can customize your new subscriber by selecting (at the bare minimum) the Audience and Subscriber Email address.
The email that you select should be used from the Stripe trigger payload. There are many other fields you can add to the Mailchimp Subscriber here, including tags, name, address, and more.
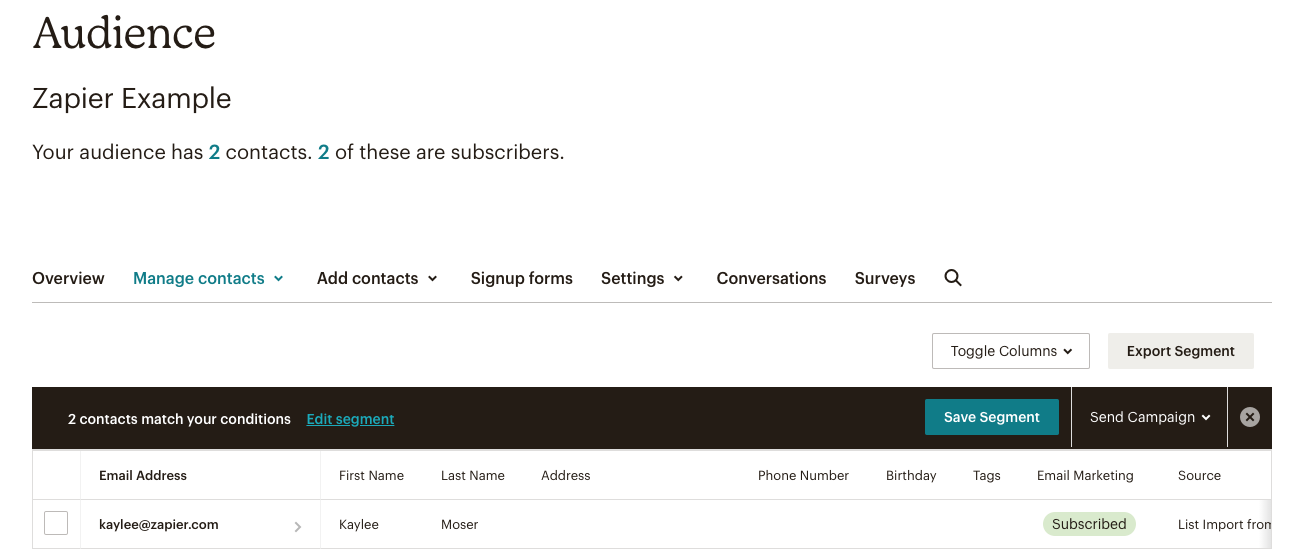
Fill in the information that you need for your campaign, then click Continue and test your Zap. After running your test, you should see a new contact in your Mailchimp Audience.
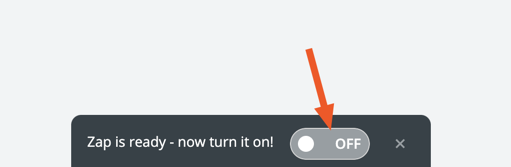
Make sure you turn on your Zap when everything looks done, by clicking the toggle switch at the bottom of the screen.
Congrats, you did it! From now on, every new Stripe customer you have will be added to your selected Mailchimp Audience.
More ways to keep in touch with your Stripe customers
If you enjoy using Mailchimp to communicate with your Stripe customers, check out these other integrations:
from The Zapier Blog https://ift.tt/3i1ixbj


Comments
Post a Comment