By now, most people are pretty familiar with video call etiquette. However, one habit that trips up even the most seasoned remote worker is remembering to upload or share the meeting recording after a call has ended.
With Zoom's New Recording trigger—available as part of Zoom's integration with Zapier—you can automatically upload new recording files to other apps, such as YouTube or Google Drive.
The basics:
- Make sure your Zoom recording settings are configured properly and create a recording in advance so you can easily test your Zap.
- Create the folder in Google Drive where you plan to upload your videos.
- Click the Use this Zap button below to use our template. (If you haven't already, create a Zapier account. It's free to start!)
- Sign in to Zoom when prompted and test to pull in recent meeting recordings from your account.
- Sign in to Google Drive and allow Zapier access permissions.
- Customize where and how you'd like your recording file to show up in Google Drive.
- Test your Zap and turn it on.
We'll walk through these steps in detail for Google Drive. If you'd like to upload Zoom recordings to another cloud storage app, you'll want to set up a Zap from scratch. Most of the steps in this tutorial will still apply.
Zapier helps you automate manual tasks between web apps. Our automated workflows, which we call Zaps, send information from one app to another, so you can focus on more meaningful work. Check out this Zapier demo to learn more about how it works.
Set up your apps
Before you get started, you'll want to make sure you have Zoom and Google Drive configured properly.
Adjust your Zoom recording settings
This trigger works on recordings that are not password-protected. Before you begin creating a Zap, make sure your Zoom recording settings are correct.
Log in to your account on the Zoom website. Click on Settings, located on the left-hand side. Under the Recording tab, make sure both Only authenticated users can view cloud recordings` and Require password to access shared cloud recordings are turned off.
This trigger works on cloud recordings, which are available on Zoom's paid plans. Currently, this trigger will not download password-protected meetings.
Make sure you have a cloud recording to use as sample data
If you've never recorded anything to the cloud with these settings in place, start up a Zoom meeting and record. It can just be a few seconds, but this will help you test and make sure your Zap works the way you want. When you end the meeting, Zoom will automatically upload the meeting to the cloud.
Set up Google Drive
Before making your Zap, set up the folder where you'd like the recordings to be saved. When you get to the last step, this will be important.
Create your Zap: Set up the Zoom trigger step
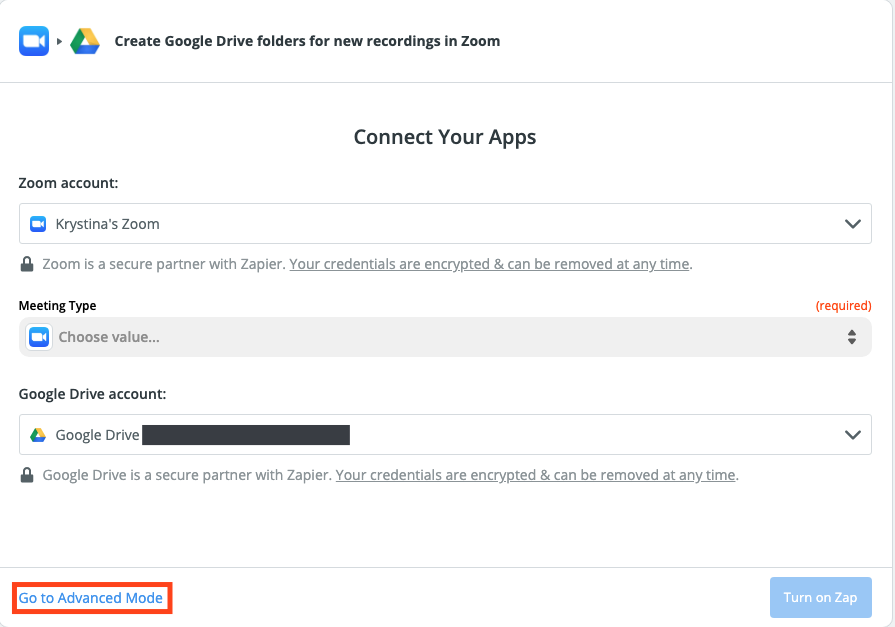
Click the Use this Zap button above to get started. You'll see a simplified version of setup, with Zoom and Google Drive already selected for you. Click Go to Advanced Mode to further customize your Zap.
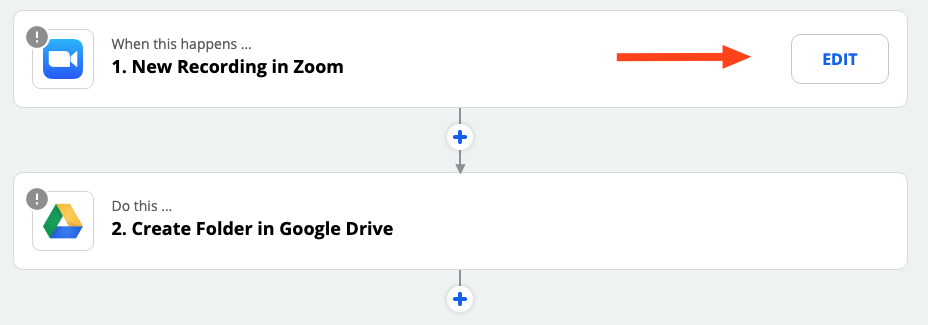
In the Zap Editor, Hover over New Recording in Zoom and click Edit.
You'll be prompted to sign in to your Zoom account with your username if you haven't connected it before.
For each app you connect, Zapier will ask for a general set of permissions which allows you to be flexible with your Zaps. The only actions Zapier takes on your app accounts are those a given Zap needs to accomplish what you've set up.
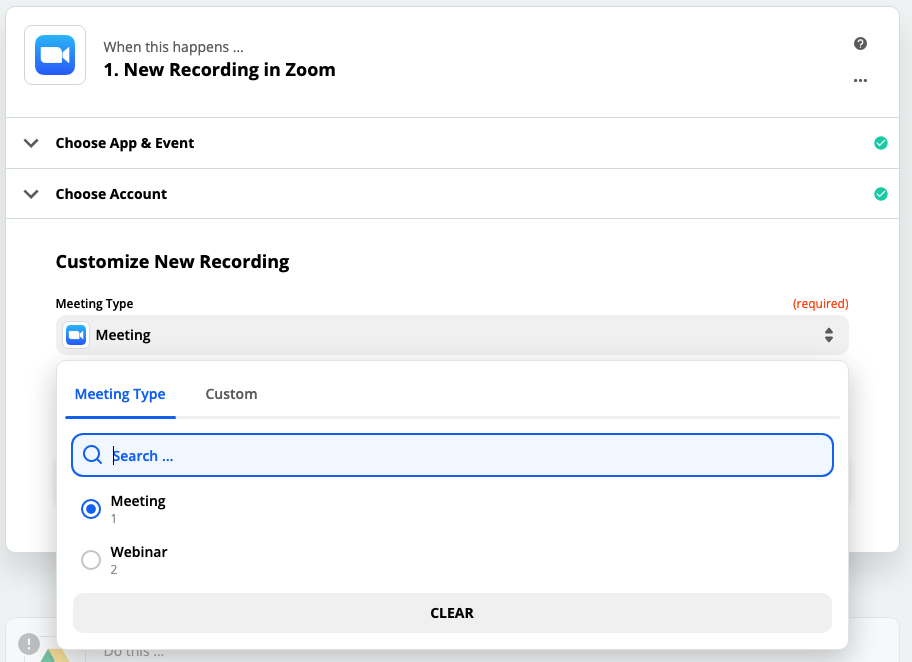
Once you've connected your account, click Continue. Select which meeting type you want to trigger whenever there's a new recording. If you're unsure which one you should use, learn more about the differences between Zoom meetings and webinars.
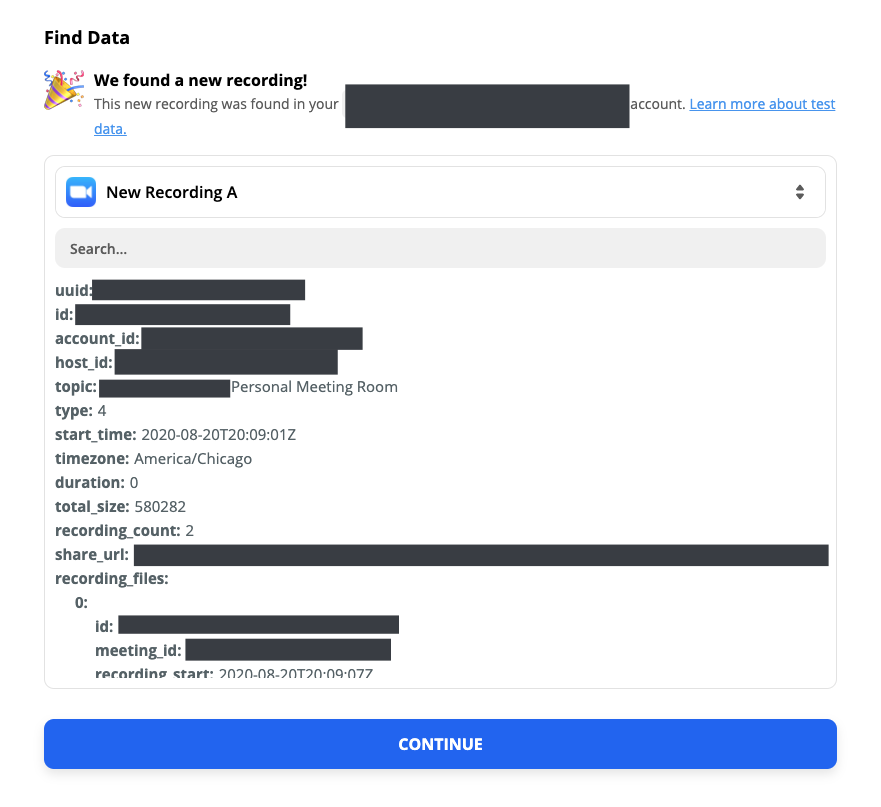
Click Continue, and you'll be prompted to test your information. Click Test trigger; Zapier will try to find a recent new recording in your Zoom account. We'll be using this as sample data to customize your workflow.
If Zapier can't find a new recording, create a new one in your Zoom account and test your trigger again. Though you have the option to skip the test, working with real data in your account is the best way to ensure your recording uploads correctly.
Once the test is successful, click Continue, and you'll move on to connecting your Google Drive account.
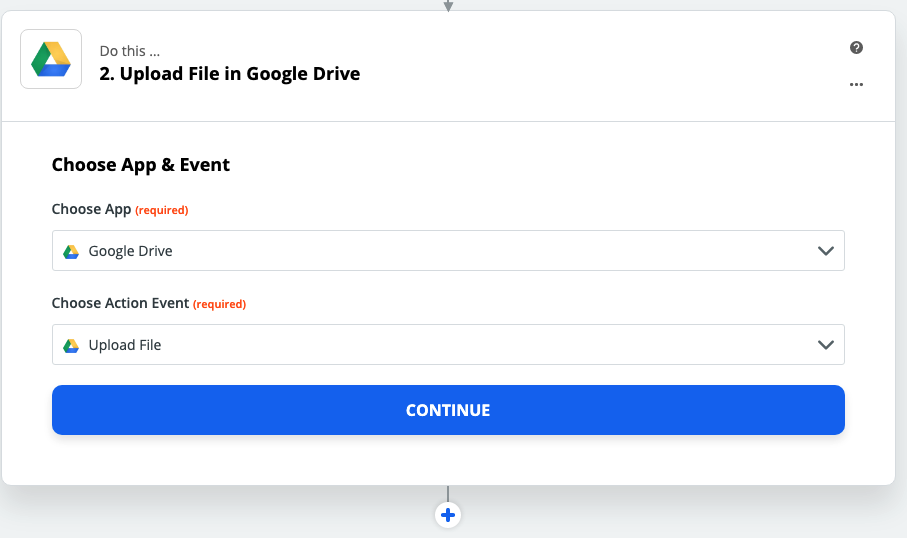
Create your Zap: Set up your Google Drive action step
You'll be prompted to choose your app, which is Google Drive, and your action event, which is Upload File. Since the template already fills this in for you, go ahead and click Continue.
Next, you'll sign into your Google Drive account with your email and password if you haven't connected it before. Click Allow to give Zapier permission to access your Drive.
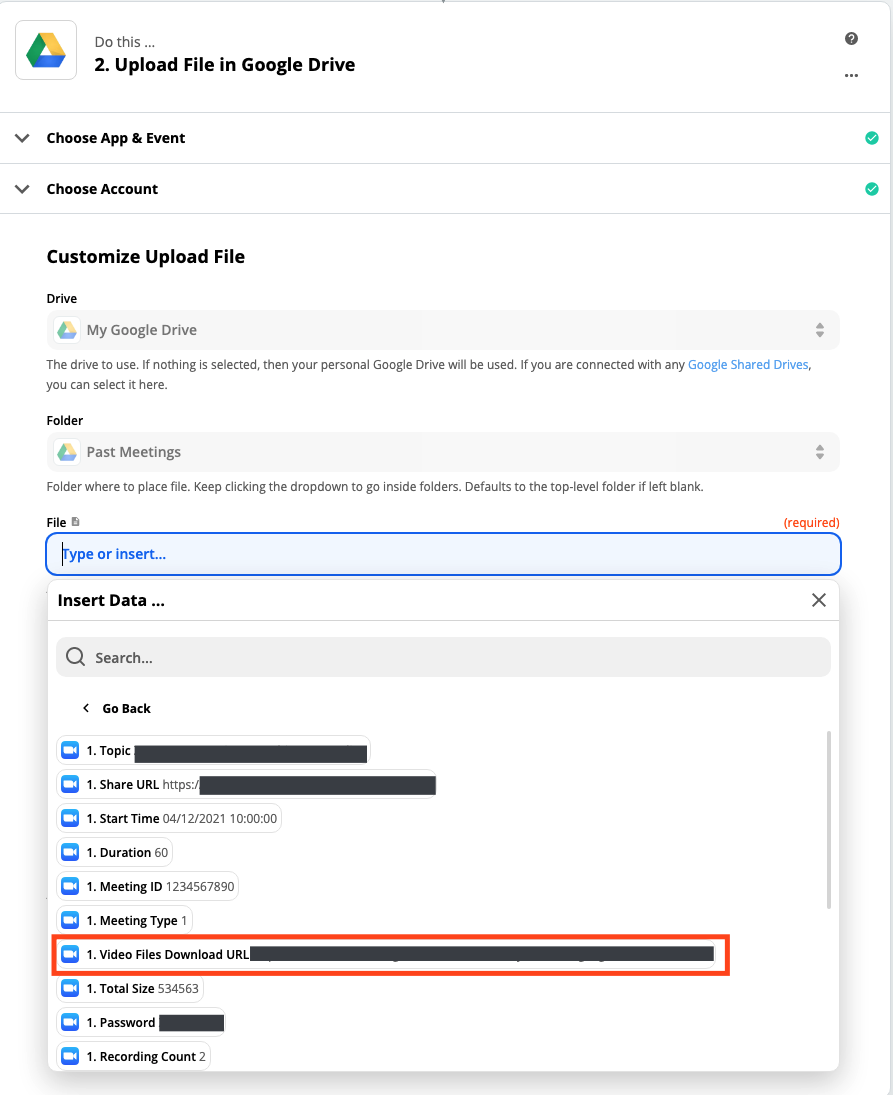
You can now customize which folder you want to upload new recordings, what file you want Zapier to upload, and what you want your file to be called.
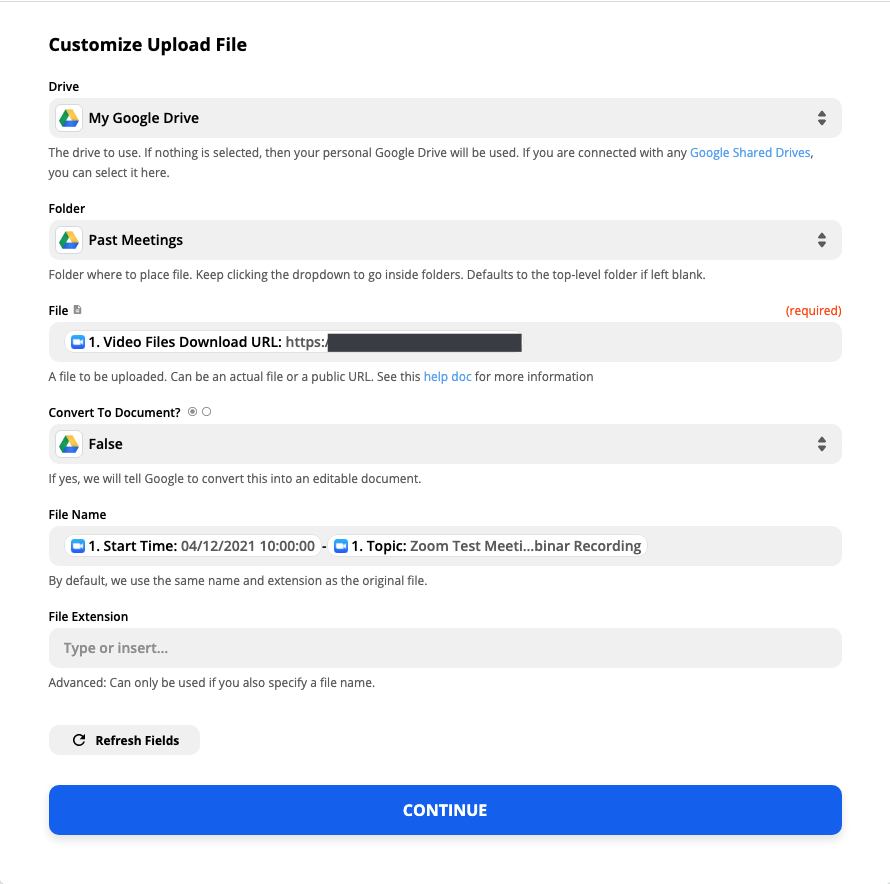
Select the Drive and Folder where you want Zapier to upload your new Zoom recordings. The File field must be populated in order for the Zap to work. The template automatically populates the correct field.
If you're building a Zap from scratch, click Type or insert… under File to pull up a dropdown menu of data options to choose from. Click Show All Options and scroll down to select Video Files Download URL.
Under the Convert To Document? field, click on Choose value and select False. If you were to select True it would tell Google Drive that this file should be an editable document. Since you're uploading a video, this isn't what you need.
By default, Zapier will use the same name and extension as your Zoom recording. If you want a little more specificity, you can use existing data options in Zoom, such as Start Time or Topic. You can also enter in your own text, but you'll still want to add unique identifiers—like the date—from Zoom so you can tell them apart.
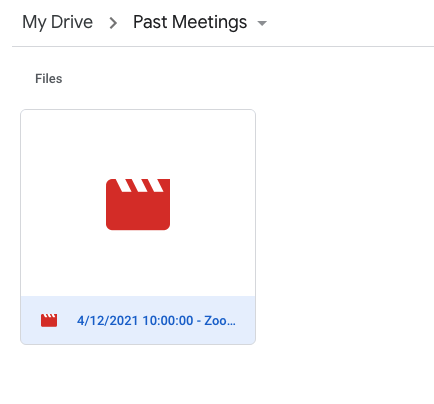
Customize everything until you're satisfied, then click Continue. You'll be asked to test your Zap, which should upload a new recording to your specified Google Drive and folder. It may take a few minutes for the video to process, depending on the size of your recording.
If something doesn't look right, feel free to go back and make any changes. Once you're happy with everything, turn on your Zap by clicking the slider at the bottom of the Zap Editor.
Now, whenever you finish recording a Zoom meeting, the recording will automatically upload to Google Drive.
Head to our Zoom integrations page to see what else you can do, or create your own Zap.
from The Zapier Blog https://ift.tt/3coYIJz


Comments
Post a Comment