Why everyone should try the accessibility features on their computer
- Get link
- X
- Other Apps
You know those dips in curbs at crosswalks? Those exist because of decades of advocacy by accessibility advocates, but today they benefit anyone who pushes a stroller or just enjoys not tripping. This universal benefit is called the curb cut effect, and it's not only for sidewalks.
Maybe, if you're American, you've turned on closed captions on your TV to understand British accents—those captions are also the direct result of disability advocacy. Texting, arguably, evolved from telecommunications devices for the deaf. Features initially designed for accessibility end up improving life for everyone, which in turn makes those features stick. It's a virtuous cycle that, at its best, helps everyone.
The accessibility features on your computer are similar: they were designed with particular needs in mind, but they benefit everyone. And they're worth exploring. I've written about how you can catch typos by making your computer read to you. There are so many more similar tricks, if you're willing to dig.
How to access accessibility features on Windows and Mac
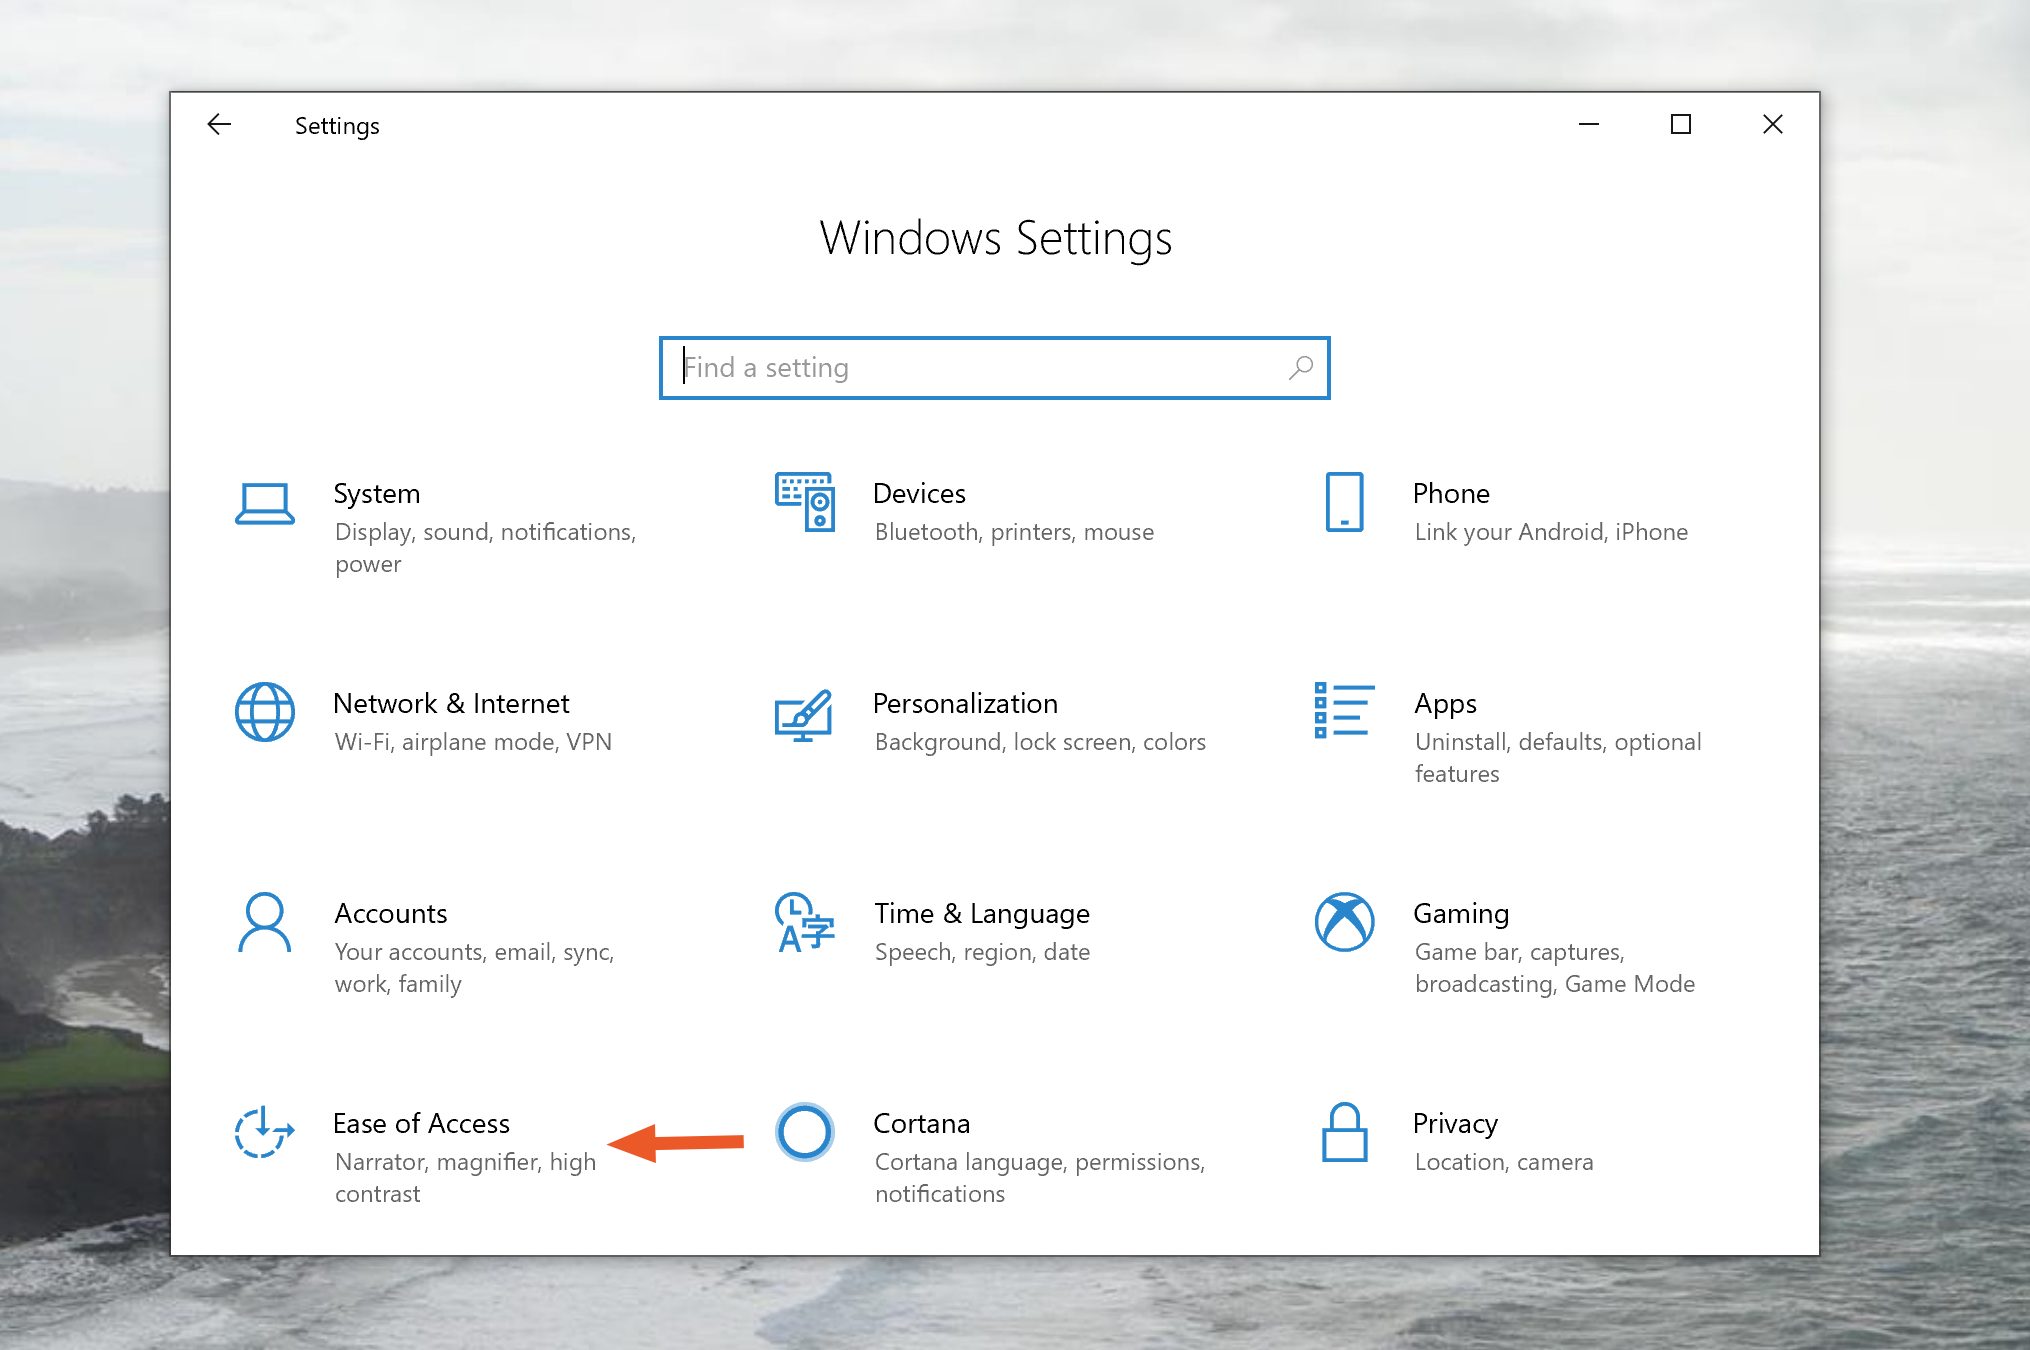
On Windows, you can find the accessibility features by opening Windows Settings and clicking Ease of Access.
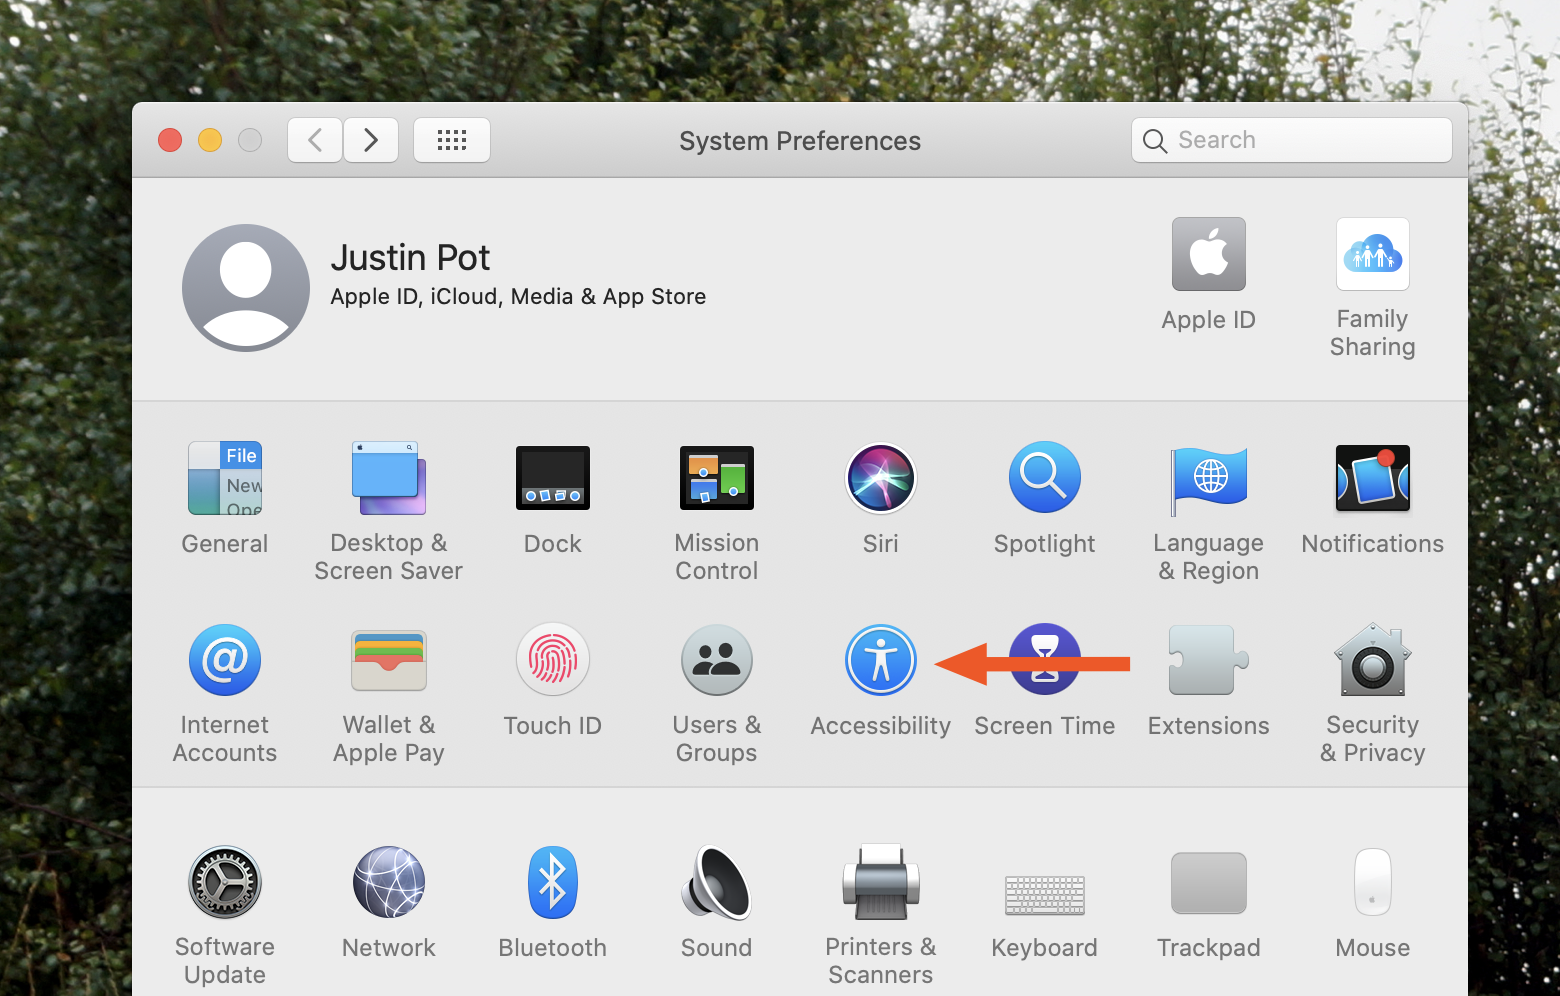
Mac users should open System Preferences and head to Accessibility.
I honestly think it's a good idea to explore and see what's here—you'll find something useful if you just click all of the buttons. But here are a few features I think everyone should enable.
Zoom in on anything—including photos and videos
Your computer can zoom in on any region of the screen, a feature that's there to help people with vision problems. But everyone can benefit from this.
Videos are better in full screen, and sometimes you want to see a photo in more detail. Not every website lets you do that, however, which is why the magnifier feature on your computer is so useful. This allows you to quickly zoom in on anything that shows up on your screen, whether the app or website you're looking at allows for a fullscreen mode or not.
On Windows, this is called Magnifier, and you can find it in Settings > Ease of Use > Magnifier.
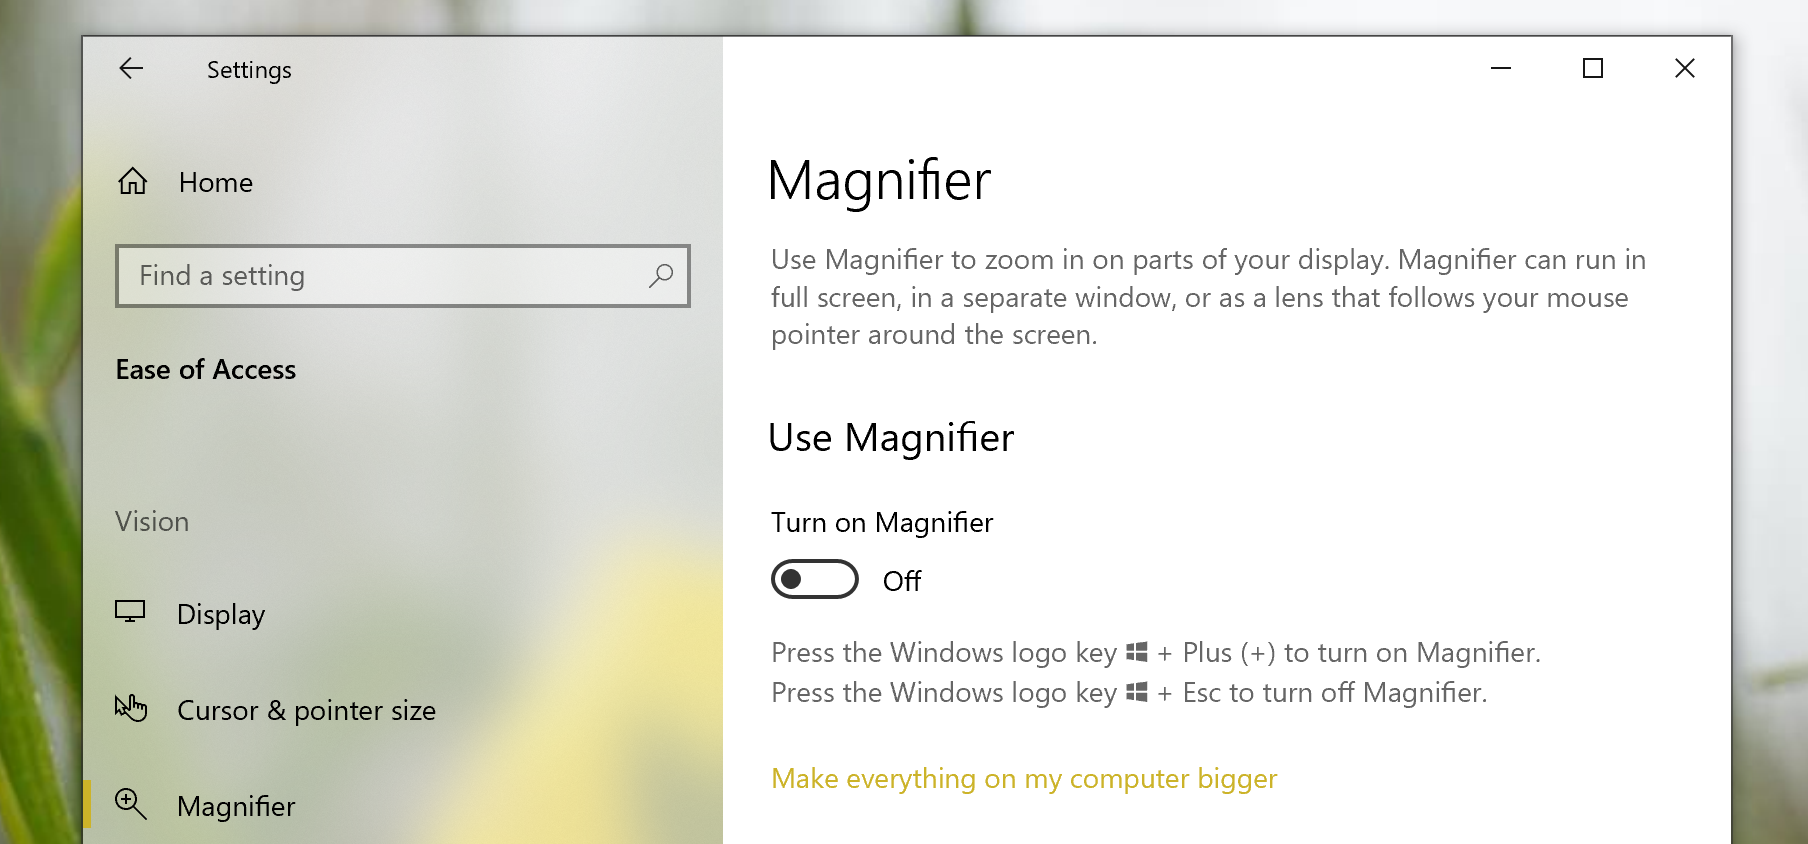
You can trigger it anytime by hitting the Windows key and plus (+) on your keyboard, then stop by hitting the Windows key and Escape.
On macOS, this feature is called Zoom, and you can find it in System Preferences > Accessibility > Zoom.
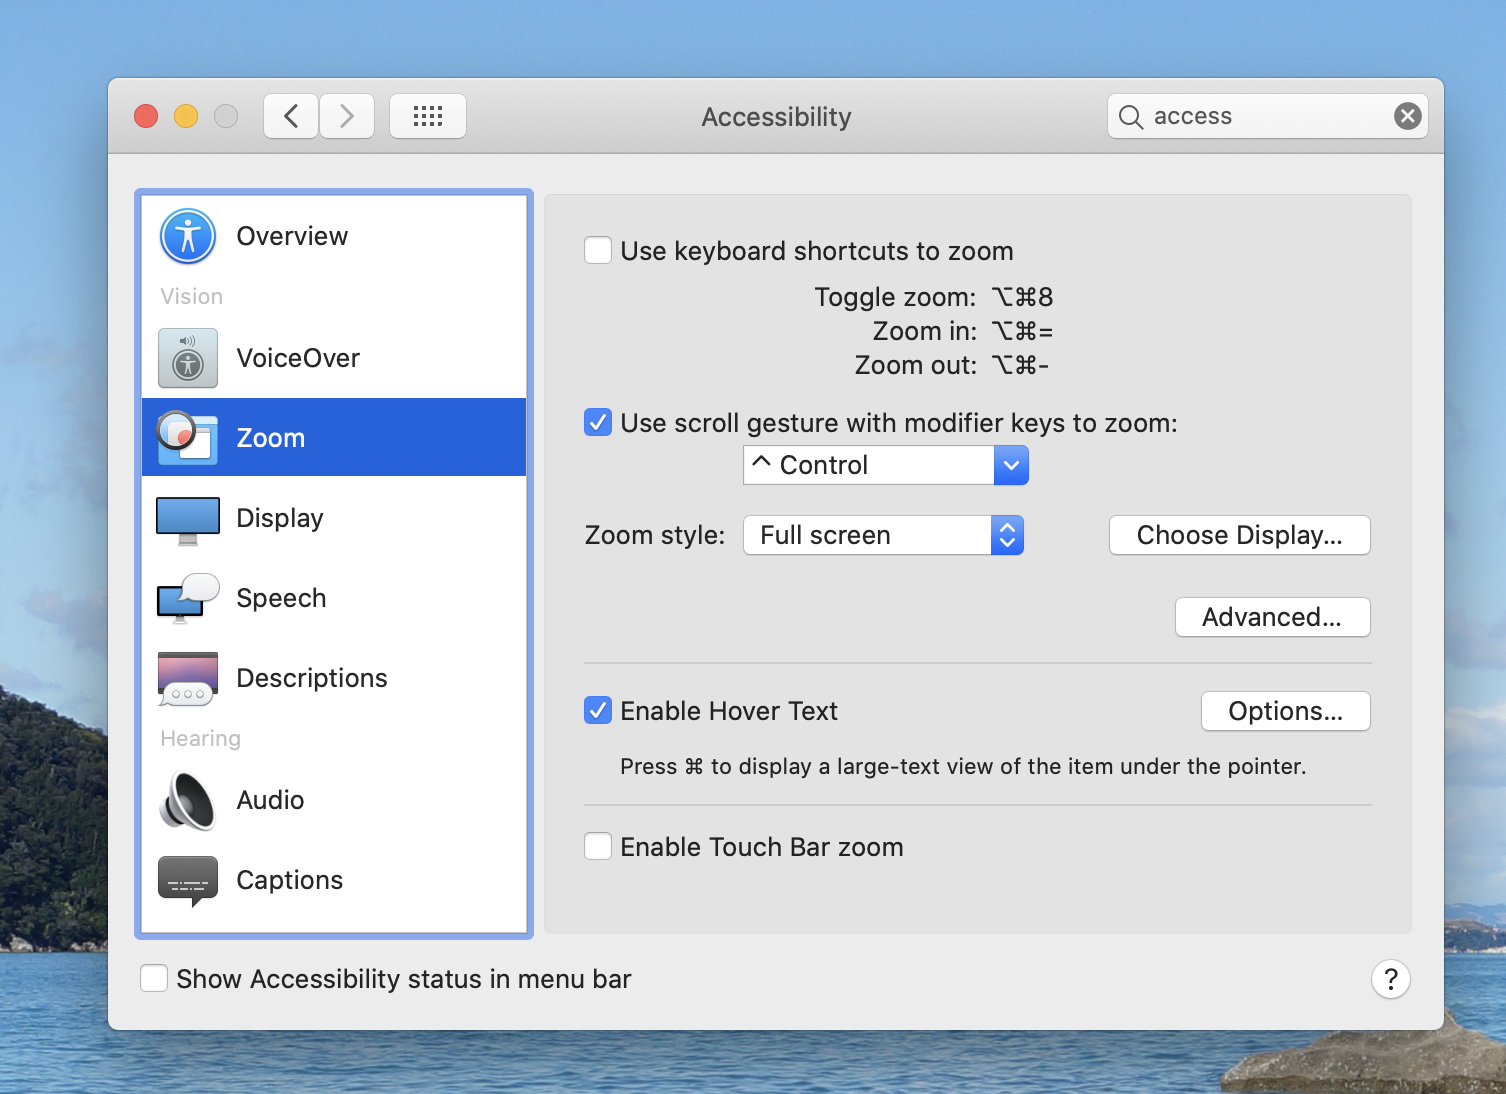
You can enable a keyboard shortcut or even a scroll gesture for zooming, then use it whenever you want. Move your mouse to see different regions of the screen, then zoom back out when you're done. I don't use this feature every day, but it comes in handy when I do. Keep it in mind.
Reduce contrast and transparency for a vintage look and increased performance
Modern desktop operating systems don't define edges with thick black lines. Instead, they use more aesthetically focused differentiators like drop shadows. It looks nice, but makes it hard for some people to tell where one window begins and another ends. All of that transparency also uses up system resources, which can be a drag on slower computers.
Which is why high contrast mode is worth checking out. On Windows, head to Settings > Ease of Use > High Contrast.
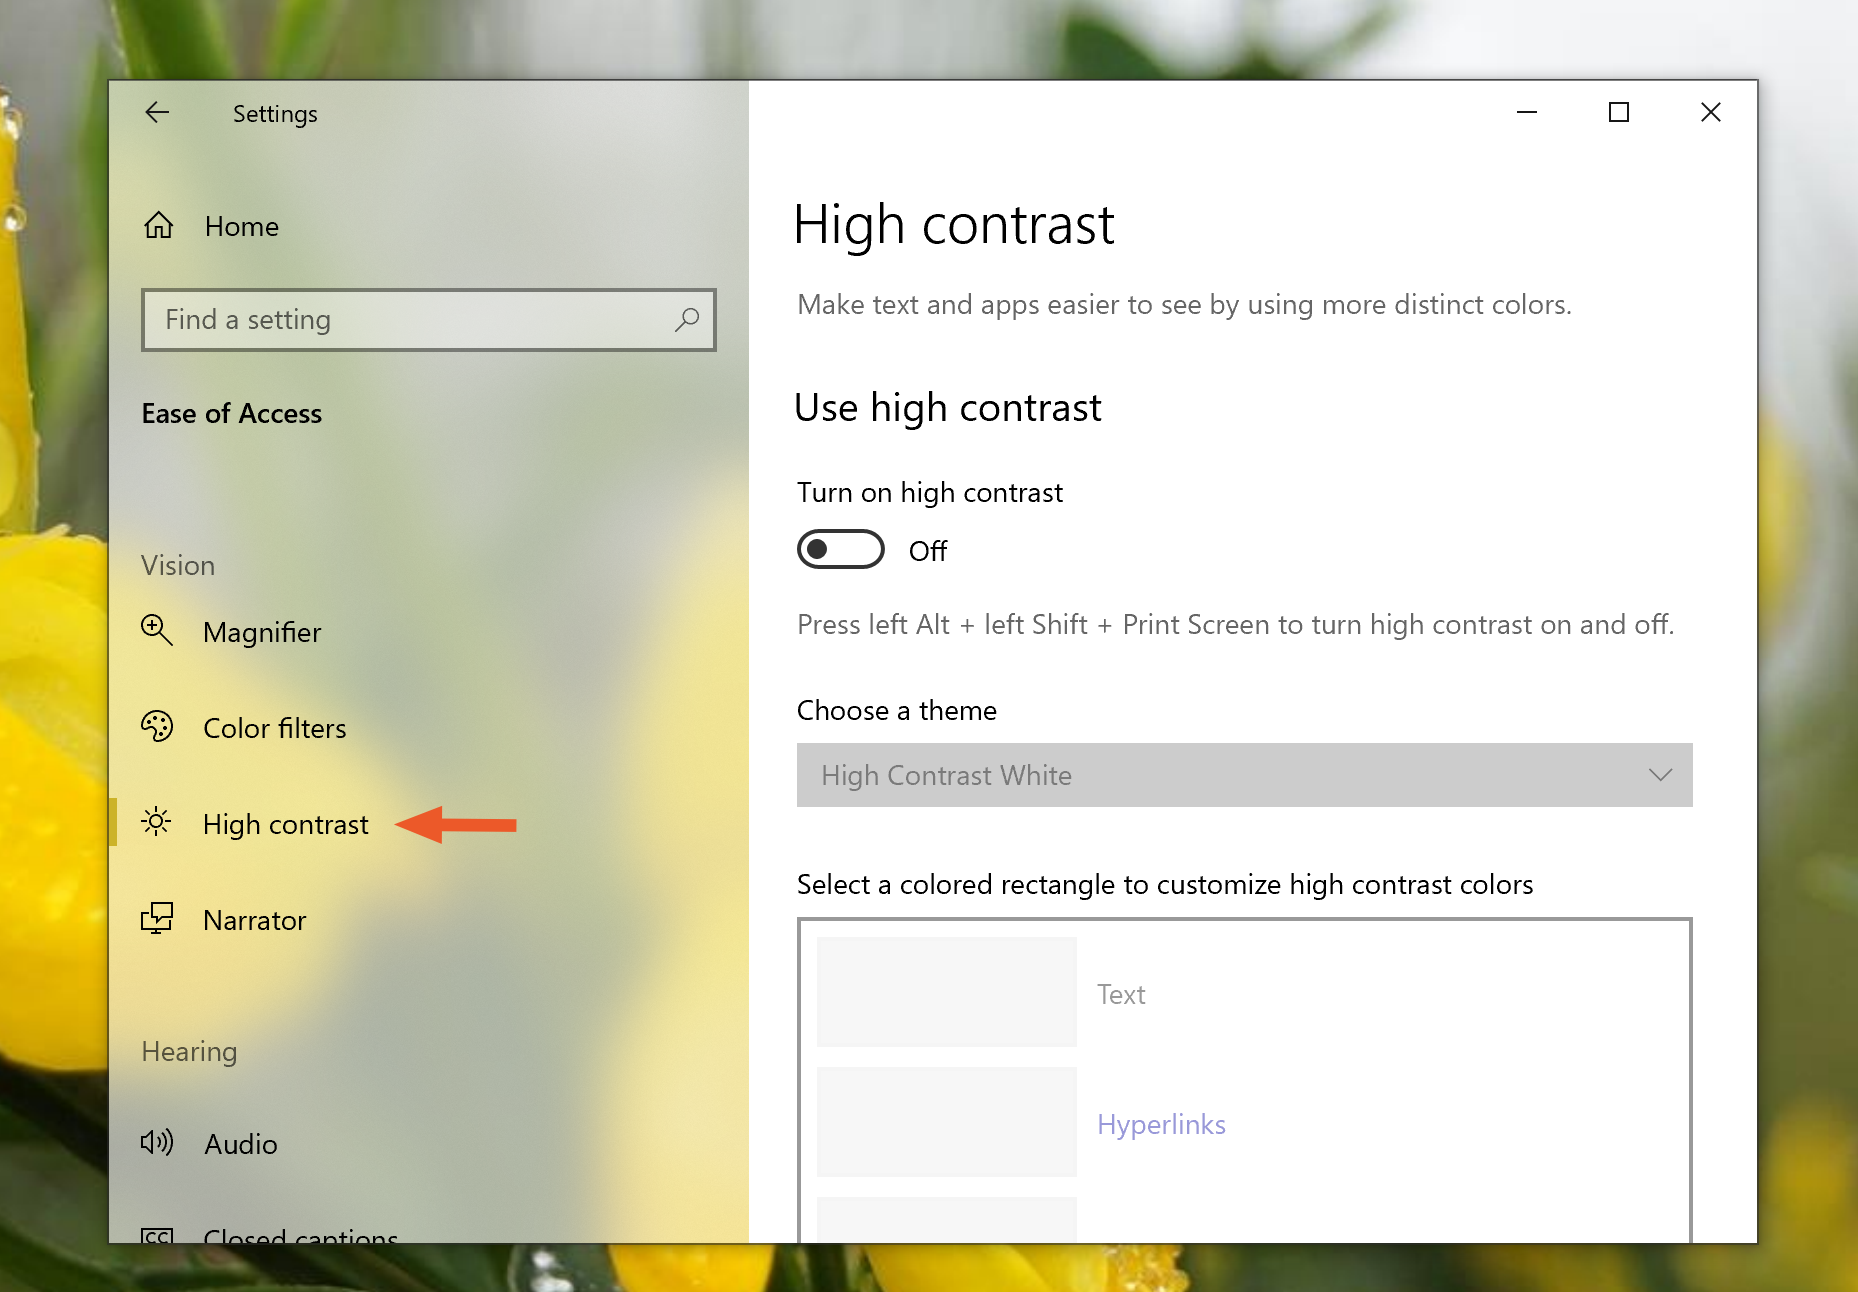
Enable this feature and you'll see the difference immediately.
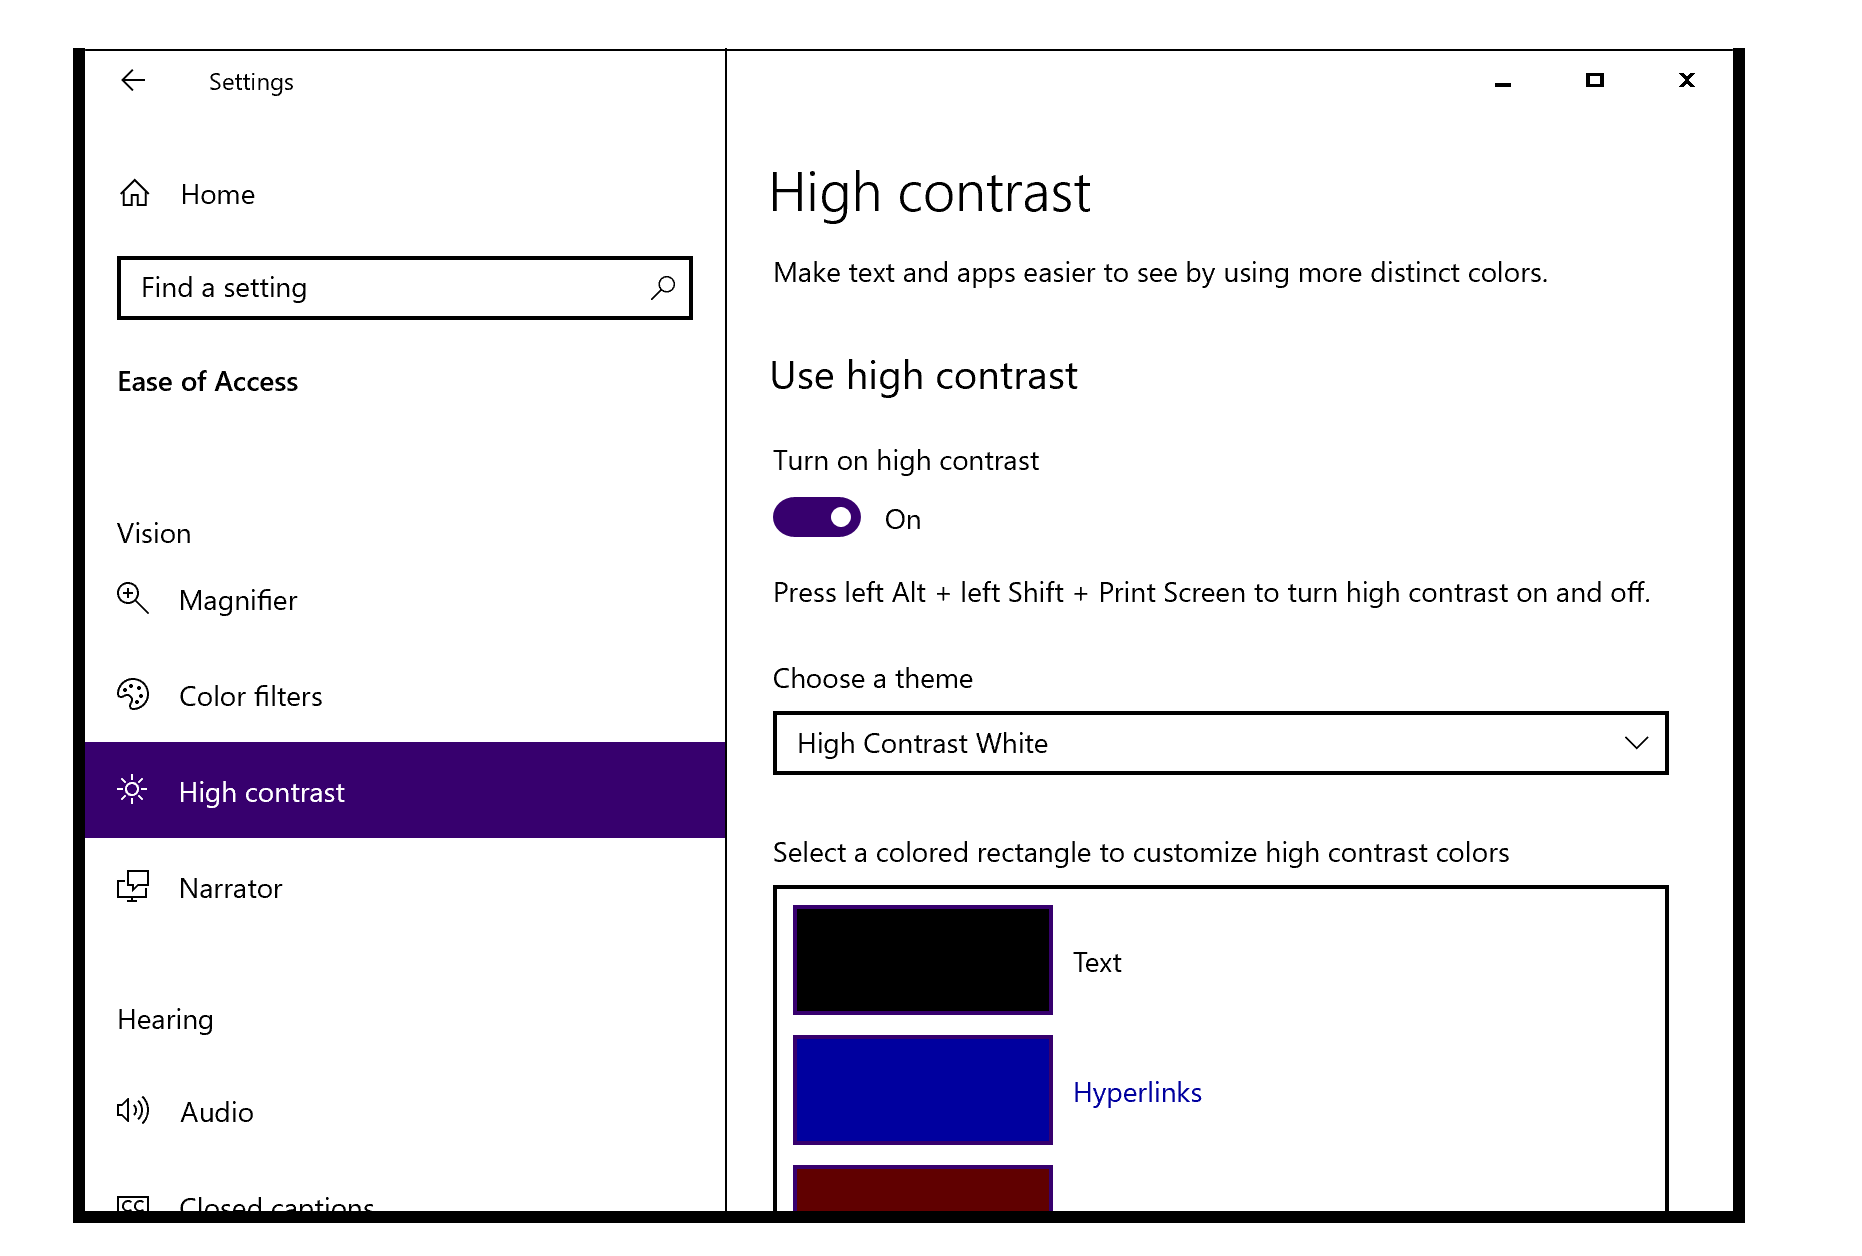
There are a few different themes available here—some dark, some light, all emphasizing clarity over aesthetics. Try some out and see how they feel.
Mac users can head to System Preferences > Accessibility > Display, then check the Increase contrast and/or Reduce transparency options.
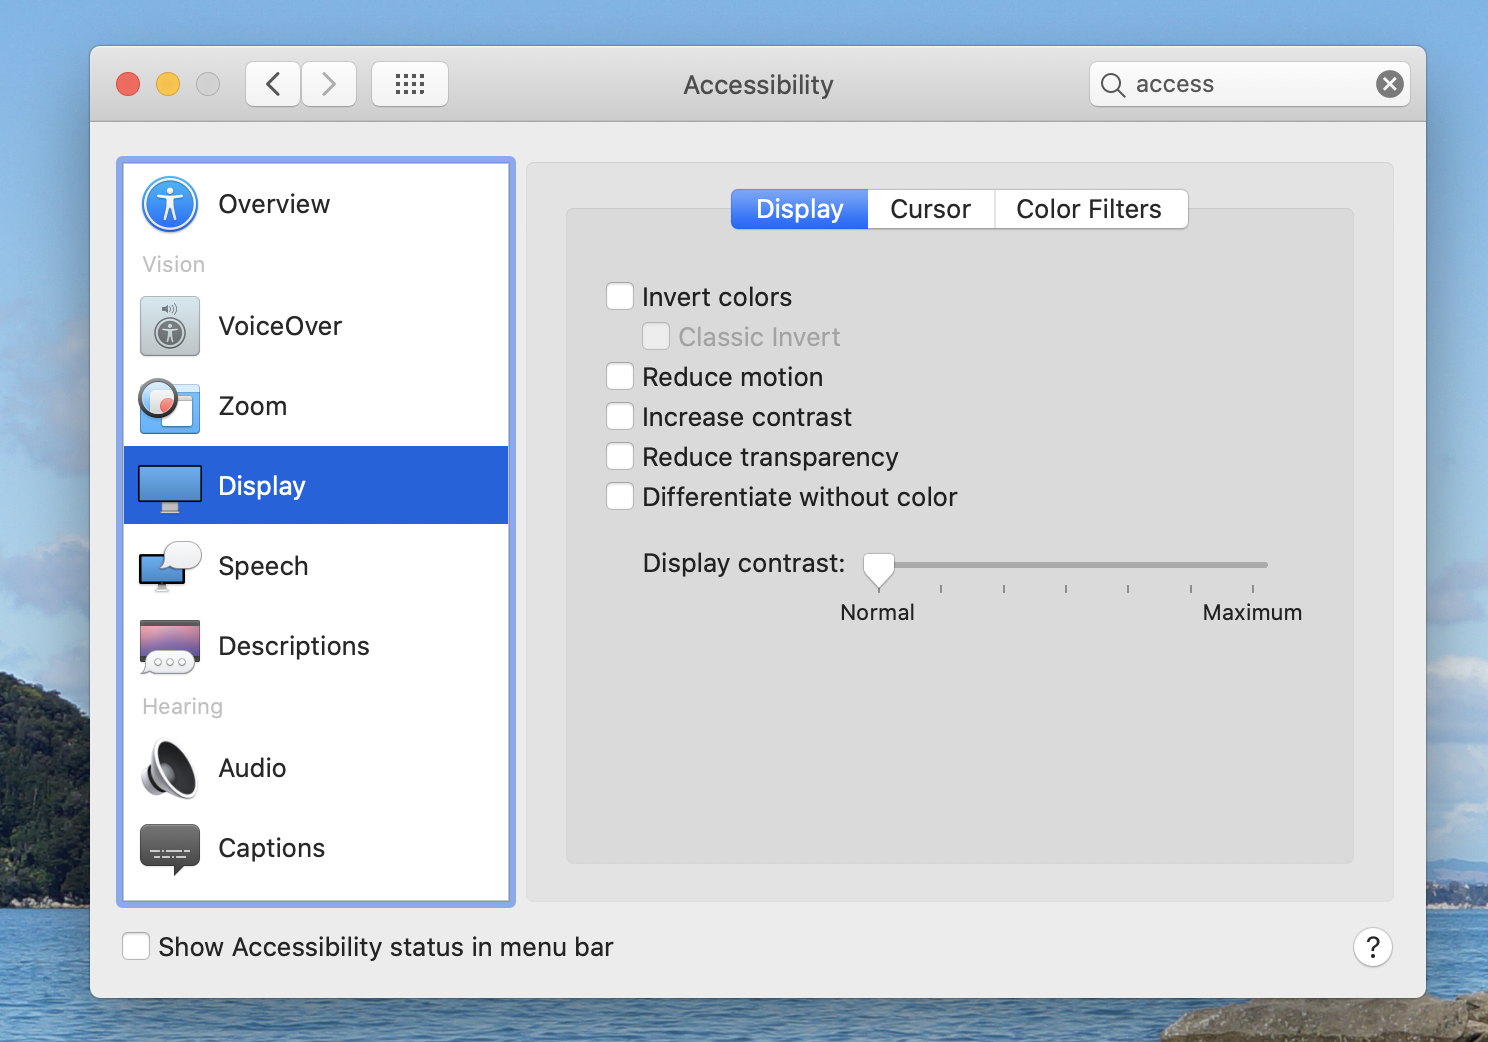
Again, the results are immediate. There's now a thick black line around all interface elements, making it a lot easier to tell where one thing ends and another begins. The fancy transparency effects are also gone.
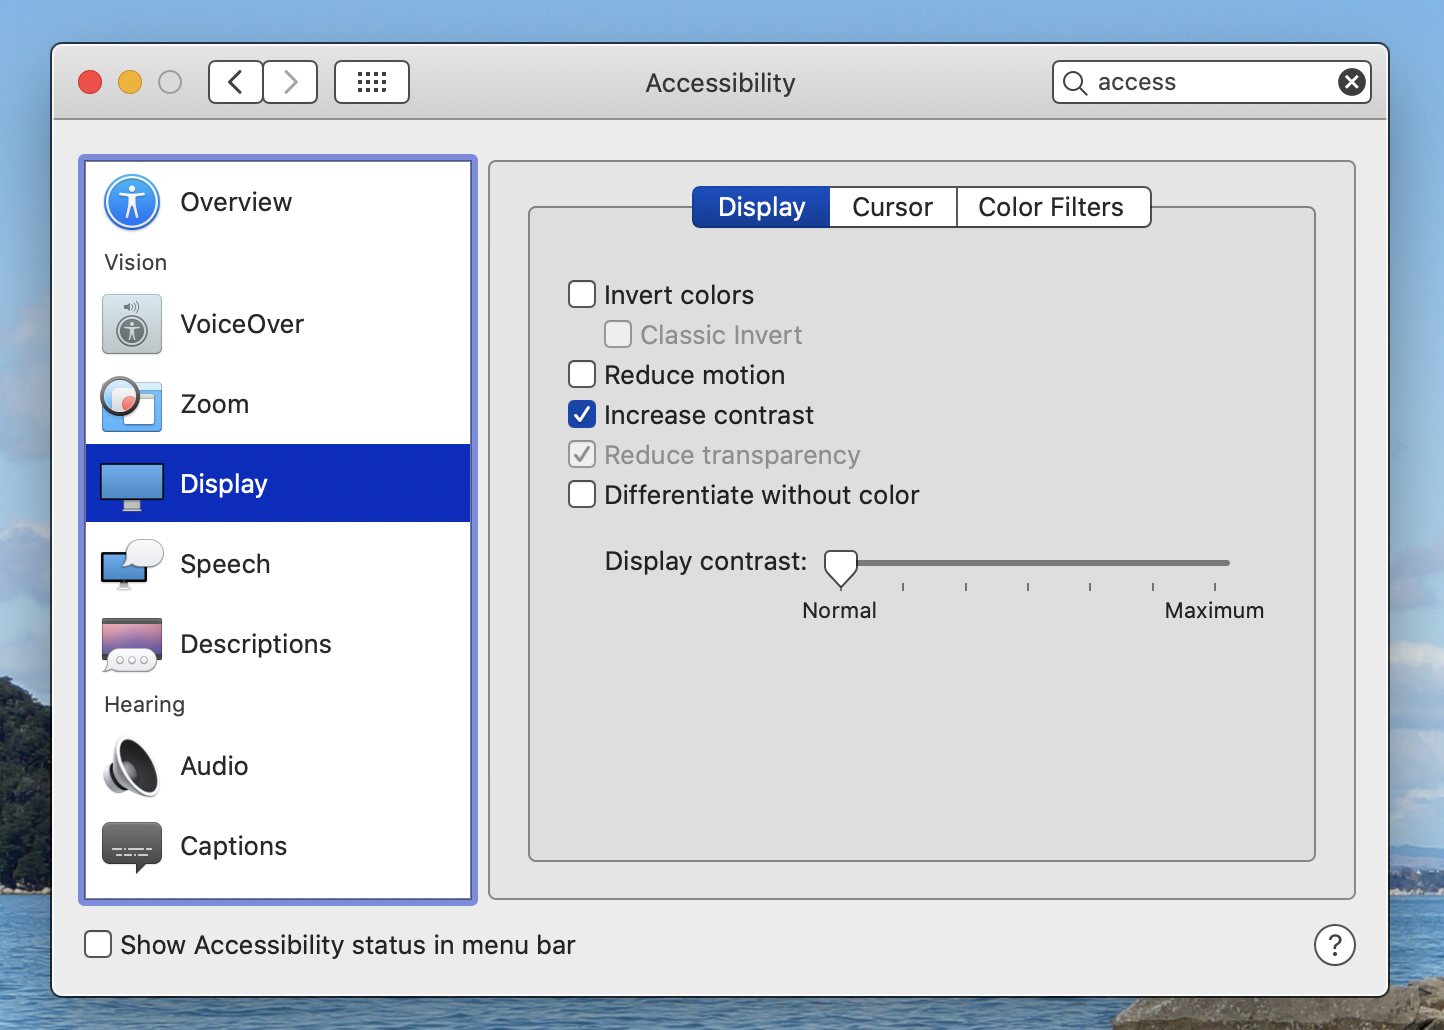
Some people need this in order to see things clearly; others might just prefer how it looks. Both are good reasons to enable the settings.
Type to your virtual assistant instead of talking to your computer
I can type faster than I can talk out loud (or think, really). This might be why I never use Siri on my Mac: talking to my computer out loud seems inefficient. Which is too bad, because Siri has quick access to all kinds of information.
This is why I recommend every Mac user enable the Type to Siri option found in System Preferences > Accessibility > Siri.
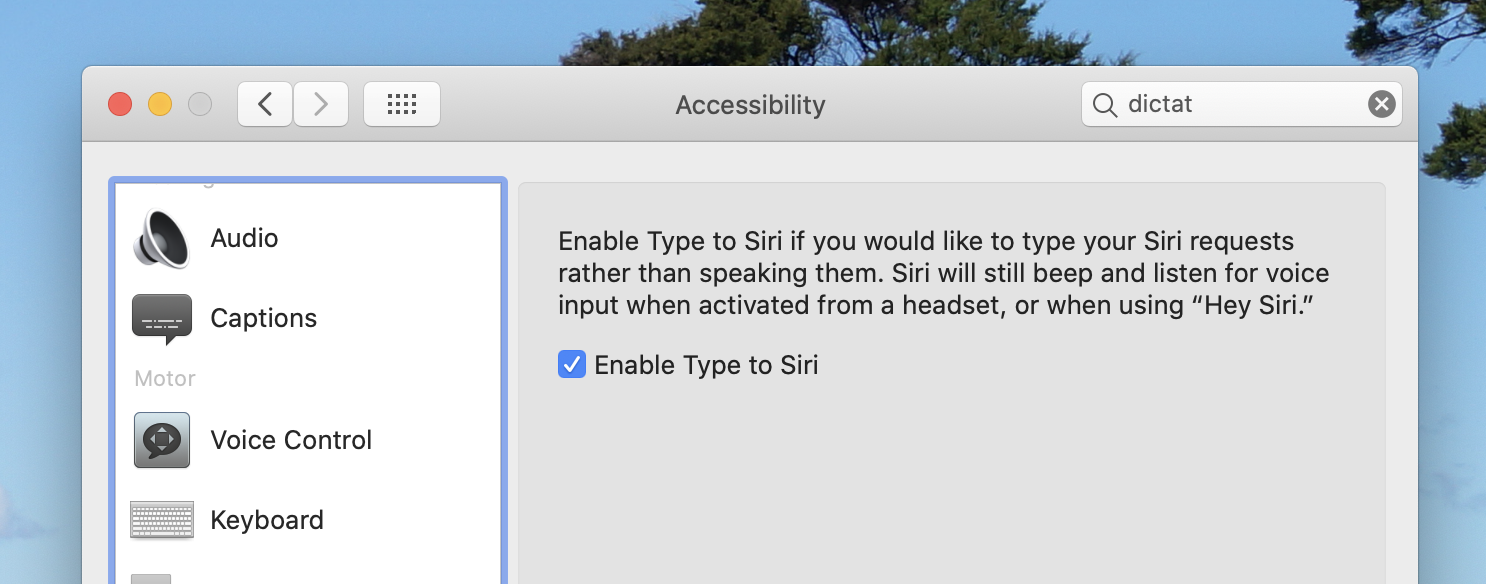
Check this option and you won't have to talk to your computer—you can type instead.

I'd point out how to do this on Windows, but Cortana works this way by default: open the Start menu and start typing.
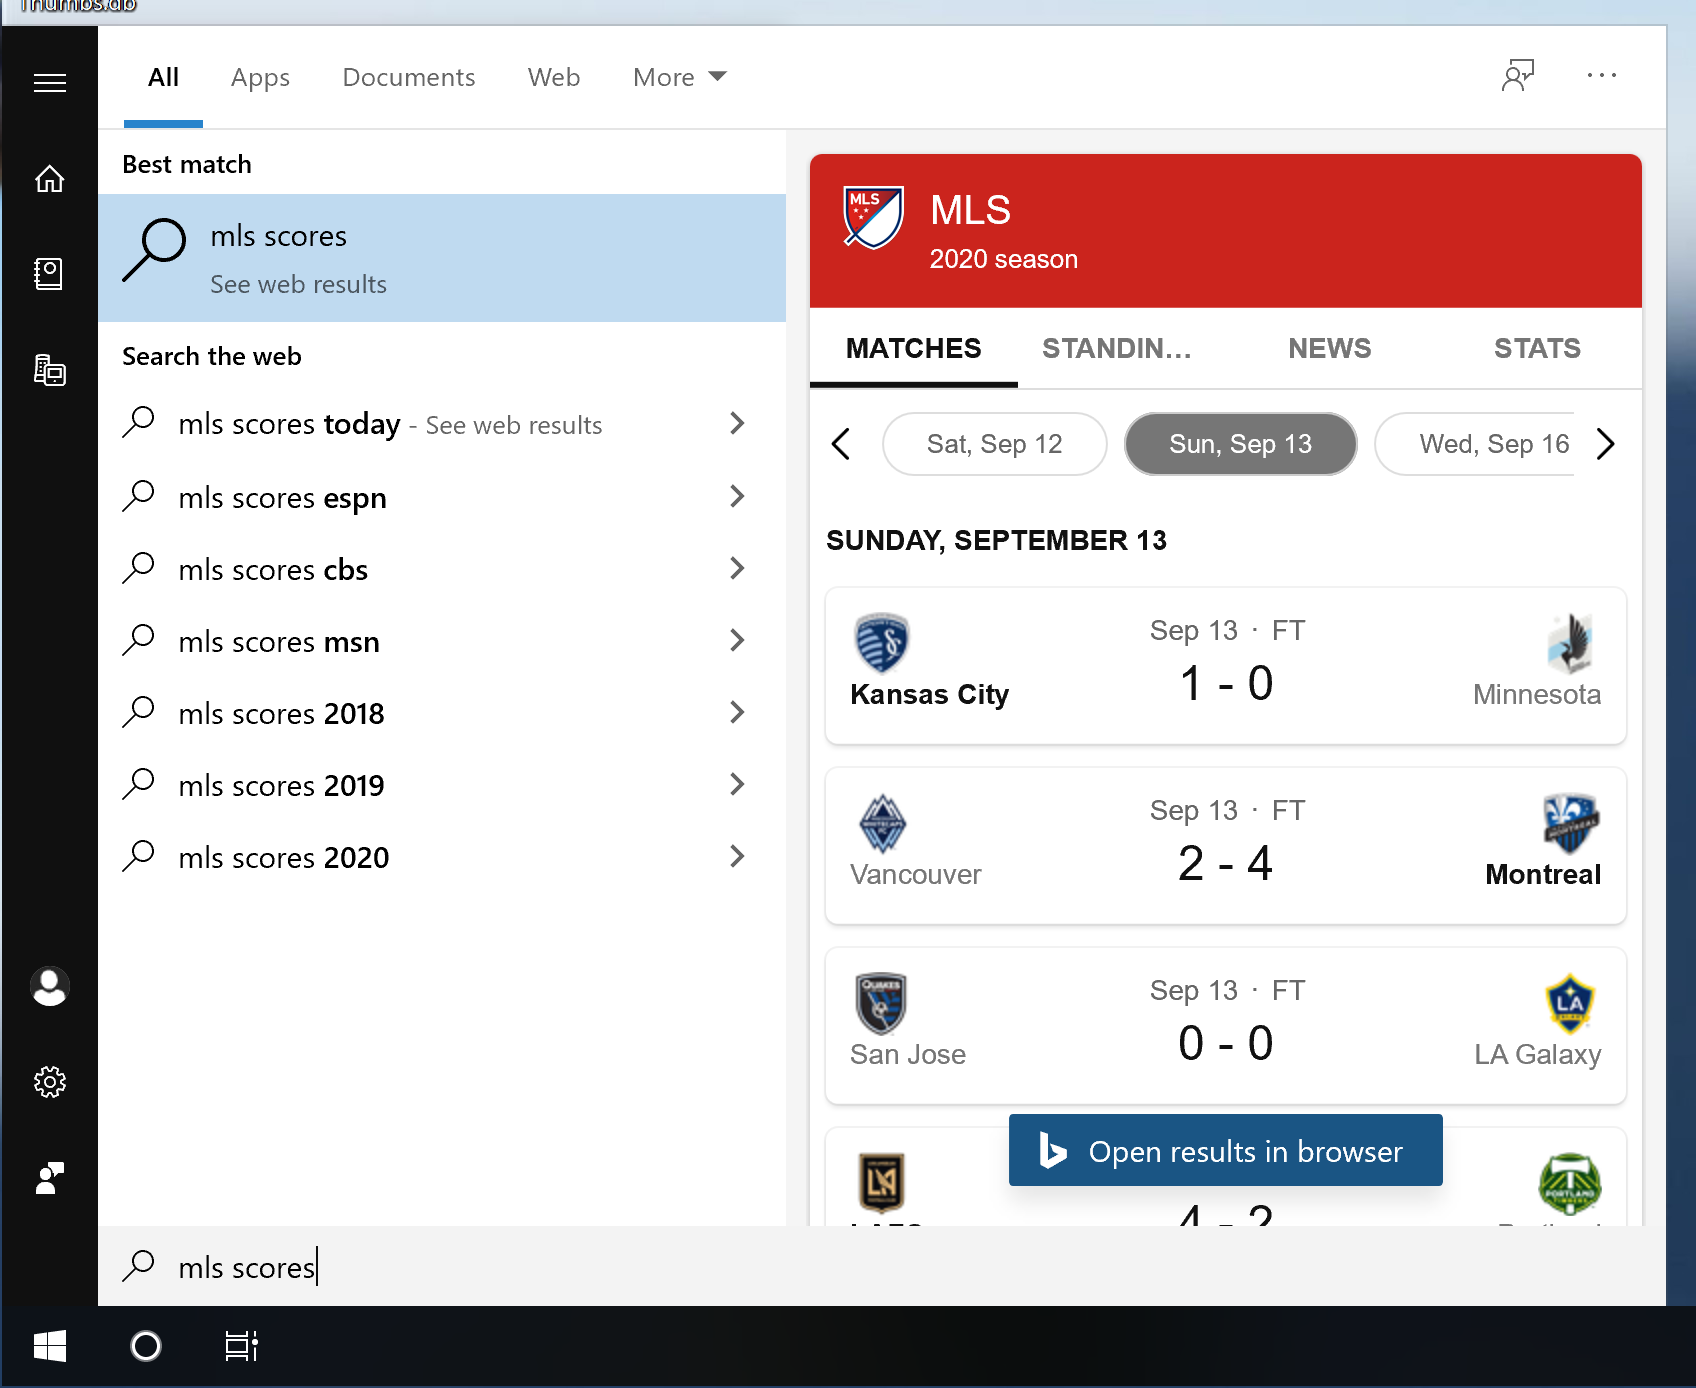
Good job on that one, Microsoft.
Talk instead of typing
Prefer to go the other way, talking out loud to your computer instead of typing? You can do that too, thanks to the text-to-speech capability that comes with every computer. This allows you to write by using your voice.
On Windows, you can find this in Windows Settings > Ease of Access > Speech.
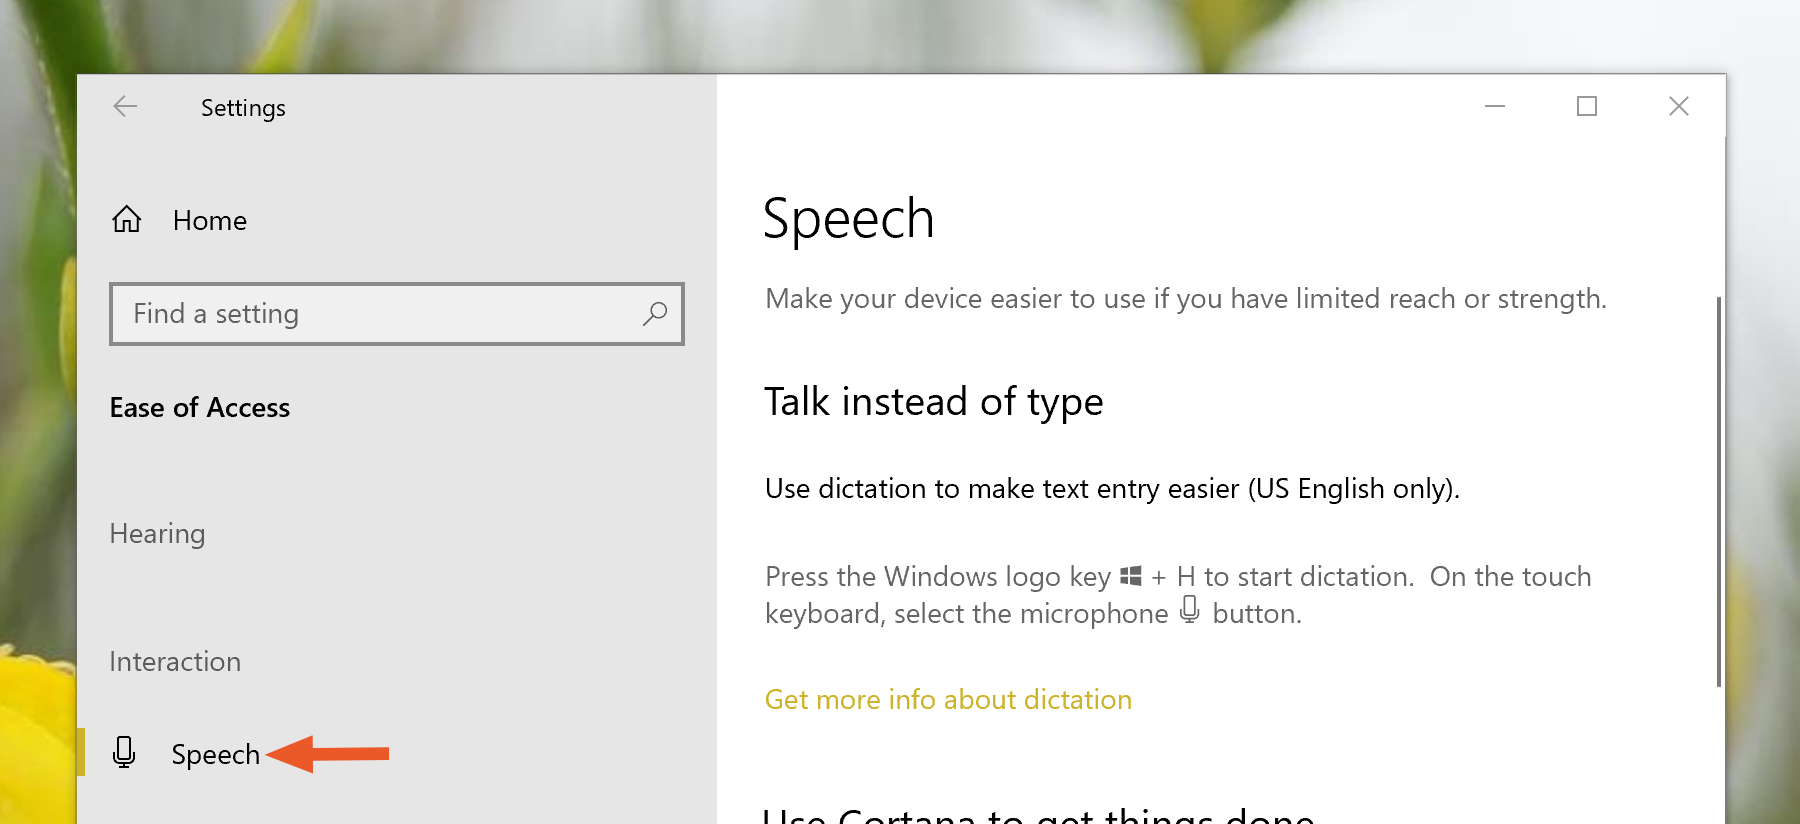
Enable the feature at any time by pressing the Windows key and H.
Mac users can enable a keyboard shortcut for dictation in System Preferences > Keyboard > Dictation.
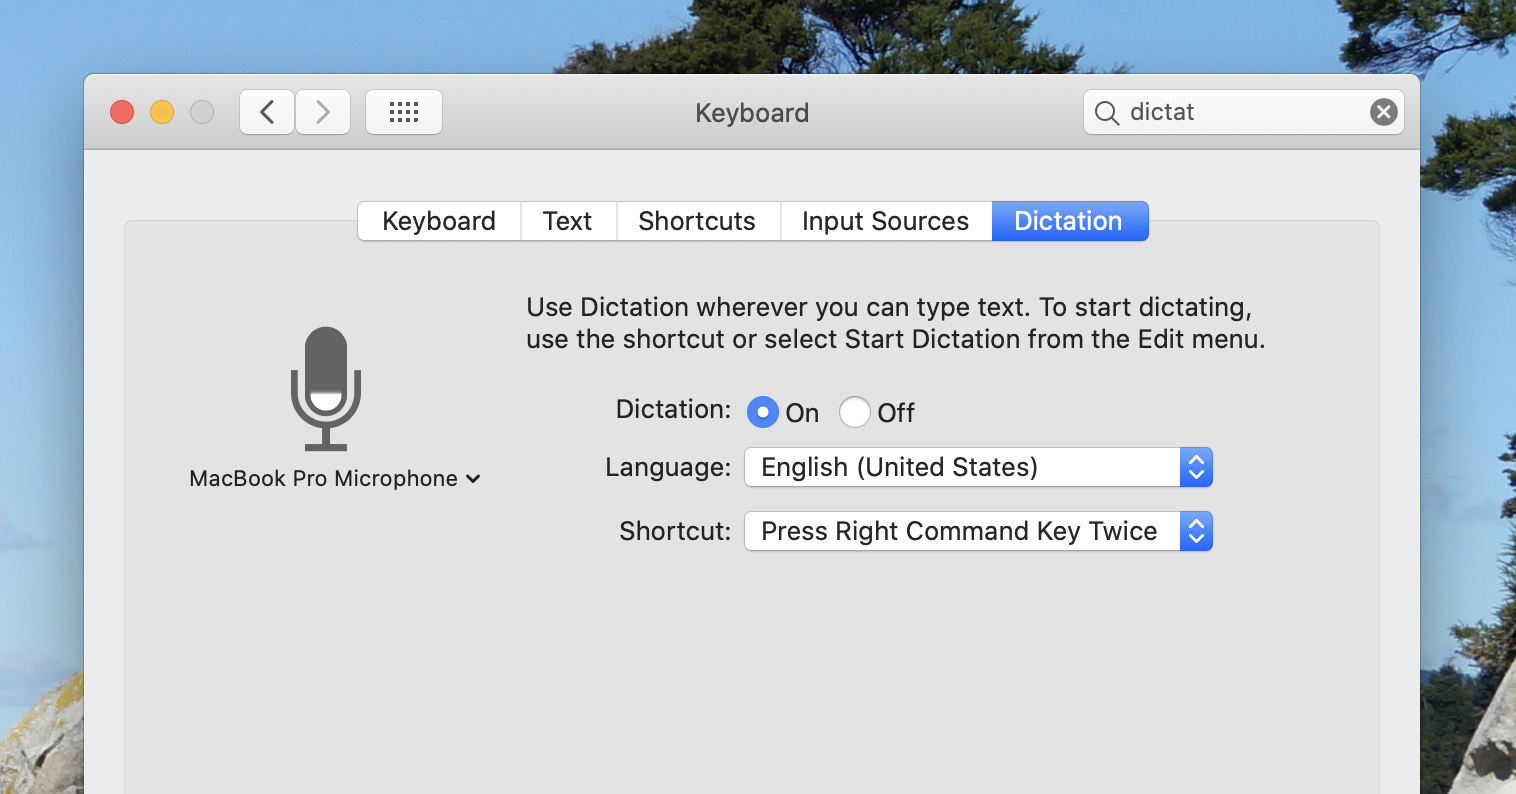
Both the Windows and Mac versions are responsive to words, but learning to use punctuation takes a little experimentation.
I personally don't use this feature for my actual writing, but it is occasionally great for things like brainstorming—I can dump the contents of my brain into a document by rambling, then sort it out later.
Not satisfied with the built-in text-to-speech option on your computer? Check out our list of the best dictation software.
Accessibility is for everyone
These are only a few accessibility features that you might find useful, and I highly recommend doing some exploring yourself to find more. It's just a matter of pressing the buttons and seeing what happens.
from The Zapier Blog https://ift.tt/2ZNTjHf
- Get link
- X
- Other Apps
Comments
Post a Comment